
Dog tag chains are designed for durability and function, but their standard length isn’t always ideal. Whether you’re adjusting a military-style chain for a better fit or customizing a pet ID tag’s reach, shortening the chain can improve comfort and reduce noise. While many assume pliers or cutting tools are necessary, there are several practical, no-tool methods that work efficiently—especially on common ball-and-link or split-ring styles. These techniques preserve the integrity of the chain while offering immediate adjustments.
The beauty of these methods lies in their simplicity. You don’t need a toolbox, workshop, or even spare parts. With just your fingers and a bit of patience, you can achieve a snugger, quieter, and more personalized fit. This guide explores proven hand-only techniques, explains when they work best, and highlights safety considerations to keep both you and your tags secure.
Understanding Dog Tag Chain Types
Before attempting any adjustment, it's crucial to identify the type of chain you're working with. The method you use depends heavily on the construction. Most dog tag chains fall into one of three categories:
- Ball-and-link chain: Features small metal balls connected by open links. Very flexible and common in military issue.
- Silicone or fabric cord: Used primarily for pets; adjustable by knotting.
- Split-link (or “jump ring”) chain: Made of interlocking oval rings, often secured with tiny spring-loaded clasps.
Ball-and-link chains are the easiest to shorten without tools because individual links can be manually separated. Split-link chains require more dexterity but can still be adjusted by hand if you know the right technique. Fabric cords offer the most flexibility through knotting and sliding adjustments.
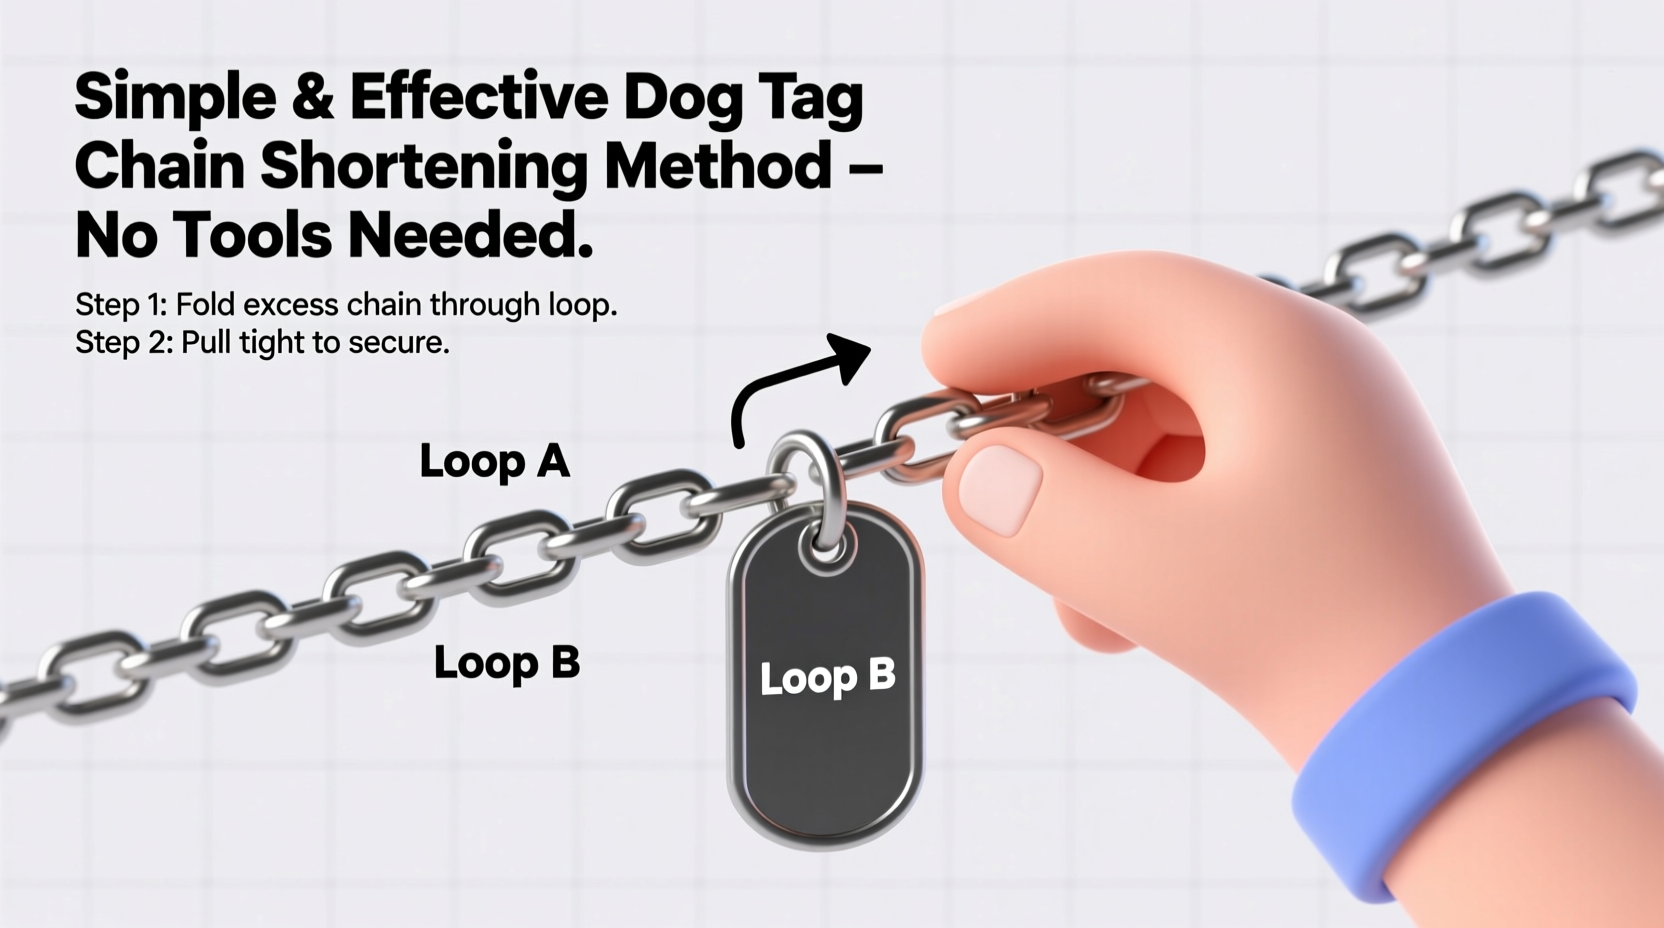
Step-by-Step: Shortening a Ball-and-Link Chain by Hand
The ball-and-link design is uniquely suited for tool-free shortening. Each link is slightly sprung, allowing adjacent links to pop open and reconnect under finger pressure. Follow this sequence:
- Inspect the chain: Lay it flat and count how many links need removal to reach your desired length. Remember: each full link includes two sides, so removing one visible \"ball\" typically means eliminating one complete connection point.
- Locate the seam: Find where two links meet. One side will have a small gap between the rounded ends—the opening mechanism.
- Separate the link: Hold the chain firmly on either side of the target link. Use your thumbnail or fingertip to press one end of the link sideways, widening the gap just enough to slide the connected link out.
- Remove excess links: Repeat until you’ve taken out the required number. Keep removed links in case you need to re-extend later.
- Reconnect securely: Slide the final links back together. You should feel a slight resistance as they snap shut. Give the joint a gentle pull to confirm stability.
This process takes practice. Start slowly to avoid bending links out of shape. Once mastered, it can be done in under a minute.
Real Example: Adjusting a Military Surplus Chain
James, a history enthusiast, purchased a replica WWII dog tag set online. The chain was too long, swinging past his chest and clinking against his coffee mug every morning. Without access to tools during a weekend trip, he used the ball-and-link method described above. Using only his thumbs, he removed four links over five minutes. The result? A clean, secure fit resting neatly below his collar. He reported no slippage over the next six months of daily wear.
“Many vintage-style chains are built for field maintenance—meaning they’re meant to be adjusted by hand when needed.” — Sgt. Daniel Reeves (Ret.), U.S. Army Veteran
Knotting Techniques for Corded or Fabric Chains
Pet owners often deal with softer materials like nylon, cotton, or silicone straps. These aren't opened like metal chains but shortened through strategic knotting. The key is maintaining accessibility to the tag while preventing fraying.
For round or flat cords, the double overhand knot works best:
- Fold the cord to your preferred length, ensuring the tag sits where you want it.
- Create a loop at the end and pass the tag-end through twice.
- Pull tight to form a compact knot close to the last link or attachment point.
- Trim excess only if the material won’t unravel (e.g., heat-sealed nylon).
If the cord is stretchy or silicone-based, consider using a sliding knot (also known as a shoelace slip knot) for future adjustability. This allows length changes without retying.
| Chain Type | Best No-Tool Method | Limits |
|---|---|---|
| Ball-and-link metal | Manual link separation | Only works on sprung-metal designs |
| Silicone/fabric cord | Knotting (double overhand or slip knot) | Not reversible if cut |
| Split-link with jump rings | Finger-opening and re-closing | Requires strong fingernails or grip |
Avoiding Common Mistakes
Even simple adjustments can go wrong if rushed. Here are frequent errors and how to prevent them:
- Removing too many links at once: It’s easier to remove than restore. Take out one or two links initially, test the fit, then continue if needed.
- Forcing stiff links: Applying excessive pressure can deform metal, weakening the chain. Warm the link slightly with body heat (rub between fingers) to increase flexibility.
- Ignoring tag orientation: After reassembly, ensure the tag hangs upright and engraving faces outward.
- Skipping the tension test: Always simulate movement by shaking the chain lightly post-adjustment to check for accidental openings.
Checklist: Safe Tool-Free Shortening in 5 Steps
Use this checklist before starting any adjustment:
- ✅ Identify your chain type (ball-and-link, cord, or split-ring)
- ✅ Determine desired length by draping the chain around the neck
- ✅ Count and mark excess links or cord length to remove
- ✅ Perform adjustment slowly, using controlled finger pressure
- ✅ Test security by gently pulling on both ends and simulating motion
FAQ
Can I shorten a stainless steel dog tag chain without tools?
Yes—if it’s a ball-and-link or sprung split-ring design. Stainless steel chains with these mechanisms are engineered to be disassembled by hand. Avoid attempting this on welded or rigid chains, which require cutting tools.
Will shortening the chain affect its durability?
Not if done correctly. Each link is independently load-rated, so removing links doesn’t weaken the remaining ones. However, poorly rejoined links may snag or open under stress. Always verify closure tightness.
Is it safe to wear a shortened chain every day?
Absolutely. Millions of service members adjust their dog tag chains regularly without tools. As long as the connections are fully seated and tested, daily wear poses no additional risk.
Final Thoughts
Adjusting a dog tag chain doesn’t require a toolbox or technical skill. Whether you're tailoring a personal keepsake, fitting a pet’s ID, or modifying surplus gear, hand-based methods offer quick, reliable results. The key is understanding your chain’s mechanics and working patiently within its design limits.
These techniques reflect a broader principle: sometimes the simplest solutions are already within reach. By mastering basic manual adjustments, you gain independence from specialized tools and extend the usability of everyday items.


 浙公网安备
33010002000092号
浙公网安备
33010002000092号 浙B2-20120091-4
Comments
No comments yet. Why don't you start the discussion?