
Designer bracelets are more than just accessories—they're investments. Whether it's a delicate gold chain, a timeless tennis bracelet, or a vintage heirloom, getting the fit right is essential for both comfort and security. But what happens when the clasp feels too tight or the band doesn’t quite reach around your wrist? Instead of rushing to a jeweler or buying a new piece, you can often extend the clasp at home with simple, safe methods. The key is knowing how to do it without compromising the integrity of your jewelry.
This guide walks through practical, tested techniques that preserve the beauty and value of your bracelet while giving you a better fit. From adding extension links to using clever connectors, these solutions are accessible, affordable, and effective—all achievable in your own home with minimal tools.
Why Extend a Bracelet Clasp?
A bracelet that’s too short can cause discomfort, restrict circulation, or even lead to damage if forced over the hand repeatedly. On the other hand, one that’s too loose risks slipping off and being lost. Extending the clasp provides flexibility, especially useful if:
- You wear the bracelet over clothing or bulky sleeves.
- Your wrist size fluctuates due to weather, activity, or health.
- The original clasp lacks adjustability.
- You’re gifting a bracelet and want to ensure a universal fit.
Extending the clasp doesn’t mean altering the entire band. Often, a small addition near the closure is enough to make a big difference.
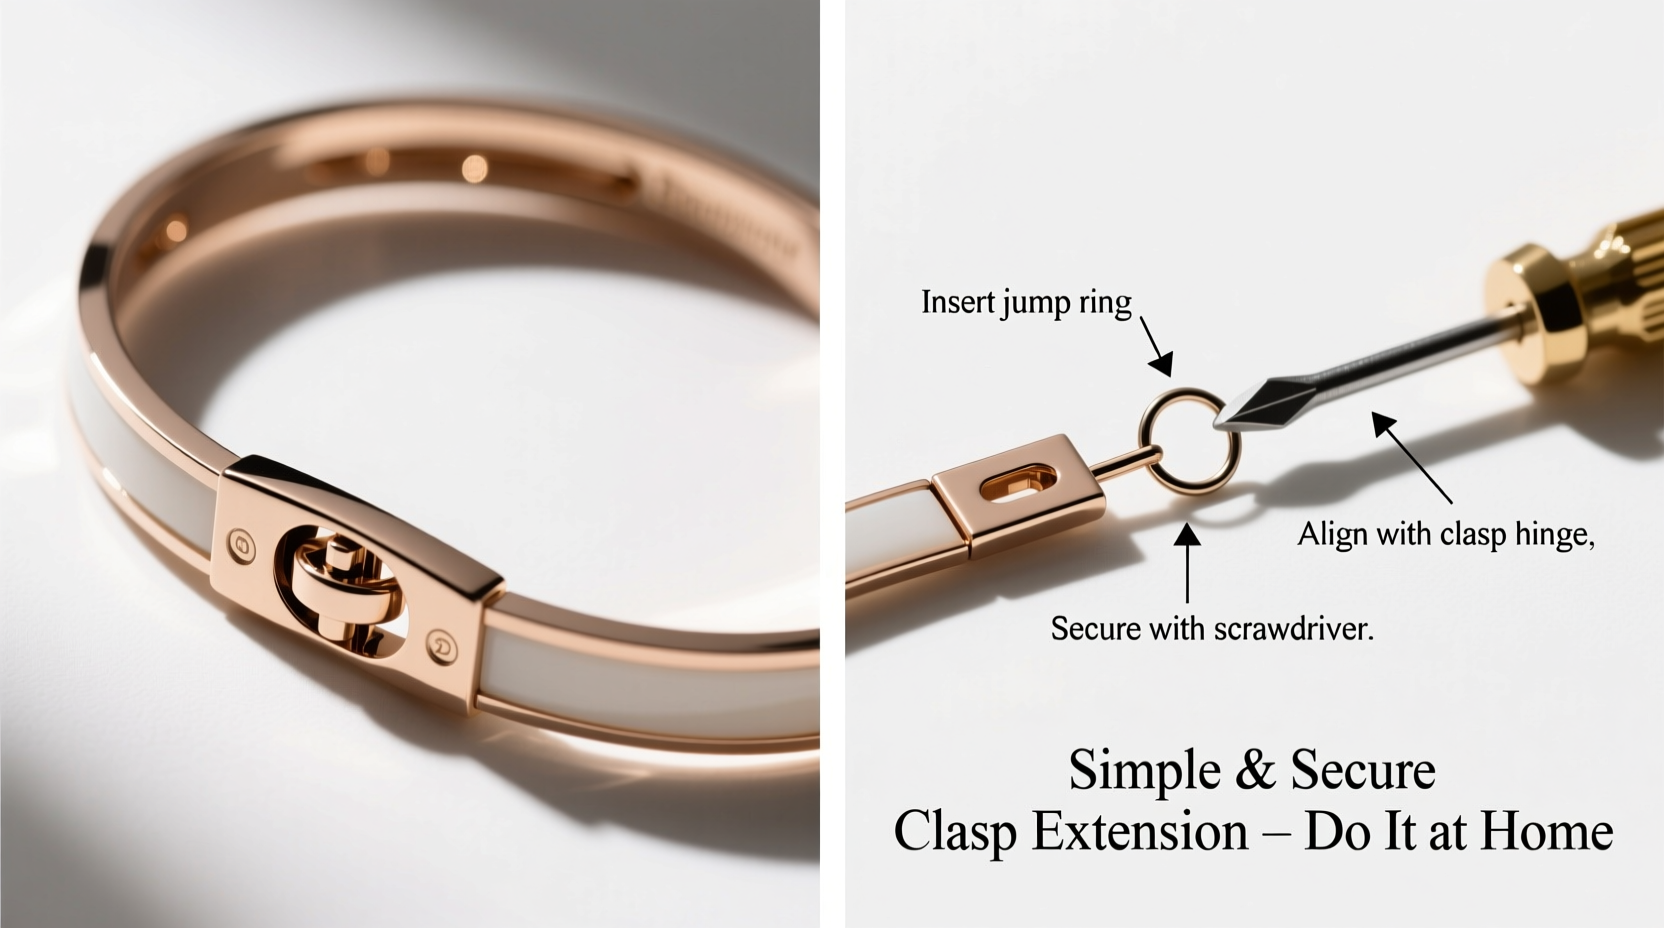
Step-by-Step Guide: How to Safely Extend Your Bracelet Clasp
Follow this detailed process to extend your bracelet securely at home. These steps work best for chains with jump rings, lobster clasps, or spring-ring closures.
- Assess the Bracelet Type: Determine whether your bracelet has a chain link structure, a continuous band, or a flexible design. Link-style bracelets (like cable or curb chains) are easiest to modify.
- Gather Tools: You’ll need chain-nose pliers, wire cutters (if adding metal links), a replacement jump ring or extension chain, and possibly a small ruler or caliper.
- Open the Jump Ring: Locate the jump ring near the clasp. Use pliers to gently twist it open sideways—never pull it apart, as this weakens the metal.
- Add an Extension Chain or Link: Attach a pre-made extension chain (available in 0.5\", 1\", or 1.5\" lengths) or a single decorative link. Ensure the metal matches your bracelet (e.g., 14k gold, sterling silver).
- Reconnect Securely: Close the jump ring by twisting it back into place. Check that the clasp operates smoothly and the added segment lies flat.
- Test the Fit: Put on the bracelet. It should fasten comfortably without stretching or sagging.
If your bracelet uses a magnetic clasp or is made of rigid materials like bangle styles, alternative methods may be needed.
Alternative Methods for Different Bracelet Types
Not all bracelets respond well to traditional link extensions. Here are tailored solutions based on design and material.
| Bracelet Type | Suitable Extension Method | Caution |
|---|---|---|
| Chain-link (gold/silver) | Add extension chain or extra link | Match metal gauge and finish |
| Tennis bracelet | Professional resizing recommended | Avoid DIY—prongs can loosen stones |
| Leather or fabric band | Add a sliding knot or button extender | Ensure knot won’t slip under tension |
| Bangle or rigid cuff | Use a silicone safety chain | Doesn’t alter fit but prevents loss |
| Magnetic clasp | Add a non-magnetic spacer link | Avoid interfering with magnet strength |
For delicate pieces, especially those with gemstones or intricate settings, consider consulting a professional—even minor missteps can devalue the piece.
Mini Case Study: Sarah’s Heirloom Bracelet
Sarah inherited a vintage 18k gold rope chain bracelet from her grandmother. While beautiful, the clasp was stiff and the band slightly too tight for her wider wrist. She didn’t want to risk sending it to a repair shop unfamiliar with antique jewelry. After measuring her wrist and the current length, she purchased a 1-inch gold-toned extension chain with a matching lobster clasp.
Using fine-tipped pliers, she opened the existing jump ring, attached the extension, and closed it carefully. The result? A perfect fit that honored the bracelet’s original design. “It felt like I could finally wear Grandma’s legacy comfortably,” she said. “And I saved $75 on a jeweler’s fee.”
Checklist: Preparing for a DIY Clasp Extension
Before starting, use this checklist to ensure success and avoid damage:
- ✅ Measure your wrist accurately
- ✅ Identify the bracelet’s metal type and clasp mechanism
- ✅ Purchase a matching extension chain or link (same metal, similar thickness)
- ✅ Use proper tools: chain-nose pliers, wire cutters (if needed)
- ✅ Work on a clean, soft surface to prevent scratches
- ✅ Test the clasp function after installation
- ✅ Inspect for sharp edges or weak connections
Skipping any of these steps increases the risk of breakage or misalignment.
Expert Insight: What Jewelers Recommend
While many minor adjustments can be done safely at home, professionals emphasize caution—especially with high-value items.
“Even a small error in opening a jump ring can stress the metal and lead to premature breakage. If the bracelet has sentimental or monetary value, it’s worth investing in a quick visit to a trusted jeweler.” — Marcus Lin, Master Jeweler & Repair Specialist, Boston
That said, Lin acknowledges that basic clasp extensions on sturdy chains are among the safest DIY projects—provided the right tools and patience are used.
Frequently Asked Questions
Can I extend a bracelet without changing its appearance?
Yes. Choose an extension chain that matches the original in color, width, and texture. For example, a twisted extension on a curb chain will stand out, while a simple oval link blends seamlessly. Some jewelers offer nearly invisible micro-extenders for premium finishes.
Will extending the clasp weaken my bracelet?
Only if done incorrectly. Opening a jump ring improperly (by pulling instead of twisting) can deform it and reduce strength. Always use two pairs of pliers to control movement, and inspect the connection afterward for smoothness and stability.
Are there no-tools options for extending a clasp?
Yes. Silicone or nylon safety extenders—small stretchable cords with clasps—can be attached temporarily. These don’t alter the bracelet and are ideal for travel or temporary fit issues. However, they’re not suitable for daily wear on valuable pieces.
Final Thoughts and Action Steps
Extending the clasp on your designer bracelet doesn’t require a trip to the jeweler or expensive tools. With careful planning and attention to detail, most people can achieve a secure, attractive fit at home. The goal isn’t just comfort—it’s preserving the elegance and longevity of a piece you love.
Start by evaluating your bracelet’s structure and your comfort needs. Then, select the method that aligns with your skill level and the item’s value. Whether you add a dainty extension chain or use a clever connector, the result should feel seamless and secure.


 浙公网安备
33010002000092号
浙公网安备
33010002000092号 浙B2-20120091-4
Comments
No comments yet. Why don't you start the discussion?