
A cluttered desk isn’t just an eyesore—it’s a productivity drain. While most people focus on clearing their desktops of papers and coffee mugs, the real chaos often hides beneath: a tangled web of power cords, USB cables, HDMI lines, and charging bricks. This mess not only looks unprofessional but can also lead to damaged wires, inefficient workflows, and even fire hazards in extreme cases. The good news? You don’t need expensive gear or technical expertise to fix it. With a few thoughtful strategies and consistent habits, you can transform that jungle of cords into a streamlined, accessible system.
Why Cable Clutter Matters More Than You Think
Beneath the surface of disorganized cabling lies a range of hidden issues. First, tangled wires are harder to troubleshoot. When your monitor stops working, how quickly can you identify whether it's a loose HDMI connection or a faulty power adapter if everything is knotted together? Second, constant bending and pulling wear down insulation over time, increasing the risk of short circuits. Third, dust accumulates faster in cable tangles, which can affect cooling and attract pests. Finally, visual clutter contributes to mental fatigue. Studies have shown that disordered environments increase stress and reduce concentration.
“Cable management isn’t about aesthetics alone—it’s about safety, efficiency, and sustainability.” — David Lin, Electrical Systems Consultant
Organizing your cables isn't just a one-time cleanup task; it's part of maintaining a healthy digital workspace. Whether you're working from home, running a small office, or managing a creative studio, taking control of your wiring setup pays dividends in both performance and peace of mind.
Step-by-Step Guide: Taming the Tangle
Start with a clear plan. Rushing into bundling wires without understanding what each one does will only make future changes more difficult. Follow this proven sequence to achieve lasting results.
- Unplug Everything: Begin by powering down all devices and disconnecting every cable from outlets, ports, and adapters. Yes—everything. This gives you full visibility and prevents accidental damage during sorting.
- Label Each Cable: Use removable labels or colored tape to mark each cord as you remove it. Note its purpose (e.g., “Monitor Power,” “Laptop Charger”) directly on the tag or nearby surface.
- Inspect for Damage: Check each wire for fraying, exposed copper, stiff connectors, or melted insulation. Discard any compromised cables immediately. Replace them with high-quality alternatives.
- Categorize by Function: Group cables into types—power, data (USB/HDMI/Ethernet), audio, and peripherals. This helps you decide on routing paths and bundling strategies later.
- Determine Usage Frequency: Identify which devices you use daily versus occasionally. Frequent-use items should be easily accessible; rarely used ones can be tucked away neatly.
- Plan Your Layout: Sketch a rough diagram of your desk and where each device sits. Map out the shortest, safest path for each cable type. Avoid crossing high-voltage and data lines when possible.
- Reconnect Strategically: Plug devices back in one at a time, following your plan. Route cables along designated paths before securing them.
Smart Tools and Techniques for Long-Term Order
Once you’ve untangled the mess, maintain order with practical tools and smart habits. These solutions are affordable, widely available, and highly effective.
Cable Clips and Adhesive Ties
Self-adhesive clips stick directly to the underside of your desk or wall surfaces and hold individual cords in place. They’re ideal for keeping power strips aligned or guiding specific lines like Ethernet toward a router. Choose models with rubber-lined channels to prevent abrasion.
Snap-Together Cable Raceways
These modular plastic channels mount to walls or desks and enclose multiple cables inside a sleek cover. Available in white, gray, or wood finishes, they blend into most interiors while protecting wires from foot traffic and pets. Great for running cables across floors or behind desks.
Velcro Straps Over Zip Ties
While zip ties may seem convenient, they’re permanent and can crush delicate wires when overtightened. Velcro straps (hook-and-loop) offer adjustable tension and can be reused endlessly. Wrap grouped cables every 6–8 inches for neat bundles.
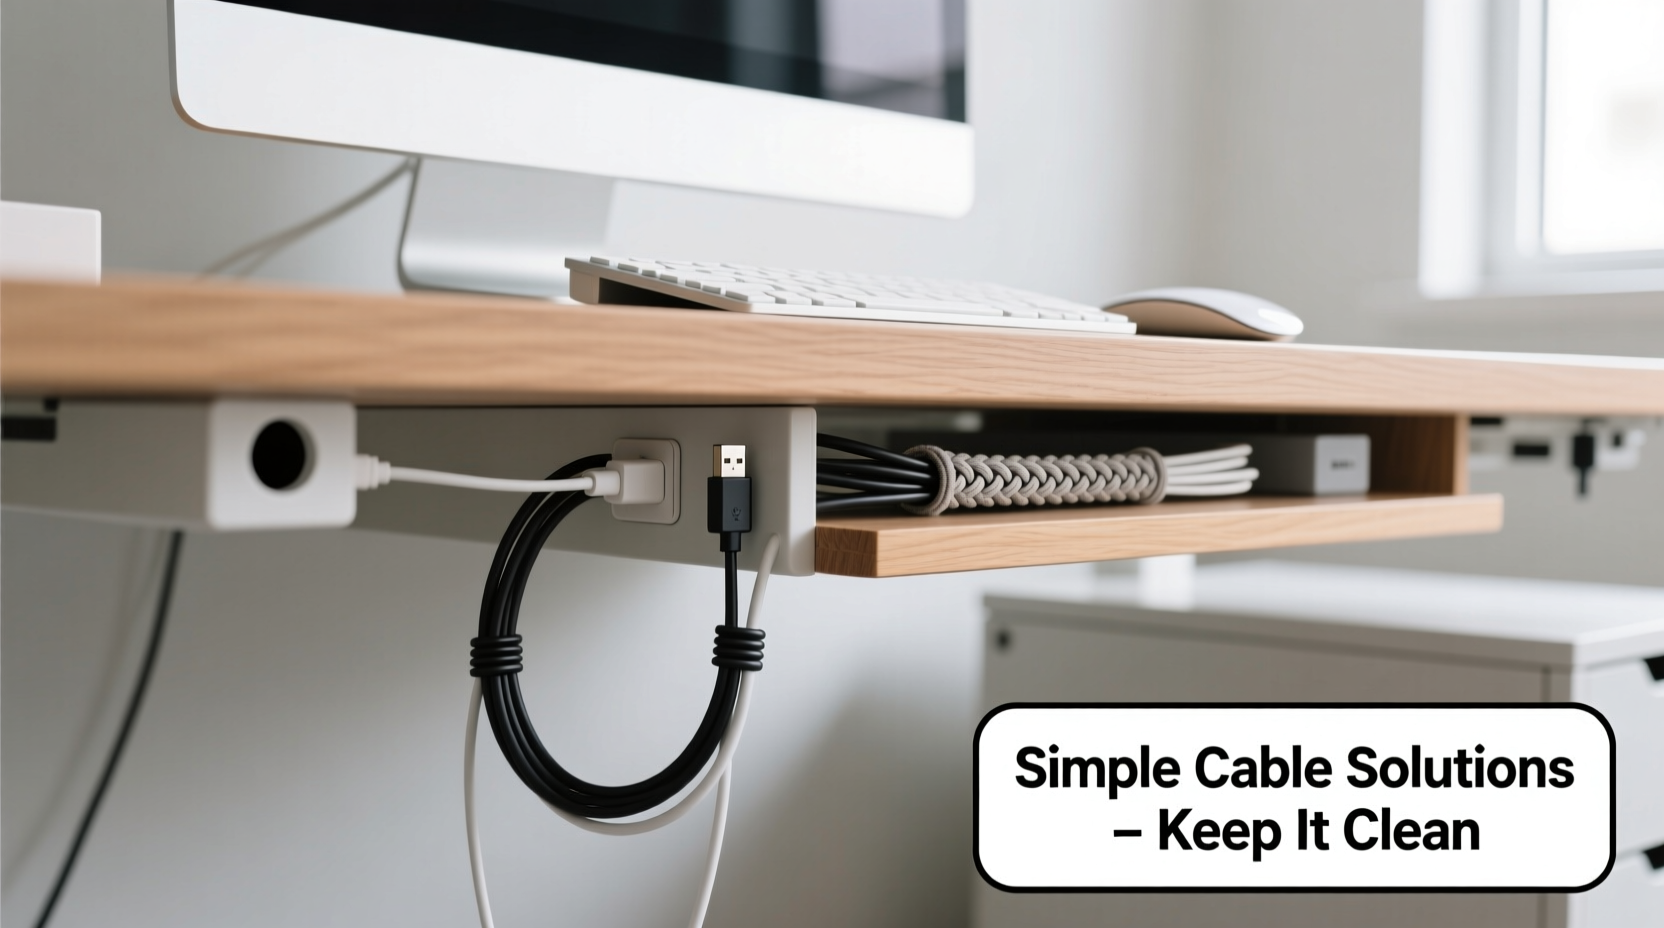
Under-Desk Cable Trays
Mount a tray beneath your desk to house power strips, docking stations, and excess cord length. This keeps heavy components off the floor and centralizes connections. Some trays include built-in grommets for feeding cables through the desk surface cleanly.
Cable Sleeves and Braided Wraps
For aesthetic appeal, bundle related cords (e.g., monitor + speakers + webcam) inside a single expandable sleeve. These come in various diameters and colors, making it easy to color-code systems. Unlike rigid conduits, sleeves flex around corners without kinking.
Do’s and Don’ts: A Quick Reference Table
| Do | Don’t |
|---|---|
| Use Velcro instead of plastic zip ties | Cut or modify factory plugs to fit tighter spaces |
| Leave slack for movement and unplugging | Over-tighten bundles, which can damage internal wiring |
| Label every cable clearly | Run power and data cables parallel for long distances (risk of interference) |
| Secure cables away from chair wheels and foot paths | |
| Dust and inspect cables quarterly | Ignore manufacturer-recommended bend radii |
Real Example: From Chaos to Calm in One Weekend
Mark, a freelance graphic designer in Portland, spent years tripping over cords under his L-shaped desk. His setup included two monitors, a drawing tablet, external hard drives, a printer, a lamp, and a phone charger—all plugged into three overlapping power strips. Dust had settled into the knots, and he once lost work because unplugging one device accidentally powered down his primary monitor.
Over a Saturday morning, Mark followed the step-by-step method outlined above. He labeled each cable with colored masking tape, replaced two frayed laptop chargers, and mounted a $15 under-desk tray from a hardware store. Using Velcro straps, he grouped monitor-related cables together and routed Ethernet separately along a raceway to avoid interference. By Sunday evening, his workspace was transformed. Not only did it look cleaner, but he could now swap devices or unplug safely without fear of cascading failures.
“It took less than four hours total,” Mark said. “Now I actually enjoy sitting down to work. And my partner stopped complaining about the ‘spider nest’ under the desk.”
Essential Checklist for a Wire-Free Workspace
Before declaring your job complete, run through this final checklist to ensure durability and usability.
- ✅ All cables are labeled and identifiable at a glance
- ✅ No wires are stretched taut or sharply bent
- ✅ Power strips are securely mounted and not overloaded
- ✅ Heat-producing adapters have space for ventilation
- ✅ Frequent-use connectors remain easily accessible
- ✅ Cables are secured away from rolling chair paths
- ✅ Surge protectors are used instead of direct wall plugging
- ✅ Unused extensions and duplicates have been removed
- ✅ A printed layout map is stored near the desk for future reference
- ✅ Dust has been wiped from all components and surfaces
Frequently Asked Questions
How often should I reorganize my under-desk cables?
At minimum, inspect your cable setup every 3–6 months. Look for signs of wear, test connections, and adjust routing if you've added new devices. If you frequently rearrange your desk, consider doing a quick review monthly.
Can I use wireless charging to reduce cable clutter?
Yes, but selectively. Wireless pads eliminate one cord per device (usually phones or earbuds), but they still require their own power source. Use them strategically—don’t replace five cables with five new power adapters. For best results, integrate wireless charging into a centralized dock powered by a single shared line.
What’s the safest way to hide cables behind furniture?
Use low-profile raceways or adhesive-backed channels designed for baseboards or desk legs. Never staple, nail, or pinch cables, as this damages insulation. Always leave room for airflow, especially near power bricks, and avoid placing heavy objects on top of bundled wires.
Conclusion: Build a Workspace That Works for You
A clean desk starts from the ground up—literally. Organizing messy cables isn’t a luxury reserved for minimalist influencers or tech enthusiasts. It’s a practical necessity for anyone who values focus, safety, and efficiency. The methods here don’t require advanced skills or big budgets. What they do require is attention to detail and a commitment to consistency. Once you experience the calm of a tidy workspace, you’ll wonder why you waited so long.


 浙公网安备
33010002000092号
浙公网安备
33010002000092号 浙B2-20120091-4
Comments
No comments yet. Why don't you start the discussion?