
Drawing doesn’t require years of training or expensive tools. With a little patience and the right approach, anyone can create something charming—even a lifelike yet adorable cartoon dog. This guide breaks down the entire process into manageable, easy-to-follow steps, making it ideal for beginners, children, or adults rediscovering their creative side. Whether you’re sketching for fun, teaching a child, or building foundational art skills, this method emphasizes simplicity, proportion, and confidence in your lines.
Gather Your Basic Supplies
Before picking up a pencil, ensure you have the right materials. You don’t need anything elaborate—just the basics will do. The goal is to focus on technique, not equipment.
- A standard #2 (HB) pencil for light sketching
- An eraser (preferably a kneaded eraser for gentle corrections)
- A ruler (optional, for aligning features)
- Plain printer paper or a sketchpad
- A black pen or marker (for final outlines, optional)
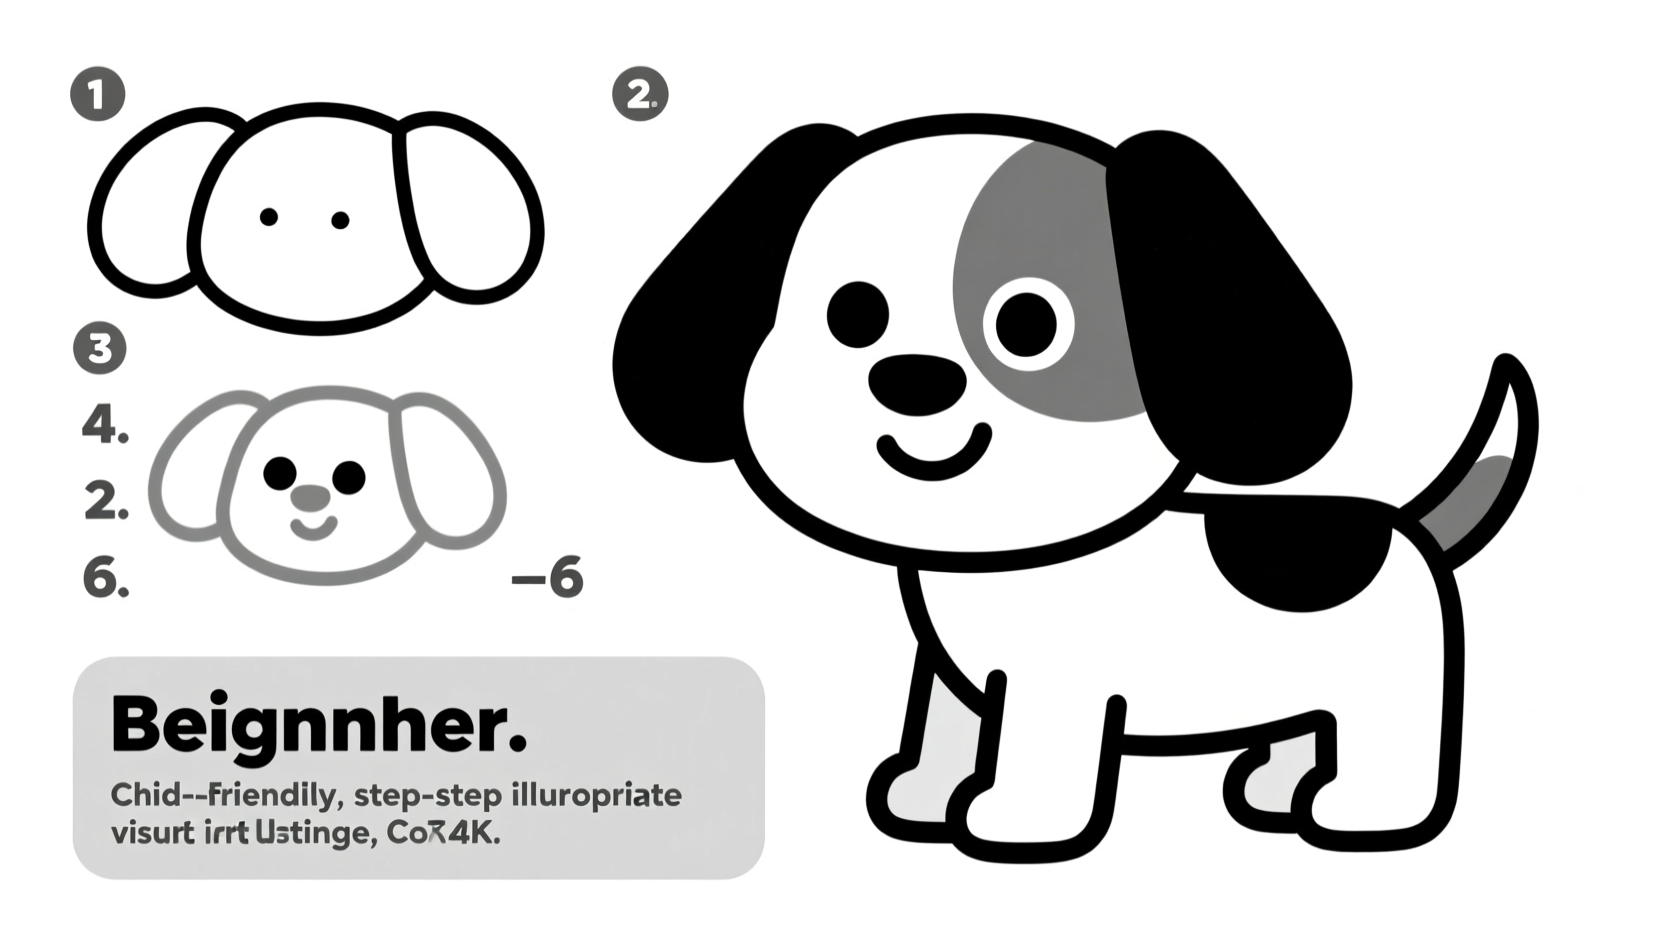
Understand Proportions with Simple Shapes
Dogs, like all animals, can be broken down into basic geometric forms. Using circles, ovals, and lines helps maintain correct proportions and symmetry. This stage isn't about details—it's about structure.
- Draw the head: Sketch a medium-sized circle. This will become the dog’s skull.
- Add the snout: Below the circle, draw a smaller oval that overlaps slightly at the bottom. This creates a natural muzzle.
- Suggest the body: Draw a larger oval behind and slightly below the head. It should connect smoothly to the head circle.
- Position the legs: Use four short vertical lines extending down from the body oval—two in front, two in back. Keep them slightly curved for a relaxed stance. <5> Ears: Add two floppy ovals on top of the head circle, angled outward for a friendly look.
At this point, your drawing may resemble a rough blueprint. That’s exactly what it should be. Resist the urge to add fur or eyes too soon. Focus on alignment: the snout should center under the head, and the body should balance naturally behind it.
| Shape | Purpose | Proportion Tip |
|---|---|---|
| Circle (head) | Base for facial features | Use as anchor—everything else connects to it |
| Oval (snout) | Defines mouth and nose area | Should be about 1/3 the size of the head |
| Oval (body) | Main torso structure | Twice as long as the head circle |
| Lines (legs) | Support and posture | Front legs slightly thicker than back |
Refine the Outline with Character
Now that the foundation is set, begin transforming the shapes into a recognizable, cute dog. This is where personality emerges. Think of a puppy with big eyes and a soft expression—roundness conveys innocence and charm.
- Connect the head and body: Smooth out the junction between the head circle and body oval with gentle curves.
- Define the face: Erase the bottom half of the head circle where it meets the snout. Then, round out the jawline to blend the two shapes.
- Shape the ears: Curve the tops of the ear ovals downward to create floppy, soft ears. Add a slight inner curve to suggest thickness.
- Outline the legs: Turn the guide lines into plump, slightly bent legs with small paws at the end. Think “cute sausage” rather than realistic anatomy.
- Add a tail: Draw a gently curved line rising from the back of the body, ending in a soft swirl or upward flick.
Add Facial Features and Personality
The face brings your dog to life. Cute dogs typically have large, expressive eyes, a small nose, and a subtle smile. Placement is key—misaligned eyes can throw off the whole expression.
- Draw the eyes: Place two large circles just above the midpoint of the head, spaced about one eye-width apart. Inside each, draw a smaller circle for the iris, and an even tinier one for the highlight. This creates a shiny, lively look.
- Sketch the nose: At the front of the snout, draw a small upside-down triangle or a rounded heart shape. Extend two short lines upward from the nose to meet between the eyes—this defines the muzzle.
- Add the mouth: Just below the nose, draw a shallow U-shape for a sweet, closed smile. Optionally, add a tiny tongue peeking out for extra charm.
- Include eyebrows: Light curved lines above the eyes can suggest emotion—slightly raised for curiosity, arched for friendliness.
“Cuteness in animal drawings often comes from exaggeration—bigger eyes, softer lines, and a touch of whimsy.” — Lena Park, Illustrator and Art Educator
Remember, perfection isn’t the goal. A slightly lopsided smile or uneven ears can make your dog feel more unique and hand-drawn, which adds character.
Finalize and Clean Up Your Drawing
With the outline complete, it’s time to finalize your artwork. This step separates a sketch from a finished piece.
- Go over your favorite lines: Using a darker pencil, pen, or marker, trace the outer edges and key features (eyes, nose, mouth). This makes them stand out.
- Erase construction lines: Carefully remove the initial circles and guide shapes. Work gently to avoid smudging.
- Add minimal details: Include a few short, curved lines around the ears and body to suggest fluffy fur. Don’t overdo it—simplicity keeps it cute.
- Sign your work: In the corner, add your initials or a small paw print. It’s a fun way to mark your creation.
Beginner Drawing Checklist
- ✅ Used light pencil strokes for initial sketch
- ✅ Broke the dog into basic shapes (circles, ovals)
- ✅ Kept head slightly oversized for cuteness
- ✅ Positioned eyes high and wide for expression
- ✅ Cleaned up guide lines before finalizing
- ✅ Added a simple background or signature
Common Mistakes and How to Avoid Them
Even experienced artists make missteps. Recognizing these early helps you improve faster.
| Mistake | Why It Happens | How to Fix It |
|---|---|---|
| Too many details too soon | Excitement to see results | Stick to shapes first; save fur and textures for last |
| Uneven or crooked features | Poor initial alignment | Use a center guideline line from head to tail |
| Flat or stiff appearance | Rigid lines, no variation | Use curved, flowing lines for a soft look |
| Over-erasing damages paper | Heavy pressure during corrections | Sketch lightly; use a kneaded eraser for precision |
Frequently Asked Questions
Can I draw a cute dog if I’ve never drawn before?
Absolutely. This method uses simple shapes and incremental steps designed specifically for first-time drawers. Many adults and children learn to draw this way—with success and enjoyment.
What kind of dog does this method work for?
This technique works best for floppy-eared, round-faced breeds like Beagles, Cocker Spaniels, or mixed-breed puppies. Once you master the basics, you can adapt the shape for longer muzzles or erect ears.
Should I color my drawing?
Coloring is optional but highly encouraged for added appeal. Use colored pencils, crayons, or markers in soft browns, blacks, whites, or golden shades. Keep shading simple—color evenly and add a highlight on the eyes for sparkle.
Keep Practicing and Make It Your Own
Every artist starts exactly where you are—blank page, pencil in hand, unsure of the first line. What matters isn’t perfection, but progress. Draw your cute dog once, then again tomorrow. Change the ear shape, widen the eyes, give it a collar. Each version builds skill and confidence.
Don’t compare your sketch to professional illustrations. Compare it to your last drawing—that’s where growth happens. Over time, you’ll develop your own style, whether playful, realistic, or whimsical.


 浙公网安备
33010002000092号
浙公网安备
33010002000092号 浙B2-20120091-4
Comments
No comments yet. Why don't you start the discussion?