
Drawing doesn’t require years of training or natural talent. For many, it begins with a playful sketch—especially when that sketch is a goofy, lopsided monster with three eyes and a toothy grin. Monsters are ideal subjects for beginners because they celebrate imagination over realism. There are no rules: asymmetrical faces, mismatched limbs, and wild colors aren’t just allowed—they’re encouraged. This guide breaks down the process into manageable steps, helping anyone, regardless of age or skill level, create fun and expressive monsters from scratch.
Why Drawing Monsters Is Perfect for Beginners
Monsters offer a forgiving canvas. Unlike portraits or animals, which demand anatomical accuracy, monsters thrive on exaggeration and whimsy. A crooked smile isn't a mistake—it's character. An extra arm? That’s creativity. This freedom makes monster drawing an excellent entry point for young artists or adults rediscovering their artistic side.
Additionally, drawing monsters builds foundational skills: hand-eye coordination, shape recognition, and confidence in mark-making. Because there’s no “wrong” way to design a monster, beginners are more likely to keep trying, iterating, and improving without fear of failure.
“Art starts with play. When children draw monsters, they're not just making pictures—they're building confidence in their ability to create.” — Dr. Lena Torres, Art Education Researcher
Essential Tools You Already Have
You don’t need expensive supplies to get started. Most households have everything required:
- Pencil and eraser (mechanical pencils work well for fine lines)
- Plain paper (printer paper is perfect)
- Ruler (optional, for symmetrical features)
- Colored pencils, crayons, or markers (for adding personality later)
Step-by-Step Guide to Creating Your First Monster
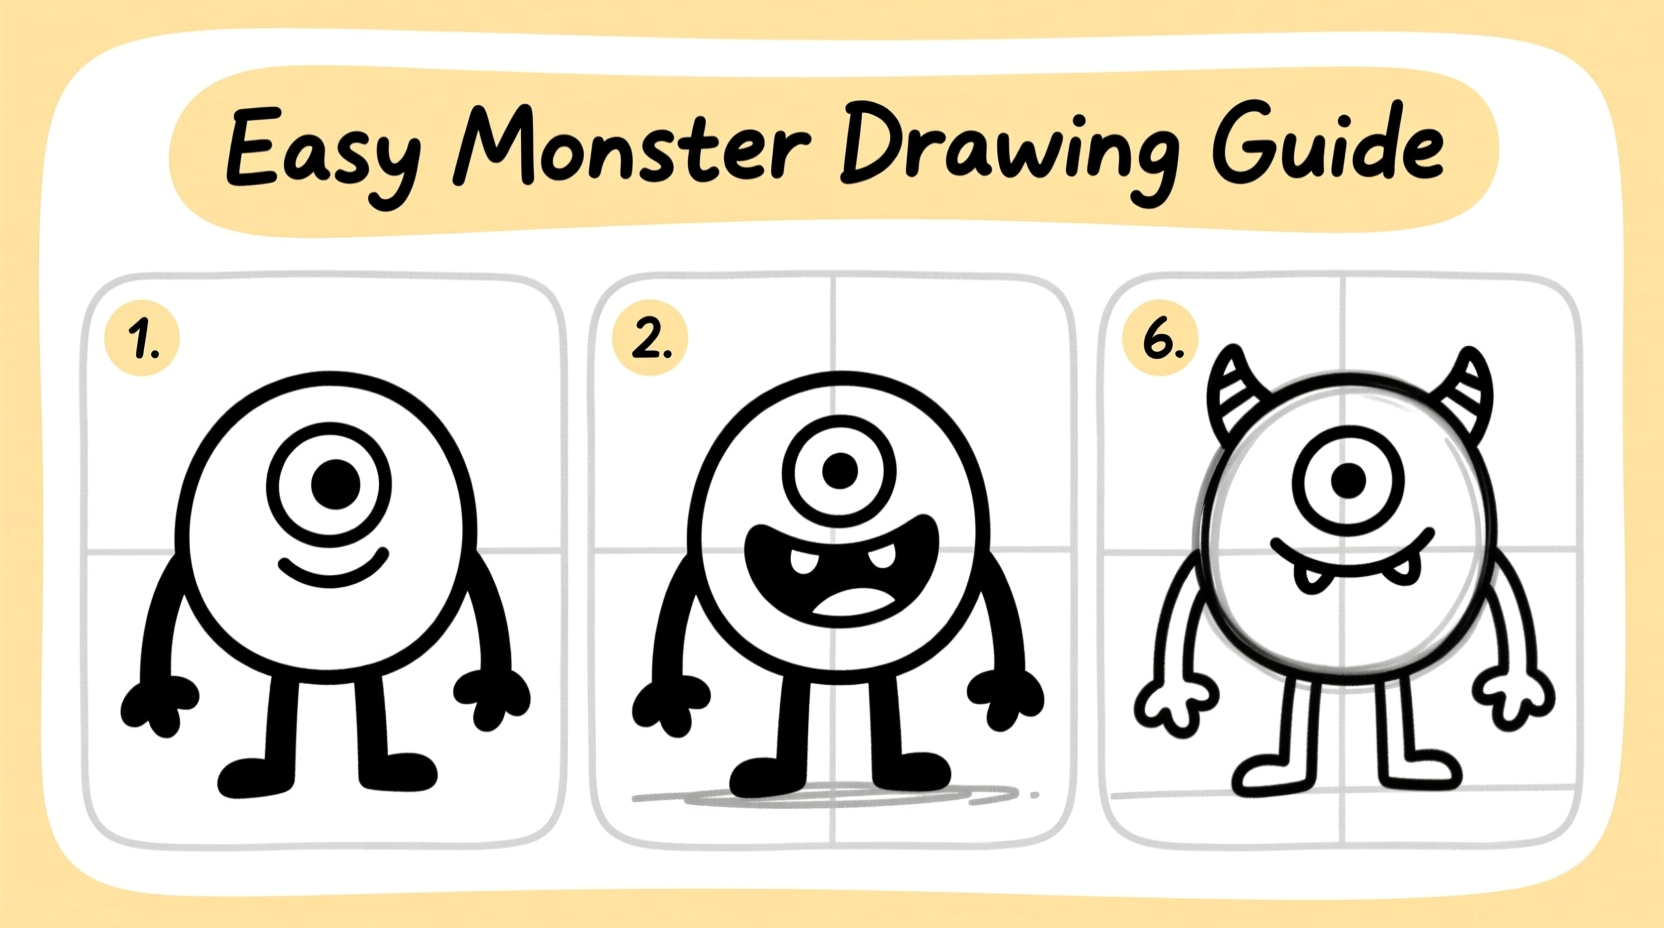
Follow this clear, six-step process to go from blank page to full-fledged monster in under 30 minutes.
- Start with a basic shape. Draw a circle, oval, or blob for the head. It doesn’t need to be perfect—slightly wobbly adds charm.
- Add facial guidelines. Lightly sketch a vertical and horizontal line across the face. These help place eyes, nose, and mouth evenly—or unevenly, if you want one eye higher than the other.
- Place the eyes. Draw two shapes where you want the eyes. They can be circles, stars, squares, or even hearts. Make one bigger than the other for a silly expression.
- Design the mouth. Below the horizontal line, draw a wide grin, a frown, or a zigzag row of teeth. Extend it beyond the face for a dramatic effect.
- Suggest a body. Attach a simple shape beneath the head—a triangle, rectangle, or another blob. Add arms as curved lines or stick-like shapes.
- Embellish with details. Give your monster spikes, horns, fur tufts, antennae, or polka dots. Three legs? Why not? Now erase the guidelines and darken your final lines.
Adding Personality Through Expression
A monster’s mood comes from its facial features. Try these combinations:
| Feature | Cheerful Monster | Grumpy Monster | Surprised Monster |
|---|---|---|---|
| Eyes | Curved upward like crescent moons | Slanted downward, narrow | Wide circles with small pupils |
| Mouth | Big U-shaped smile | Deep frown or tight line | Oval or large \"O\" |
| Brows | High and arched | Low and angled inward | High and straight |
| Extra Features | Blushing cheeks, sparkles | Furrowed forehead, steam lines | Hair standing up, floating objects |
Common Beginner Challenges—and How to Overcome Them
Every artist hits snags early on. Here’s how to handle frequent issues:
- “My monster looks flat.” Add depth with shading. Use your pencil to gently darken one side of the head or body, simulating light from above.
- “I can’t decide what my monster should look like.” Roll a die: 1 = scales, 2 = fur, 3 = horns, 4 = wings, 5 = multiple eyes, 6 = tentacles. Let chance spark ideas.
- “I erased too much and tore the paper.” Work lightly. Save heavy lines for the final outline after you’re happy with the sketch.
Mini Case Study: Maya’s First Monster Drawing
Maya, a 9-year-old student, was hesitant to draw during art class. She said she “wasn’t good at it.” Her teacher introduced the idea of drawing a friendly monster who lived under beds and collected lost socks. Using the step-by-step method, Maya began with a lopsided oval. She gave her monster two large green eyes, one smaller blue eye on top, and a mouth full of zigzag teeth. She added furry arms and labeled it “Sockzilla.” By the end of the session, she had drawn three variations and proudly displayed them on her bedroom door. The exercise didn’t just teach drawing—it built confidence through creative ownership.
Checklist: Create a Monster in One Sitting
Use this checklist to stay focused and complete your drawing without overwhelm:
- ☐ Gather pencil, paper, and eraser
- ☐ Choose a head shape (circle, square, blob)
- ☐ Lightly sketch facial guidelines
- ☐ Place eyes, mouth, and any extra features
- ☐ Attach a simple body and limbs
- ☐ Add unique details (horns, spots, fur, etc.)
- ☐ Erase guidelines and refine outlines
- ☐ Color or shade your monster (optional)
- ☐ Give your monster a name and short backstory
Expanding Your Skills: From Simple to Creative
Once comfortable with the basics, experiment with themes:
- Food monsters: A cupcake with jellybean eyes and licorice arms.
- Weather monsters: A cloud with thunderbolt eyebrows and raindrop tears.
- Nighttime monsters: A shy creature made of stars and shadows.
Try drawing the same monster in different emotions. How does Sockzilla look when he’s excited versus sleepy? This builds expressive range and reinforces core drawing principles.
“The best art lessons for beginners aren’t about precision—they’re about permission. Permission to mess up, to invent, and to enjoy the act of making.” — Rafael Kim, Children’s Art Instructor
FAQ
Can very young children follow this guide?
Absolutely. Children as young as 5 can participate with minor assistance. Simplify steps—start with just eyes and a mouth on a circle. Celebrate effort over accuracy.
What if I don’t know how to draw hands or feet?
You don’t need to! Monsters can have claws, paws, suction cups, or no limbs at all. Focus on shapes and expressions instead of realistic anatomy.
How do I make my monster look unique?
Give it an unexpected trait: only two fingers, glowing ears, or clothing like a tiny hat or scarf. Combine familiar elements in strange ways—like a turtle shell on a flying monster.
Final Thoughts: Start Drawing, Not Doubting
The simplest drawings often carry the most joy. A monster sketched in five minutes can become a cherished character, a story starter, or a window into someone’s imagination. You don’t need talent to begin—you only need a pencil and the willingness to try. Every expert artist once drew their first wobbly-eyed creature just like you’re about to do.


 浙公网安备
33010002000092号
浙公网安备
33010002000092号 浙B2-20120091-4
Comments
No comments yet. Why don't you start the discussion?