
Every cat deserves a personal retreat—a quiet space where they can nap, hide, or simply observe their kingdom in peace. While store-bought cat houses can be expensive and generic, building one at home allows you to customize size, style, and comfort while saving money. With just a few basic tools and common household materials, you can create a warm, safe, and inviting shelter your cat will love. This guide walks you through the entire process, from planning to finishing touches, ensuring success even if you’ve never built anything before.
Why Build a DIY Cat House?
Cats are naturally drawn to enclosed spaces that offer warmth, privacy, and a sense of security. A well-designed cat house mimics the den-like environments cats instinctively seek. Commercial options often use synthetic materials, lack proper insulation, or are too large for small living spaces. By crafting your own, you control the quality of materials, design for your cat’s specific habits, and incorporate eco-friendly or recycled components.
Additionally, a homemade cat house can blend seamlessly with your home decor. Whether you prefer rustic wood, modern cardboard, or a fabric-covered structure, customization is limitless. The satisfaction of seeing your cat curl up in something you made adds emotional value no retail product can match.
Materials and Tools You’ll Need
The beauty of this project lies in its flexibility. Depending on your skill level and available supplies, you can build a durable wooden house, a quick cardboard version, or a soft fabric enclosure. Below is a general list of materials and tools suitable for a sturdy, insulated wooden model—the most long-lasting option.
| Category | Item | Notes |
|---|---|---|
| Structural Materials | Plywood (¼” or ½” thick), scrap wood | Use untreated, non-toxic wood; avoid pressure-treated lumber. |
| Insulation | Foam board, felt, or recycled denim insulation | Helps regulate temperature in colder months. |
| Exterior Finish | Non-toxic paint, stain, or fabric wrap | Ensure all finishes are pet-safe and fully cured before use. |
| Interior Comfort | Washable cushion, old sweater, or fleece blanket | Removable for easy cleaning. |
| Tools | Measuring tape, saw, sandpaper, drill, screws, staple gun | Basic toolkit—no power tools required for cardboard versions. |
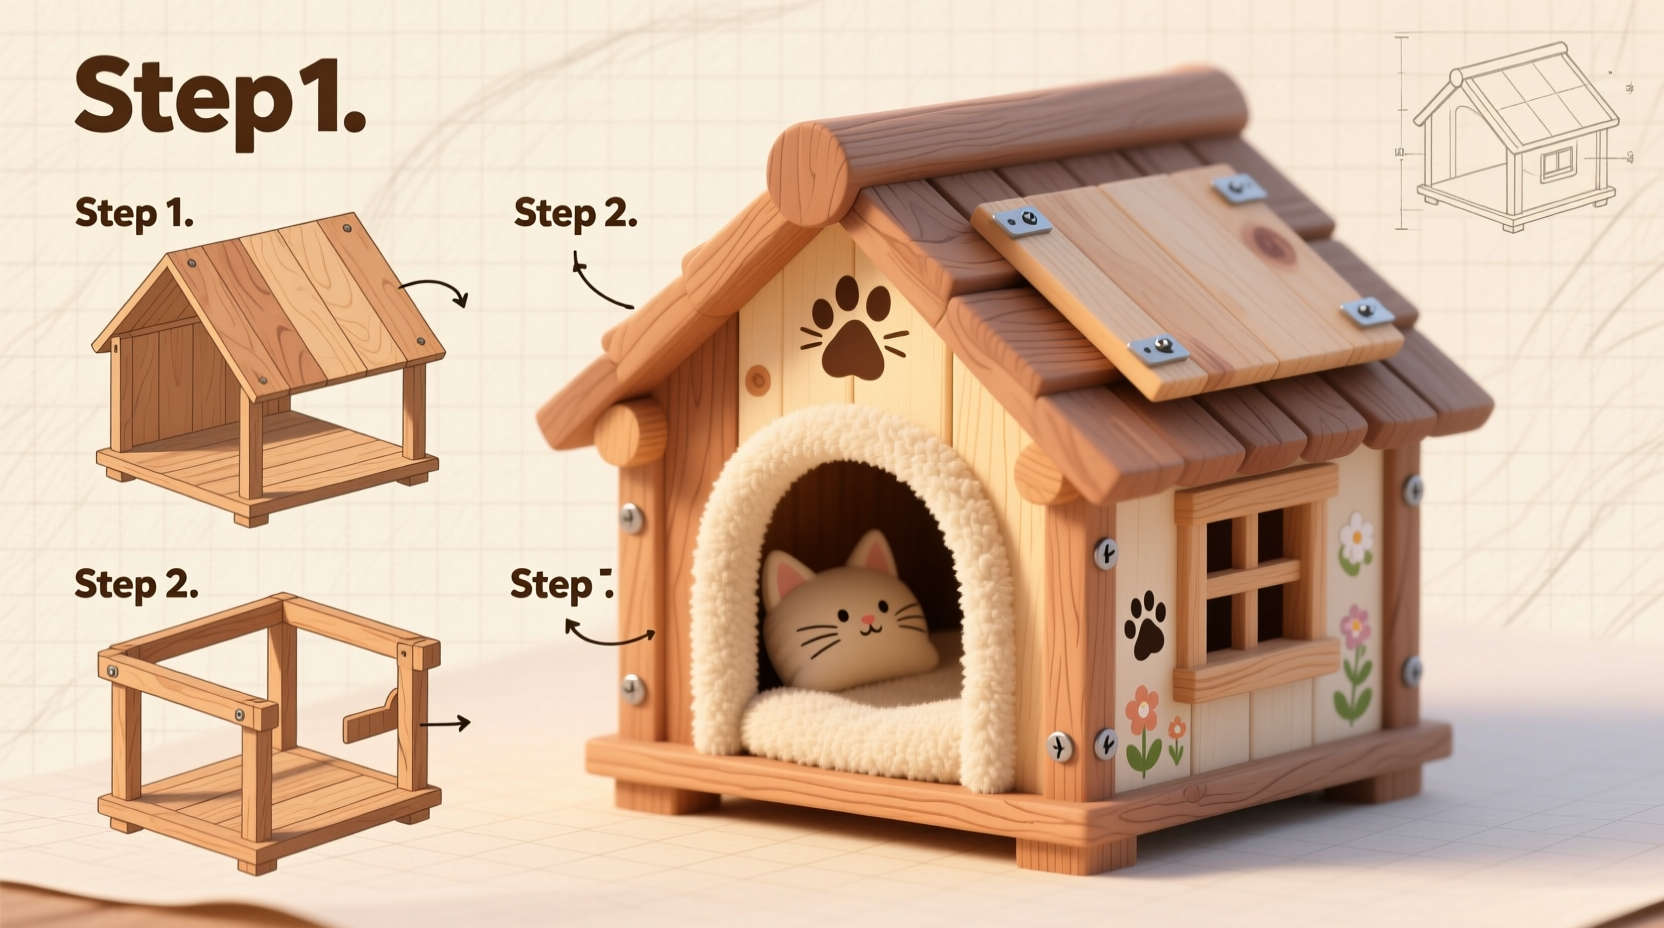
Step-by-Step Construction Guide
Follow these steps to build a compact, insulated wooden cat house suitable for indoor use. Estimated build time: 3–5 hours, not including drying time for paint or adhesive.
- Design and Measure: Sketch a simple box with one entrance. Ideal interior dimensions: 18” wide x 14” deep x 16” high. Allow extra width if your cat is large. Include a 7”–8” diameter entrance, centered on the front panel.
- Cut the Panels: Using plywood, cut five pieces: front, back, two sides, and a base. If adding a sloped roof, cut two triangular roof panels or one flat top piece slightly larger than the base for overhang.
- Sand All Edges: Smooth every cut edge to prevent splinters. Cats will rub against the walls—rough surfaces can snag fur or irritate skin.
- Assemble the Frame: Attach side panels to the base using wood screws. Then secure front and back panels. Pre-drill holes to avoid splitting the wood.
- Add Insulation: Cut foam board to fit inside the walls and base. Secure with non-toxic adhesive. This step is crucial for homes with cold floors or drafty rooms.
- Attach the Roof: Fix the roof panel(s) with hinges for easy access, or screw it permanently. A removable roof simplifies future cleaning.
- Finish the Exterior: Paint or stain with pet-safe products. Let dry completely—minimum 24 hours. Alternatively, wrap in fabric using a staple gun for a soft, modern look.
- Line the Interior: Place a cushion or folded fleece inside. Avoid loose stuffing or strings that could be chewed.
Alternative Designs for Different Needs
Not every home or cat suits a wooden structure. Consider these variations based on lifestyle and resources:
- Cardboard Cat House: Use a large shipping box, cut an entrance, and line with fabric. Decorate with non-toxic markers. Replace every few months.
- Fabric Igloo: Modify a small storage bin with a dome lid. Cover with upholstery fabric and fill with a padded insert. Lightweight and portable.
- Upcycled Furniture: Convert an old nightstand or ottoman into a cat house by removing a drawer and adding a cushion.
“Cats thrive in environments where they can control their surroundings. A personalized hideaway gives them autonomy and reduces stress.” — Dr. Lena Torres, Feline Behavior Specialist
Real Example: Mia’s Mini Retreat
Sarah, a pet owner in Portland, noticed her rescue cat Mia avoided the store-bought plastic bed she’d purchased. Instead, Mia curled up in a laundry basket lined with towels. Inspired, Sarah used the basket as a mold to build a wooden house slightly larger than the container. She insulated the base with recycled denim, painted the exterior sage green to match her living room, and added a fleece mat inside. Within hours of placing it near the window, Mia claimed it as her favorite spot. “It cost under $30 and took one weekend,” Sarah said. “Now she naps there every afternoon.”
Checklist: Building Your Cat House Successfully
Before starting, ensure you have everything in place:
- ✅ Measured your cat’s current resting spots for size reference
- ✅ Chosen safe, non-toxic materials
- ✅ Selected a quiet, low-traffic area for placement
- ✅ Allowed time for paints or adhesives to cure fully
- ✅ Included a removable, washable interior pad
- ✅ Tested stability—ensure the house won’t tip if leaned on
Common Mistakes to Avoid
Even well-intentioned builds can go wrong. Steer clear of these pitfalls:
- Using toxic finishes: Some paints and glues emit fumes harmful to cats. Always verify pet safety.
- Oversizing the entrance: A smaller opening (7”–8”) retains warmth and enhances security.
- Ignoring ventilation: Stale air can lead to mildew or discomfort. Small upper vents solve this.
- Placing in a noisy area: Cats seek quiet. Avoid high-traffic zones or near loud appliances.
Frequently Asked Questions
Can I use an old microwave or printer casing?
No. Electronic casings may contain hazardous plastics, insulation, or residual chemicals. Stick to raw wood, cardboard, or fabric-safe containers.
How do I clean the cat house?
Remove the cushion weekly and wash it. Wipe down hard surfaces with a damp cloth and mild vinegar solution. Deep clean every 3–4 weeks. Avoid strong disinfectants.
My cat isn’t using the house. What should I do?
Cats need time to accept new objects. Place familiar-smelling items (like a worn T-shirt) inside. Position treats nearby, then gradually inside. Never force entry—let curiosity take over.
Final Thoughts
A handmade cat house is more than a shelter—it’s a gesture of care. It reflects attention to your cat’s instincts, comfort, and personality. Whether crafted from wood, cardboard, or repurposed furniture, the effort you invest translates directly into your pet’s well-being. The process itself can be enjoyable, creative, and bonding. Once completed, watch quietly as your cat inspects, sniffs, and eventually claims the space as their own. That moment of trust is priceless.


 浙公网安备
33010002000092号
浙公网安备
33010002000092号 浙B2-20120091-4
Comments
No comments yet. Why don't you start the discussion?