
Smartphones have transformed the way we capture life’s moments. With high-resolution cameras built into every iPhone, it's easier than ever to take stunning photos. But with great photo quality comes a growing challenge: storage. Over time, thousands of images can fill up your device, slow down performance, and put your memories at risk if the phone is lost or damaged. That’s where Google Photos comes in—a reliable, cloud-based solution that ensures your photos are backed up, organized, and accessible from any device.
Uploading pictures from your iPhone to Google Photos doesn’t require technical expertise. With just a few taps, you can automate backups, free up space on your phone, and enjoy peace of mind knowing your memories are safe. Whether you're new to cloud storage or looking to refine your workflow, this guide walks you through everything you need to know.
Why Use Google Photos for iPhone Backups?
While iCloud is Apple’s native backup service, many users prefer Google Photos for its cross-platform flexibility, smart organization tools, and generous free storage tier (up to 15 GB shared across Google services). Unlike iCloud, which keeps files within Apple’s ecosystem, Google Photos lets you access your images from Android devices, Windows PCs, tablets, and web browsers—ideal for households using multiple platforms.
Google Photos also uses AI to automatically sort your images by people, pets, places, and events. You can search for “beach,” “dog,” or even “birthday 2023” and instantly find relevant photos. This intelligent tagging makes retrieval effortless, especially as your library grows.
“Cloud backups are no longer optional—they’re essential for digital hygiene. Services like Google Photos provide both security and convenience.” — David Lin, Digital Archiving Specialist
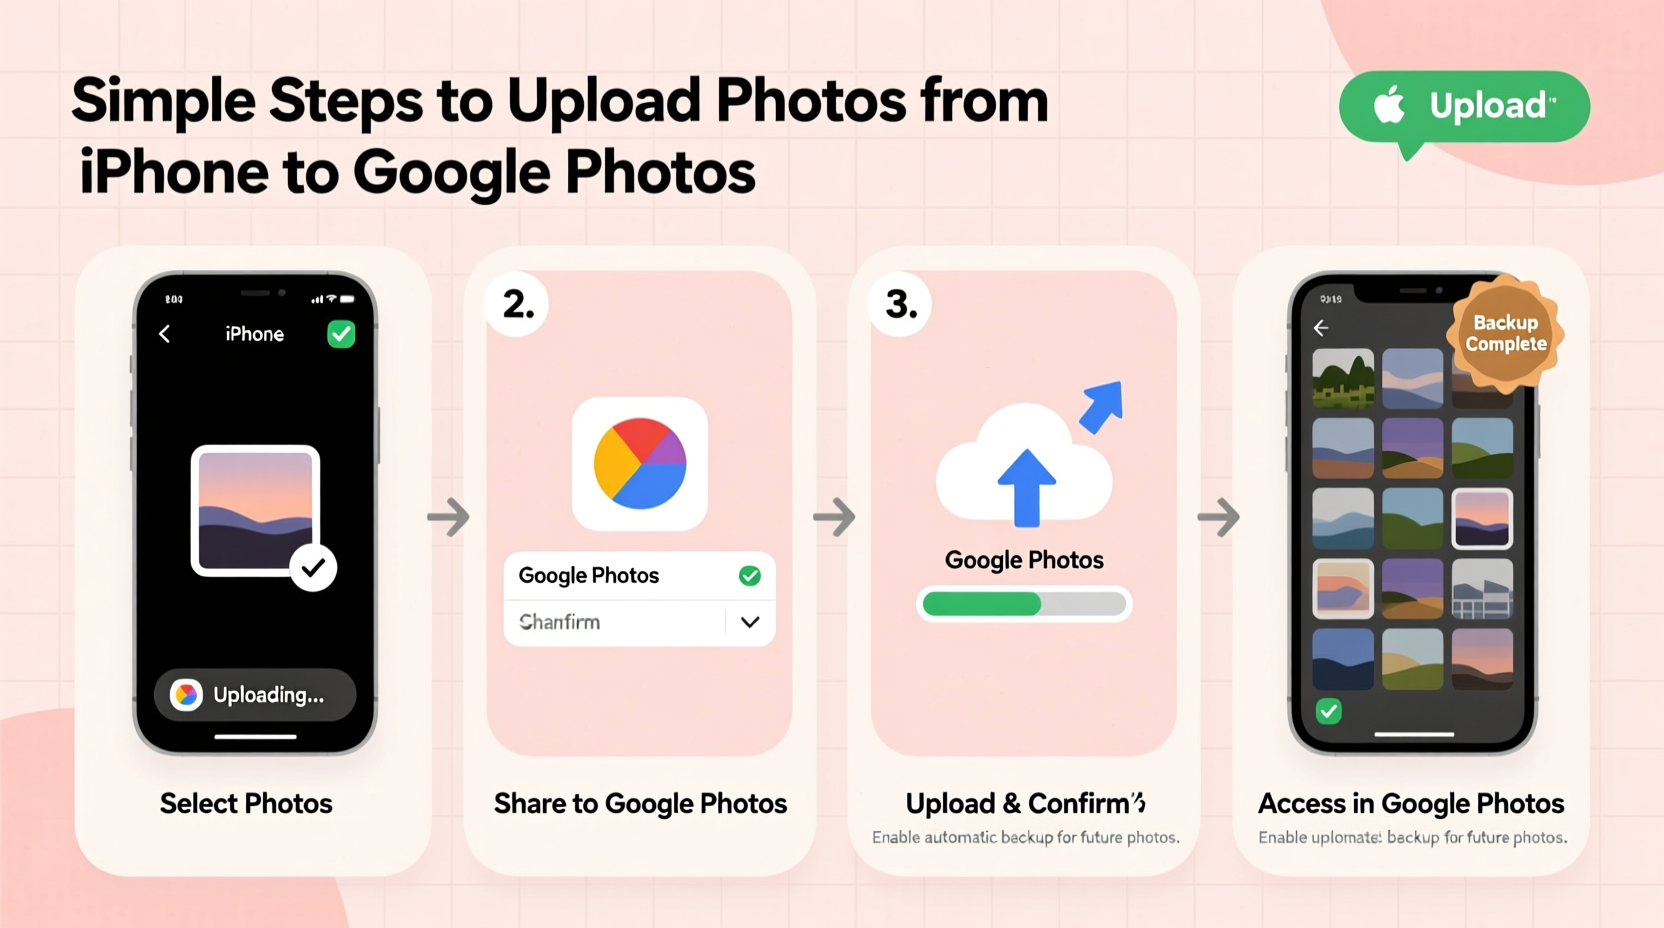
Step-by-Step Guide to Upload Pictures from iPhone to Google Photos
The process of uploading photos from your iPhone to Google Photos is straightforward. Follow these steps to get started:
- Download the Google Photos App: Open the App Store, search for “Google Photos,” and install the official app from Google LLC.
- Sign In to Your Google Account: Launch the app and tap “Sign in.” Use the Google account where you want your photos stored. If you don’t have one, create a free account during setup.
- Enable Backup & Sync: Once signed in, tap your profile icon (top right), go to Photos settings, then select Backup & Sync. Toggle it on.
- Choose Backup Quality: Under Backup settings, select either “High quality (free unlimited)” or “Original quality.” The former compresses images slightly but offers unlimited free storage. The latter preserves full resolution but counts against your 15 GB limit.
- Connect to Wi-Fi: To avoid data charges, ensure your iPhone is connected to a stable Wi-Fi network. Backups work best over Wi-Fi.
- Wait for Upload to Begin: The app will scan your camera roll and start uploading photos in the background. You’ll see a progress indicator near your profile picture.
Automate Your Photo Backups
Manual uploads work, but automation ensures nothing gets left behind. With Backup & Sync enabled, every new photo you take will automatically upload when your phone is charging, locked, and connected to Wi-Fi. This “set it and forget it” approach minimizes effort while maximizing protection.
To verify automation is working:
- Open Google Photos and check the Library tab.
- Navigate to Backed up under the Devices section to confirm recent uploads.
- Take a test photo, wait a few minutes, and see if it appears in the web version of Google Photos at photos.google.com.
If uploads stall, try restarting the app or toggling Backup & Sync off and on again. Also, ensure Location Services are enabled for Google Photos under iPhone Settings > Privacy > Location Services.
Free Up Space After Backup
One of the most valuable features of Google Photos is the ability to remove backed-up photos from your iPhone to reclaim storage. This is especially helpful for older iPhone models with limited capacity.
To do this:
- Go to the Google Photos app.
- Tap Library > Utilities.
- Select Free up space.
- The app will calculate how much storage can be freed by removing photos already saved in the cloud.
- Tap Remove to confirm.
This action only deletes local copies—not the ones in Google Photos. You can still view them anytime via the app.
| Action | Effect on iPhone | Effect on Google Photos |
|---|---|---|
| Enable Backup & Sync | Starts automatic uploads | Stores all photos securely |
| Free up space | Deletes local copies | No change; originals remain |
| Delete from Google Photos | No direct effect | Removed permanently after 60 days |
Mini Case Study: Recovering Lost Memories
Sarah, a freelance photographer in Portland, accidentally dropped her iPhone in a lake during a hiking trip. The device was unrecoverable, and she hadn’t backed up to iCloud in weeks. Panicked, she remembered installing Google Photos months earlier—but wasn’t sure if it had been working.
She logged into photos.google.com from a friend’s laptop and found every photo from the past three months safely stored in the cloud. Even recent shots from the hike were there, uploaded the night before the accident. Because she had Backup & Sync enabled, she lost no work. Within days, she had a new phone and restored her entire gallery with minimal disruption.
Sarah now checks her backup status weekly and recommends Google Photos to all her clients.
Tips for a Smooth and Secure Experience
- Use Albums Wisely: Create albums for trips, events, or themes. These sync across devices and can be shared with family.
- Review Shared Libraries: Enable “Sharing suggestions” to automatically share photos of friends detected in images.
- Check Privacy Settings: Avoid public sharing unless intentional. Most backups should remain private.
- Monitor Storage Usage: Visit one.google.com/storage to track your 15 GB limit and manage files.
Frequently Asked Questions
Will my Live Photos and videos upload too?
Yes. When Backup & Sync is enabled, Live Photos, videos, and bursts are uploaded along with standard images. Live Photos retain their motion and sound features in Google Photos.
Can I back up without using Wi-Fi?
You can allow cellular uploads by going to Settings > Backup & Sync > Advanced settings and enabling “Backup on mobile networks.” However, this may consume significant data and is not recommended for large libraries.
What happens if I delete a photo from my iPhone?
If the photo has already been backed up, deleting it from your iPhone does not remove it from Google Photos. If it hasn’t been backed up, it will be deleted from both unless recovered within 30 days from the Recently Deleted folder.
Final Checklist Before You Start
- ✅ Download Google Photos from the App Store
- Ensure it’s the official app by Google.
- ✅ Sign in with the correct Google account
- Use an account you control and remember.
- ✅ Turn on Backup & Sync
- Find it under your profile > Photos settings.
- ✅ Select High Quality for unlimited free backup
- Unless you need pixel-perfect originals.
- ✅ Connect to Wi-Fi and let the first backup run
- Larger libraries may take hours or overnight.
- ✅ Run “Free up space” once backup is complete
- Reclaim gigabytes instantly.
Conclusion
Backing up your iPhone photos to Google Photos is one of the simplest yet most impactful digital habits you can adopt. It protects your memories, reduces device clutter, and gives you seamless access across all your screens. The initial setup takes less than ten minutes, and once configured, the system works silently in the background—just as it should.
Don’t wait until your phone runs out of space or gets lost. Take a moment today to install the app, enable backup, and let Google Photos do the rest. Your future self will thank you when every smile, sunset, and surprise moment remains exactly where it belongs: safe, searchable, and always within reach.


 浙公网安备
33010002000092号
浙公网安备
33010002000092号 浙B2-20120091-4
Comments
No comments yet. Why don't you start the discussion?