
Grid style drying mats have become a staple in modern kitchens for their excellent water drainage, non-slip surface, and quick-drying capabilities. Whether made of silicone, rubber, or eco-friendly TPE, these mats are designed to protect countertops while improving dish-drying efficiency. However, once the dishes are put away, many users struggle with where—and how—to store them neatly. Left crumpled in a drawer or draped over a cabinet handle, they can take up unnecessary space or attract dust and moisture.
The key to maintaining both functionality and cleanliness lies in smart storage. With thoughtful organization, you can keep your drying mat ready for use, extend its lifespan, and preserve valuable kitchen real estate. This guide explores practical, tested methods to store your grid style drying mat efficiently—without sacrificing convenience or aesthetics.
Why Proper Storage Matters
Improper storage doesn’t just create clutter—it can degrade your drying mat over time. Trapped moisture promotes mildew growth, especially in humid environments. Folding or rolling the mat tightly may cause permanent creasing, reducing its flatness and effectiveness on surfaces. Additionally, storing it in direct sunlight can lead to material degradation, particularly in silicone-based mats.
Proper storage maintains the mat’s structural integrity, prevents bacterial buildup, and ensures it’s always clean and ready for use. A well-stored mat also contributes to a streamlined kitchen workflow, eliminating last-minute scrambling to find or unfold it before washing dishes.
“Many people overlook the importance of post-use care for drying mats. How you store them directly affects hygiene and longevity.” — Dr. Lena Torres, Home Hygiene Researcher at the Institute for Sustainable Living
Top 5 Space-Saving Storage Solutions
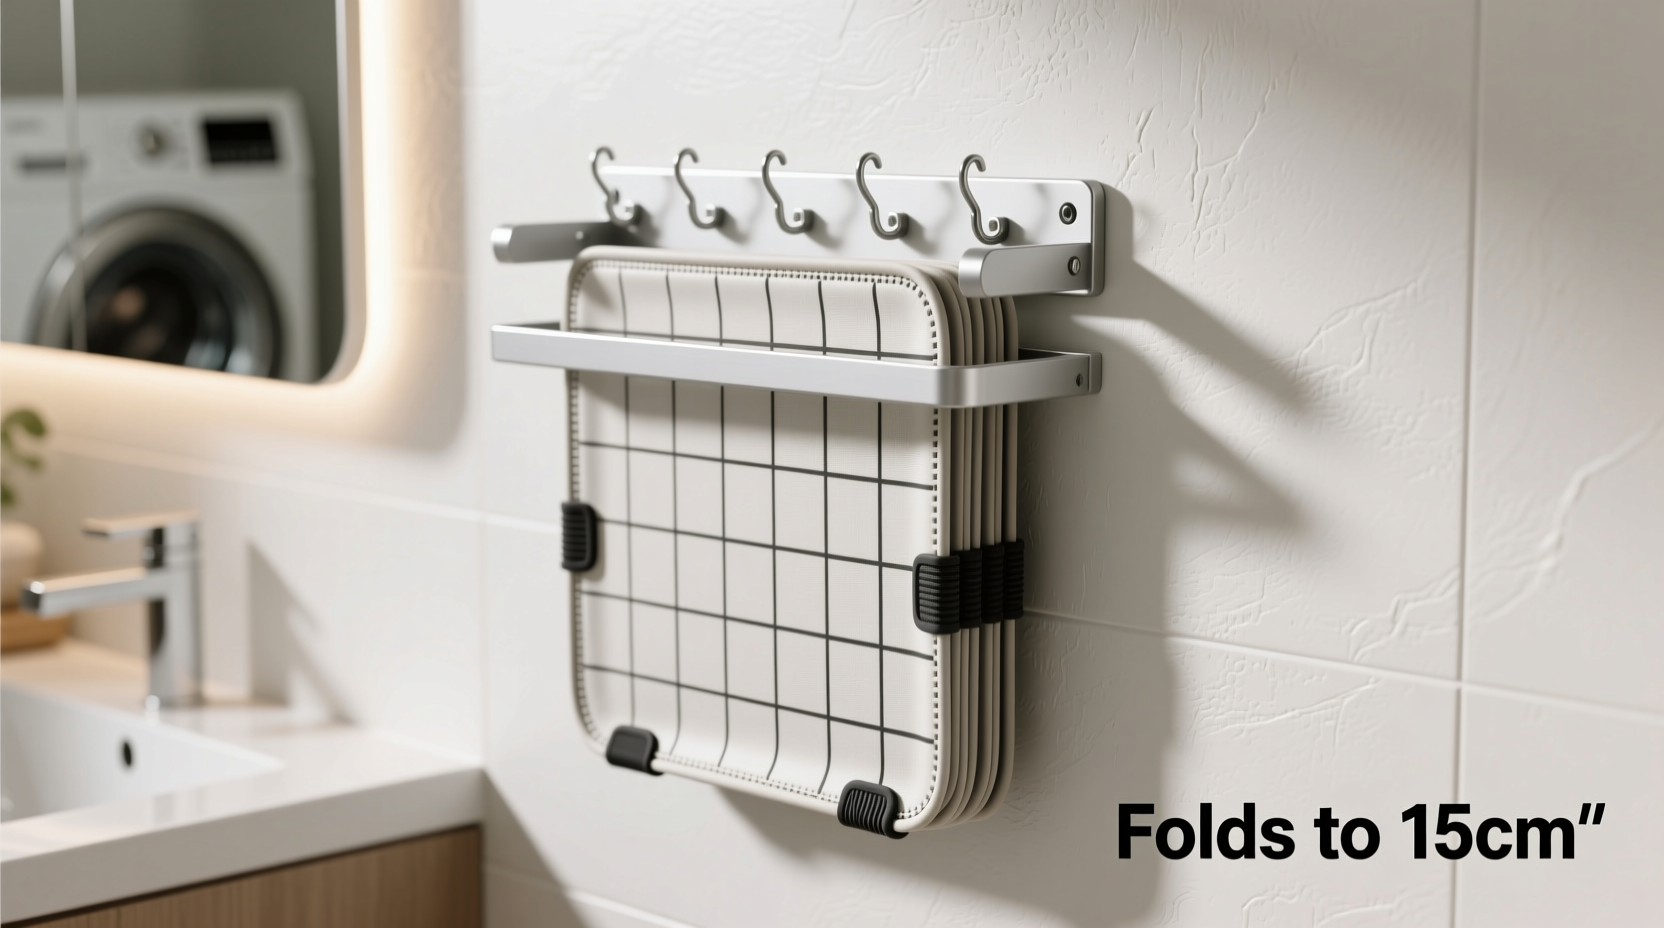
1. Vertical Roll with a Towel Rod or Under-Cabinet Hook
One of the most efficient ways to store a grid style drying mat is vertically rolled and hung. This method saves counter and drawer space while allowing air circulation to prevent dampness.
Install an adhesive hook under a cabinet or use an existing towel rod. After cleaning and drying the mat, roll it tightly from one end to the other, then secure it with a fabric strap or silicone band. Hang it by the loop created at the top of the roll.
2. Flat Storage in a Deep Drawer with Divider
If hanging isn’t feasible, flat storage in a deep drawer offers stability and protection. Place the mat inside a wide drawer—preferably one designated for linens or baking sheets. To avoid creasing, lay it flat without folding.
Use adjustable dividers or insert a stiff board (like a cutting board) beneath the mat to maintain its shape. If stacking items above, ensure they’re lightweight to prevent warping.
3. Behind-the-Door Organizer for Pantry or Cabinet
Maximize unused vertical space by utilizing the back of a kitchen door. Over-the-door organizers with clear pockets are ideal for thinner grid mats.
Clean and dry the mat thoroughly, fold it once (if necessary), and slide it into a large pocket. This keeps it visible, accessible, and out of the way. Choose organizers with reinforced stitching to support the mat’s weight when slightly damp.
4. Integrated Sink Grid Holder (DIY Option)
If your sink has a built-in grid or strainer basket, consider modifying it to double as a mat holder. When not in use, place the drying mat inside the empty sink basin and cover it with a fitted sink cover or cutting board.
This method keeps the mat near its point of use, avoids floor contact, and turns dead sink space into functional storage. Just ensure the mat is completely dry to prevent odor buildup.
5. Wall-Mounted Frame or Clip System
For a sleek, minimalist look, install two discreet wall clips or picture-frame hangers on a kitchen wall or backsplash. Slide the ends of the dried mat into the clips to hold it flat against the wall.
This approach works best in larger kitchens where wall space is available. It doubles as a design element and ensures rapid drying after each use. Use rust-resistant hardware to avoid damage in moist environments.
Step-by-Step Guide: Preparing Your Mat for Storage
Before storing your grid style drying mat, proper preparation is essential. Follow this sequence to ensure hygiene and durability:
- Rinse thoroughly: Remove food particles and soap residue with warm water.
- Wipe or shake dry: Use a microfiber cloth or hang it over the sink edge to drain excess moisture.
- Sanitize weekly: Soak in a mix of water and white vinegar (3:1 ratio) for 10 minutes to eliminate bacteria.
- Air-dry completely: Lay flat or hang vertically for at least 2–3 hours before storage.
- Inspect for damage: Check for tears, warping, or persistent odors that may indicate mold.
- Choose storage method: Select one of the space-saving options based on your kitchen layout.
“Allowing a drying mat to remain damp before storage is the most common mistake. Even 30 minutes of airflow can make a difference.” — Carlos Mendez, Kitchen Organization Consultant
Do’s and Don’ts of Drying Mat Storage
| Do’s | Don’ts |
|---|---|
| Store in a cool, dry, and ventilated area | Fold tightly or crumple into a ball |
| Hang vertically using hooks or rods | Leave it in the sink when not in use |
| Use breathable covers or sleeves | Expose to prolonged direct sunlight |
| Rotate storage position monthly | Stack heavy items on top of stored mats |
| Clean and dry before placing in storage | Store in sealed plastic bags while damp |
Real-Life Example: The Compact Apartment Kitchen
Sophie, a graphic designer living in a 500-square-foot studio apartment in Seattle, faced constant kitchen clutter. Her drying mat was often left on the counter, interfering with meal prep. After researching compact storage ideas, she installed two small adhesive hooks under her upper cabinet, just above the dishwasher.
She began rolling her mat daily after use and hanging it vertically. The change freed up nearly 12 inches of counter space and reduced the need for constant wiping due to less moisture exposure. “It took me two weeks to build the habit,” she said, “but now it’s automatic. I even get compliments on how tidy my kitchen looks.”
Checklist: Smart Storage Routine for Your Drying Mat
- ✅ Rinse the mat after each use
- ✅ Shake off excess water or wipe dry
- ✅ Sanitize weekly with vinegar solution
- ✅ Allow full air-drying before storage
- ✅ Choose a designated storage spot (hook, drawer, wall, etc.)
- ✅ Inspect monthly for wear or odor
- ✅ Rotate storage method every few months to prevent stress points
Frequently Asked Questions
Can I fold my grid style drying mat for storage?
Folding is acceptable only if absolutely necessary and done loosely. Repeated sharp folds can create permanent creases, leading to cracks over time. Rolling is preferred to maintain flexibility and flatness.
How often should I replace my drying mat?
With proper care, a high-quality grid mat lasts 1–3 years. Replace it if you notice discoloration, persistent odor after cleaning, or surface degradation like flaking or stickiness.
Is it safe to store the mat inside a kitchen drawer?
Yes, provided the mat is completely dry and placed flat. Avoid sealing it in airtight containers. Consider lining the drawer with a moisture-absorbing sachet to prevent humidity buildup.
Final Thoughts: Turn Small Habits into Big Gains
Storing your grid style drying mat properly isn’t just about tidiness—it’s about optimizing your kitchen’s function and hygiene. The right storage method enhances convenience, prolongs the life of your mat, and supports a more organized cooking environment. Whether you choose vertical hanging, flat drawer placement, or a creative wall-mounted solution, consistency is key.
Start today by selecting one storage technique that fits your kitchen layout and routine. Implement the cleaning and drying steps diligently, and soon, managing your drying mat will become second nature. A small change in how you store one simple tool can ripple into greater efficiency across your entire home.


 浙公网安备
33010002000092号
浙公网安备
33010002000092号 浙B2-20120091-4
Comments
No comments yet. Why don't you start the discussion?