
A cluttered desk isn’t just unsightly—it’s a productivity killer. Studies show that visual disarray increases cognitive load, making it harder to focus and process information efficiently. One of the most overlooked yet powerful tools in achieving a streamlined workspace is the humble storage plate: a flat, elevated surface designed to hold frequently used items without sacrificing desk real estate. When used strategically, a storage plate transforms chaos into calm, offering both functional utility and aesthetic harmony.
More than just a tray or organizer, a well-placed storage plate creates zones of intentionality on your desktop. It elevates essential tools—like notebooks, pens, smartphones, or tablets—into easy reach while keeping the rest of the surface clear for active work. This article explores how to leverage this simple tool with precision, turning your desk into a model of minimalist efficiency.
Why a Storage Plate Works Where Other Organizers Fail
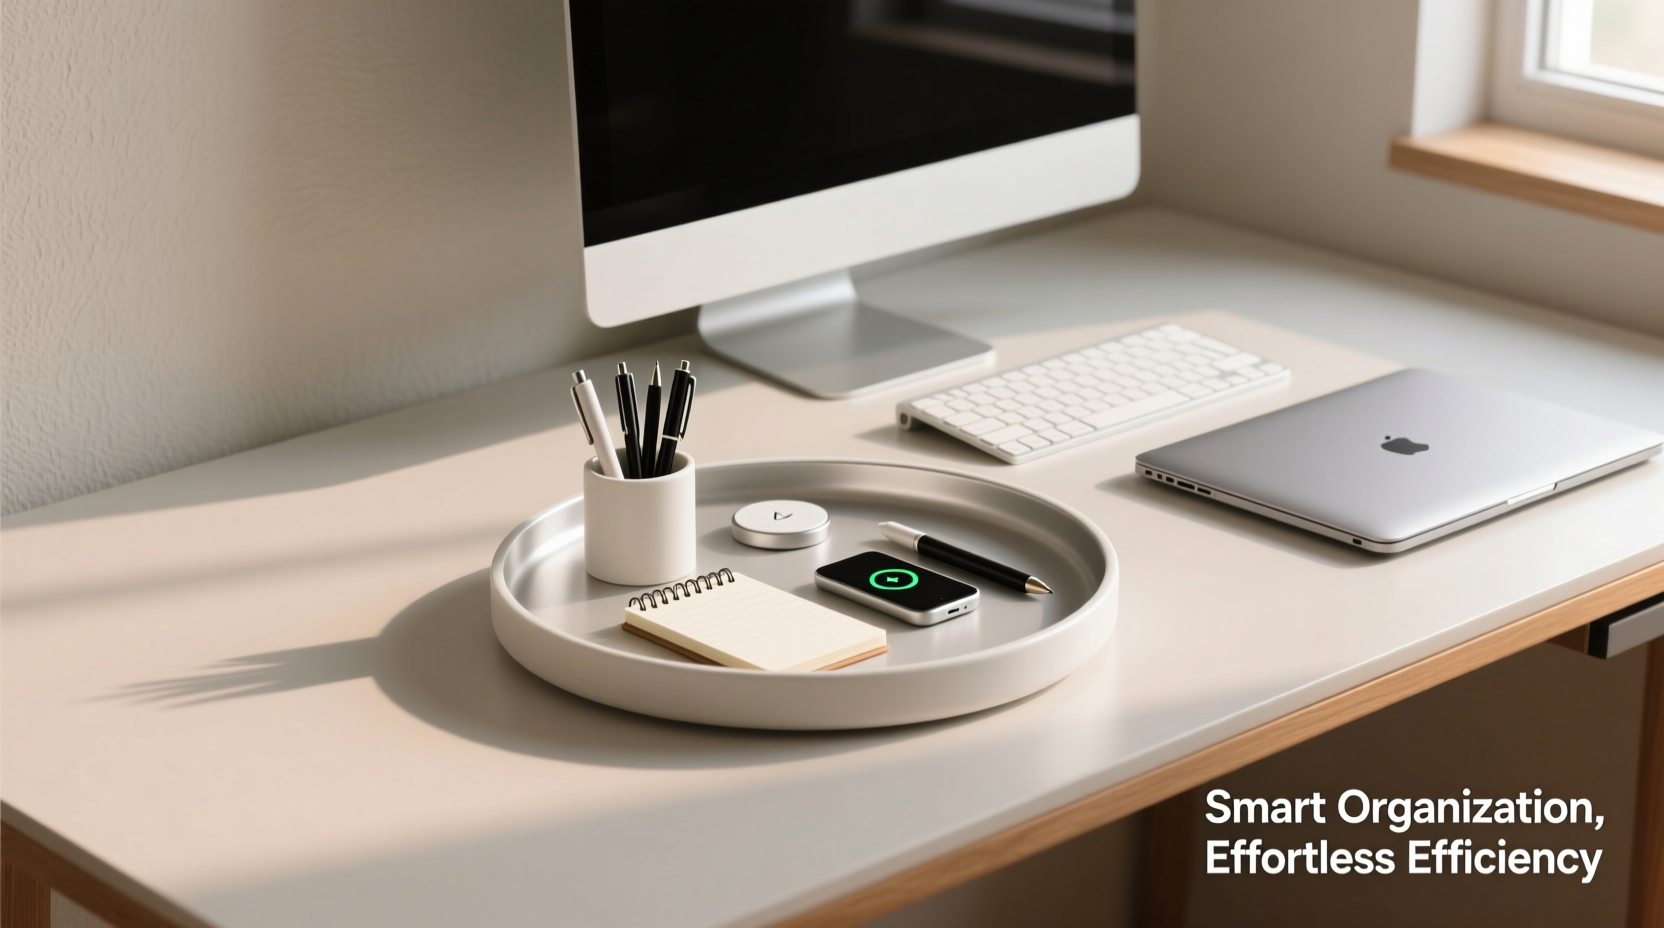
Traditional organizers often compartmentalize items too rigidly or occupy excessive space. In contrast, a storage plate provides a flexible, open platform that adapts to changing needs. Its low profile keeps items visible and accessible, reducing the time spent searching or retrieving. Unlike drawers or boxes that encourage hoarding, a storage plate promotes mindfulness—because everything is in plain sight, you’re more likely to keep only what’s necessary.
Designers and productivity experts emphasize the psychological benefit of “visual breathing room.” According to workplace ergonomics researcher Dr. Lena Patel, “A clean horizontal plane reduces decision fatigue. When your eyes aren’t scanning piles of objects, your brain conserves energy for actual tasks.” A storage plate supports this principle by centralizing essentials while preserving open space.
“Elevating key tools just 1–2 inches off the desk creates a subconscious boundary between ‘in use’ and ‘stored.’ That small lift improves workflow rhythm.” — Dr. Lena Patel, Workplace Ergonomics Researcher
Step-by-Step Guide to Implementing Your Storage Plate System
Introducing a storage plate isn’t just about placing a tray on your desk. It requires intentional planning and routine maintenance. Follow this six-step process to build a sustainable system:
- Clear your desktop completely. Remove every item, including cables, sticky notes, and chargers. Wipe down the surface to reset visually and physically.
- Sort items into categories: writing tools, digital devices, reference materials, personal items, and supplies (tape, clips, etc.).
- Identify daily-use essentials. Only items touched multiple times per day should qualify for the plate. Examples: notebook, pen, phone, wireless earbuds.
- Select the right plate size and height. Opt for a plate that covers no more than 25% of your desk surface. Ideal height: 1–3 inches to allow airflow and cable management underneath.
- Arrange items ergonomically. Place frequently used tools within natural hand reach. Keep heavier items near the back edge to avoid tipping.
- Anchor cables beneath the plate. Use adhesive clips or grommets to route cords underneath, maintaining a clean silhouette.
Optimizing Placement and Compatibility
The location of your storage plate significantly impacts its effectiveness. The ideal zone depends on your dominant hand and monitor setup:
- Right-handed users: position the plate to the right of the keyboard.
- Left-handed users: place it on the left side.
- For dual-monitor setups: center the plate in front of the primary screen if space allows.
Avoid placing the plate directly under task lighting or near heat sources, which can warp materials or degrade device batteries. Materials matter—choose non-slip surfaces like felt-lined wood, matte silicone, or powder-coated metal to prevent sliding and scratching.
| Material | Pros | Cons |
|---|---|---|
| Wood with felt base | Elegant, stable, protects desk finish | Can absorb moisture; not ideal for humid climates |
| Silicone tray | Foldable, grippy, easy to clean | May yellow over time with sun exposure |
| Metal (aluminum/steel) | Durable, modern look, supports weight | Cold to touch; may scratch if uncoated |
| Bamboo composite | Eco-friendly, lightweight, antimicrobial | Less rigid; may flex under heavy loads |
Real Example: Transforming a Home Office Chaos Zone
Consider Sarah, a freelance graphic designer working from a compact home office. Her desk was buried under sketchbooks, styluses, charging cables, and coffee mugs. After implementing a 10” x 7” bamboo storage plate positioned to the right of her keyboard, she reorganized her top-tier tools: tablet, two favorite pens, a small notebook, and wireless earbuds—all elevated and contained. She routed her tablet charger through a grommet hole beneath the plate, hiding the cord entirely.
Within a week, Sarah reported a 30% reduction in time wasted searching for tools and a noticeable improvement in mental clarity during creative sessions. “It’s not magic,” she said. “It’s just knowing exactly where my things live. I don’t feel overwhelmed anymore.”
Checklist: Building Your Clutter-Free Desktop
Use this checklist weekly to maintain peak organization:
- ✅ Clear all non-essential items from the desktop
- ✅ Wipe down the storage plate and items on it
- ✅ Verify only daily-use tools remain on the plate
- ✅ Check cable integrity and routing underneath
- ✅ Reassess one month in: remove anything unused for 14+ days
Frequently Asked Questions
Can I use multiple storage plates?
Yes, but only if your desk is large enough (minimum 48” width). Use one for active tools and another for passive items like spare notebooks or backup drives. Avoid overcrowding—each plate should serve a distinct purpose.
What if I have limited desk space?
In compact environments, prioritize verticality. Choose a slightly taller plate (2–3”) to allow space underneath for thin items like notebooks or mouse pads. Wall-mounted shelves above the desk can handle overflow, keeping the primary surface minimal.
How do I clean and maintain the plate?
Wood and bamboo: wipe with a dry or slightly damp cloth; avoid soaking. Silicone: wash with mild soap and water. Metal: use a microfiber cloth with glass cleaner. Always remove items before cleaning.
Designing for Long-Term Efficiency
The true value of a storage plate lies not in its immediate impact but in its ability to sustain order over time. To ensure longevity, integrate the system into your daily rituals. For example, make it part of your end-of-day routine to return all items to their designated spots on the plate. Over time, this becomes automatic, reinforcing discipline without effort.
Moreover, treat the plate as a dynamic tool. As projects change, so should its contents. Rotate seasonal tools—like holiday greeting cards or tax documents—off the plate when inactive. This prevents stagnation and keeps your workspace aligned with current priorities.
Conclusion: Elevate Your Work, Literally and Figuratively
Organizing your desktop with a storage plate is more than a cosmetic upgrade—it’s a behavioral intervention. By raising essentials just above the surface, you create a hierarchy of importance, reduce visual noise, and reclaim cognitive bandwidth. The result? Sharper focus, faster transitions between tasks, and a workspace that supports—not hinders—your goals.


 浙公网安备
33010002000092号
浙公网安备
33010002000092号 浙B2-20120091-4
Comments
No comments yet. Why don't you start the discussion?