
A large capacity makeup bag offers the luxury of carrying all your beauty essentials—but only if it’s organized effectively. Without a clear system, even the most spacious bag can become a chaotic jumble of brushes, compacts, and half-empty tubes. The key isn’t just having room; it’s using that space wisely. Whether you're a frequent traveler, a professional makeup artist, or someone who likes to be fully prepped on the go, smart organization transforms convenience into efficiency. These practical strategies will help you declutter, categorize, and optimize every inch of your makeup bag for seamless access and lasting durability.
Assess and Edit Your Makeup Collection
Before organizing, evaluate what you actually need. A common mistake is assuming “more space” means “store more products.” In reality, excess items lead to disarray and make finding essentials frustrating. Start by emptying your entire bag onto a clean surface. Sort items into categories: foundation, concealer, eyeshadow, lip products, tools, skincare, etc.
As you sort, ask critical questions: Is this product expired? Do I use it regularly? Does it serve a unique purpose? If not, set it aside. According to industry esthetician Naomi Reyes, “Most people carry at least 30% more than they need. Streamlining your collection reduces weight and improves accessibility.”
Create Functional Zones with Dividers
Just like a well-designed kitchen uses zones for prep, cooking, and storage, your makeup bag should have designated areas for different types of products. This prevents cross-contamination, minimizes spills, and speeds up your routine.
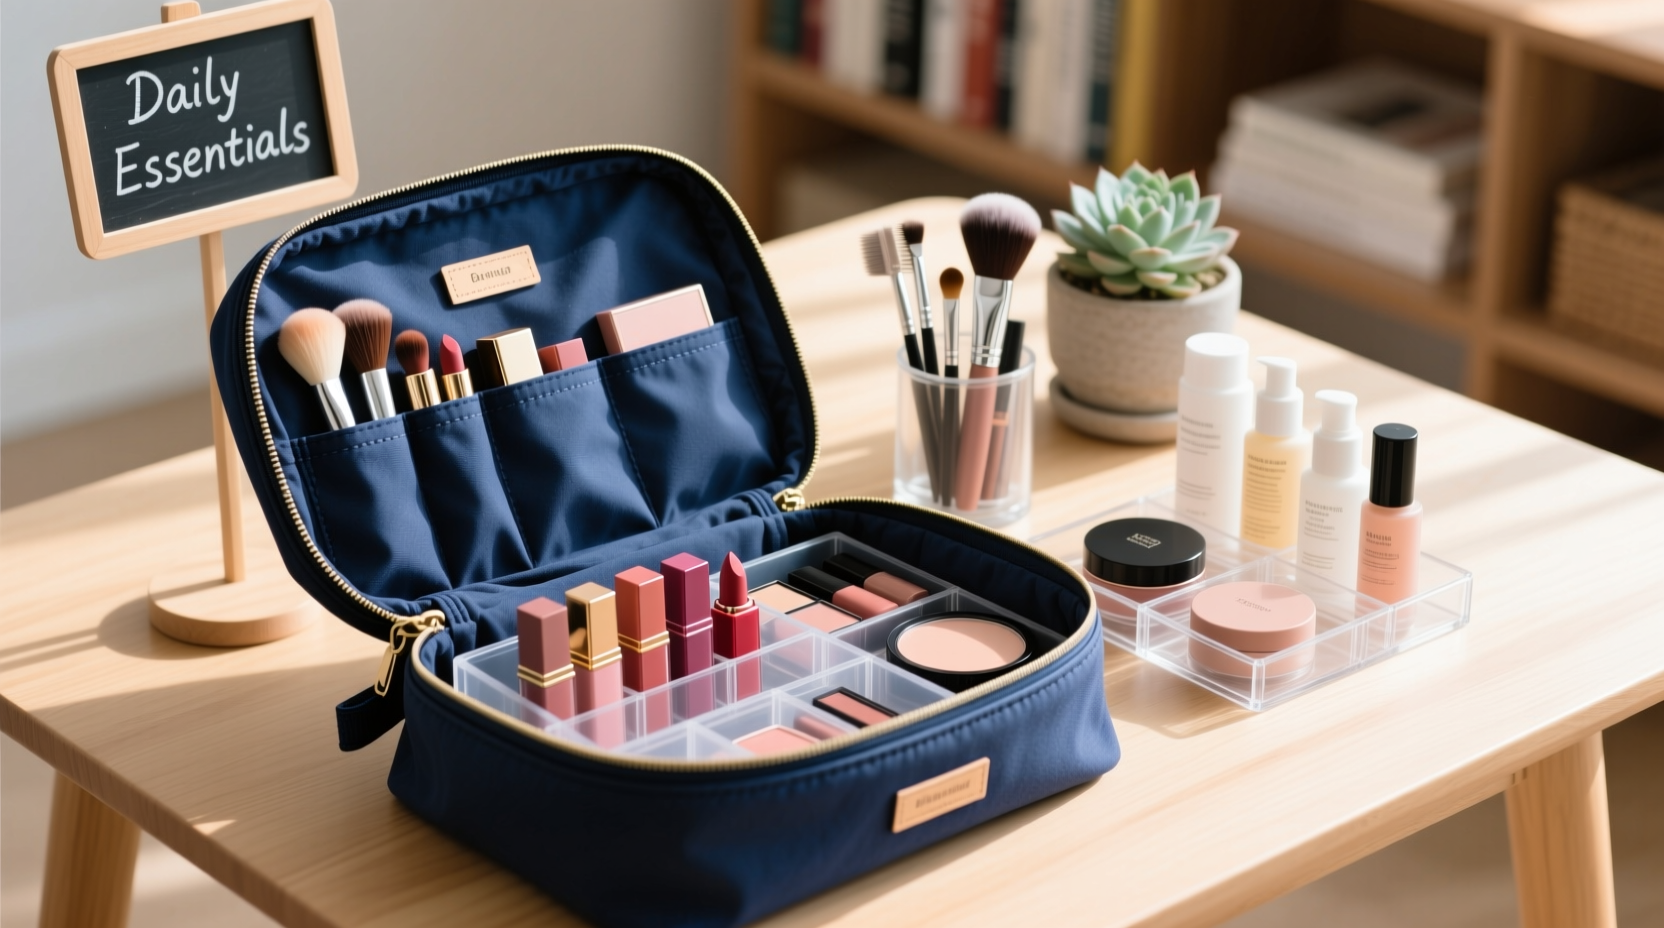
Use built-in compartments if your bag has them. If not, invest in removable silicone dividers, small fabric organizers, or even repurpose travel pencil cases. Assign each zone based on frequency of use and category:
- Front pocket: Daily essentials (mascara, lipstick, blotting papers)
- Main compartment: Foundation, concealer, powders
- Side sleeves: Brushes and applicators
- Zippered inner mesh: Skincare samples or delicate items
- Bottom layer: Heavier items like palettes or primers
“Zoning turns chaos into order. When everything has a home, you stop digging and start applying.” — Lena Torres, Professional Makeup Organizer
Maximize Vertical and Layered Space
Flat stacking wastes valuable depth. Instead, think vertically. Stack smaller compacts inside larger ones—foundation bottles inside palette wells, lip glosses nestled within blush compacts. Use collapsible silicone containers for multi-use products like cream shadows that double as blush or liner.
Consider layering with stackable trays or foldable inserts. For example, place a slim magnetic palette at the bottom, then add a brush roll on top, followed by a zip pouch containing liquid products. This tiered approach ensures visibility and protects fragile items from pressure.
| Space-Saving Technique | Best For | Effectiveness |
|---|---|---|
| Stacking compacts | Powders, creams | ★★★★☆ |
| Roll-up brush holders | Brushes, sponges | ★★★★★ |
| Mini vacuum-sealed bags | Samples, travel sizes | ★★★☆☆ |
| Magnetic refill palettes | Eyeshadows, blushes | ★★★★★ |
| Hanging inner pockets | Lipsticks, liners | ★★★☆☆ |
Protect Liquids and Prevent Spills
Liquid products are among the most space-consuming and risky. To avoid leaks and damage, follow these precautions:
- Always tighten caps securely and wipe residue before storing.
- Place liquids in resealable silicone pouches or zip-top plastic bags—even within your makeup bag.
- Store bottles upright whenever possible; never lay serums or foundations on their sides.
- Use travel-sized dispensers instead of full bottles when possible.
- Keep cotton pads or absorbent cloths nearby to manage minor spills quickly.
Real-Life Example: From Cluttered Kit to Artist-Ready Setup
Jasmine, a freelance makeup artist based in Austin, used to struggle with her oversized tote. She’d spend five minutes searching for her favorite concealer during client appointments. After attending an organizational workshop, she implemented a zoning strategy using three modular pouches: one for face products, one for eyes and brows, and one transparent bag for lip colors. She labeled each with waterproof tags and placed frequently used items at the top.
The result? Her setup time dropped by 70%, and she reported fewer product losses due to breakage. “I thought I needed a bigger bag,” she said. “But really, I just needed a smarter system.”
Step-by-Step Weekly Maintenance Routine
Organization isn’t a one-time task—it requires upkeep. Follow this simple weekly process to maintain order:
- Empty the bag completely. Wipe down interior surfaces with a disinfectant wipe.
- Check expiration dates. Toss anything past its prime (liquid products: 6–12 months; powders: up to 2 years).
- Reassess usage patterns. Move rarely used items to home storage.
- Re-zoned placement. Adjust compartments based on seasonal needs (e.g., heavier moisturizers in winter).
- Refresh protective layers. Replace damaged liners or pouches.
Do’s and Don’ts of Makeup Bag Organization
| Do’s | Don’ts |
|---|---|
| Group similar items together | Mix wet and dry products loosely |
| Use clear, labeled containers | Overstuff the main compartment |
| Clean brushes weekly | Store sharp tools loose (risk of puncture) |
| Rotate seasonal items | Leave open products unsealed |
| Invest in compact multi-use formulas | Ignore signs of wear on zippers or seams |
Frequently Asked Questions
How do I prevent my makeup from shifting during travel?
Use soft padding like microfiber cloths between layers, and fill empty gaps with rolled scarves or socks. This stabilizes contents and absorbs shock. Avoid overpacking, which stresses zippers and distorts shape.
What’s the best way to organize a transparent makeup bag?
Transparency demands neatness. Stick to uniform containers—square tins, same-size jars—and align labels facing outward. Use color-coded pouches: pink for lips, gold for eyes, white for skin. This makes identification instant and visually pleasing.
Can I wash my makeup bag?
Yes, but method depends on material. Fabric bags can usually be hand-washed with mild soap and air-dried. Vinyl or leather should be wiped with a damp cloth and conditioner (for leather). Never machine-wash unless specified by the manufacturer.
Final Checklist: Optimize Your Makeup Bag in 7 Steps
- ☐ Empty and deep-clean your bag
- ☐ Discard expired or unused products
- ☐ Categorize remaining items by type and frequency
- ☐ Assign zones using dividers or pouches
- ☐ Store liquids in sealed, upright containers
- ☐ Label sections for quick access
- ☐ Perform weekly maintenance checks
Conclusion: Turn Space Into Strategy
A large capacity makeup bag is only as effective as the system behind it. By curating your collection, designing functional zones, and maintaining consistency, you transform bulk into brilliance. Organization isn’t about perfection—it’s about making your daily routine easier, faster, and more enjoyable. With these smart tips, you’re not just storing makeup; you’re mastering efficiency.


 浙公网安备
33010002000092号
浙公网安备
33010002000092号 浙B2-20120091-4
Comments
No comments yet. Why don't you start the discussion?