
In an age where smartphones are essential for communication, navigation, and productivity, losing or damaging one due to a slip can be both costly and disruptive. Phone lanyards have emerged as a popular solution for keeping devices secure and within reach. However, not all lanyards are built equally. Many standard models use thin cords or weak attachment points that compromise both safety and comfort over time. Reinforcing your phone lanyard isn’t just about durability—it’s about ensuring peace of mind during daily use, whether you're commuting, traveling, or working hands-free.
A well-reinforced lanyard prevents accidental drops, reduces strain on your neck or wrist, and maintains structural integrity even under frequent tension. By applying thoughtful upgrades and strategic materials, you can transform a basic lanyard into a reliable extension of your mobile lifestyle.
Why Standard Lanyards Fail
Most off-the-shelf phone lanyards are designed with aesthetics in mind rather than long-term functionality. They often feature:
- Thin polyester or nylon cords that fray after weeks of use
- Flimsy clips or loops that detach under stress
- Lack of padding, leading to discomfort when worn for extended periods
- Poor weight distribution, causing the phone to swing unpredictably
These weaknesses become especially apparent when carrying heavier phones or moving through crowded spaces. A single snag or sudden pull can result in detachment—and potentially a shattered screen.
“Over 40% of phone damage claims involve drops from hand or pocket. Secure tethering systems like reinforced lanyards can reduce this risk significantly.” — Dr. Lena Torres, Consumer Device Safety Researcher at Mobile Integrity Lab
Step-by-Step Guide to Reinforce Your Lanyard
Reinforcement doesn’t require advanced tools or expertise. With a few simple modifications, you can dramatically improve strength and comfort. Follow this sequence to upgrade any standard lanyard.
- Evaluate your current lanyard: Identify weak points—typically the cord-to-clip junctions, stitching, or attachment loop on the phone case.
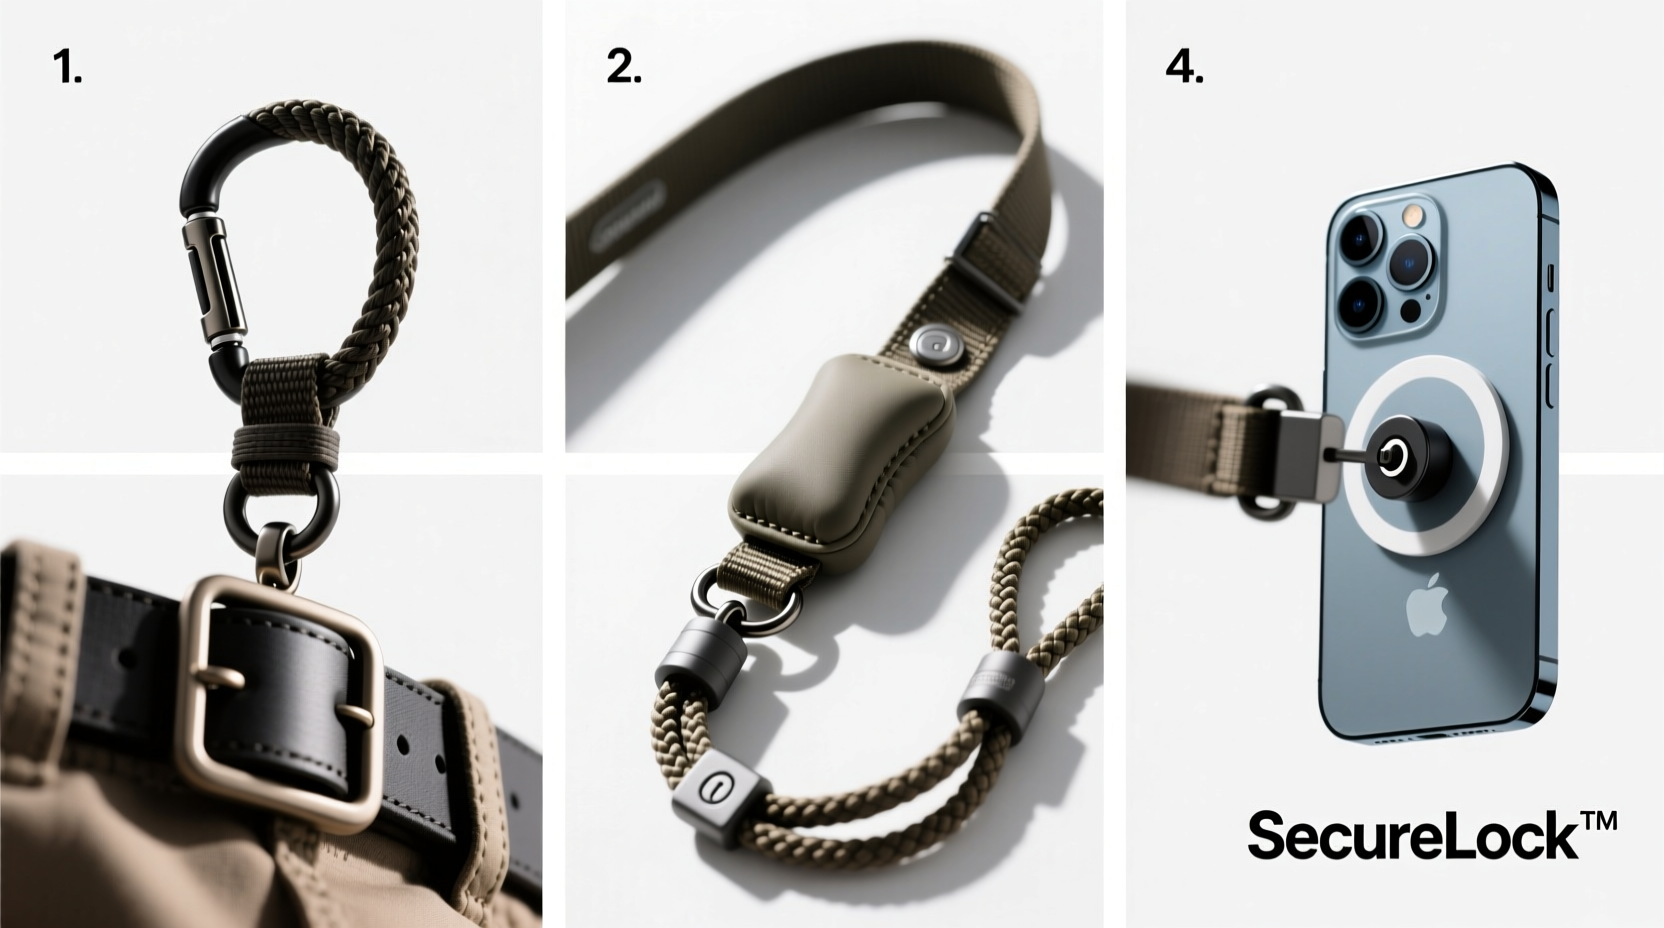
- Replace the cord with high-tensile material: Swap out thin string with paracord (Type III), which supports up to 550 lbs. It’s lightweight, abrasion-resistant, and widely available.
- Add double-loop knots at connection points: Use a double fisherman’s knot or bowline knot where the cord meets the clip or phone ring. This prevents slippage under load.
- Upgrade the carabiner or clip: Choose a micro-locking carabiner rated for at least 2 kN (kilonewtons). These won’t accidentally open if snagged.
- Integrate a padded section near the shoulder: Sew or slide a small foam sleeve onto the upper third of the lanyard to distribute pressure evenly.
- Test under controlled tension: Gently pull the phone downward while wearing the lanyard to ensure no stretching, slipping, or deformation occurs.
Material Comparison: What Works Best
Selecting the right components is crucial. Below is a comparison of common materials used in DIY lanyard reinforcement.
| Material | Tensile Strength | Comfort Level | Durability | Best For |
|---|---|---|---|---|
| Polyester Cord (Standard) | 50–100 lbs | Moderate | Low | Short-term use, light phones |
| Paracord (Type III) | 550 lbs | High (when braided) | Very High | All-day carry, rugged environments |
| Webbing Strap (1-inch) | 800+ lbs | Very High (with padding) | Extreme | Heavy phones, industrial settings |
| Silicone-Coated Cable | 200 lbs | Medium | Moderate | Fashion-focused users |
Real-World Example: Festival Photographer’s Fix
Jamal, a freelance event photographer based in Austin, relied on his smartphone for candid shots at music festivals. He frequently moved through dense crowds, making it difficult to keep his phone secure in pockets. After losing two phones to snags and drops, he redesigned his lanyard system using feedback from fellow photographers.
He replaced the original cord with a 3-foot length of paracord, added a locking carabiner, and attached a steel D-ring to a rugged phone case. To prevent neck strain during 12-hour shifts, he inserted a neoprene shoulder pad salvaged from an old headset. The final setup held up through dust, rain, and constant motion—without a single incident over seven months of heavy use.
His experience underscores how targeted reinforcement solves real-world problems beyond mere convenience.
Essential Checklist for Lanyard Reinforcement
Before deploying your upgraded lanyard, verify these key elements:
- ✅ Cord material is high-strength (e.g., paracord or webbing)
- ✅ Connection knots are tight and secured with a drop of fabric glue
- ✅ Clip or carabiner has a locking mechanism
- ✅ Attachment point on phone case is metal-reinforced (not plastic-only)
- ✅ Padding is placed where lanyard contacts skin or clothing
- ✅ Total length allows phone to rest comfortably at chest level
- ✅ No sharp edges or frayed ends present
Common Mistakes to Avoid
Even well-intentioned upgrades can backfire if executed poorly. Watch out for these pitfalls:
- Using adhesive-only bonds: Glue alone won’t hold under dynamic loads. Always combine with mechanical fasteners or knots.
- Ignoring case compatibility: Some cases lack secure anchor points. Opt for models with integrated lanyard loops or MOLLE-style rails.
- Over-tightening around the neck: A lanyard should be supportive, not restrictive. Leave enough slack to remove easily in emergencies.
- Skipping periodic inspections: Check weekly for signs of wear, especially near joints and bends.
Frequently Asked Questions
Can I use a keychain instead of a dedicated phone lanyard?
While possible, most keychains aren’t designed for the weight and balance of smartphones. Using one increases the risk of twisting, snapping, or damaging the attachment port. A purpose-built, reinforced lanyard offers better ergonomics and safety.
How do I clean a reinforced lanyard without weakening it?
Hand wash with mild soap and lukewarm water. Avoid bleach or machine washing, which degrades fibers. Let air dry completely before reuse. For padded sections, spot clean only to preserve internal structure.
Is it safe to sleep with a phone on a lanyard?
No. Wearing a lanyard while sleeping poses entanglement risks. Remove it before bed and store the phone separately. Consider bedside charging stations instead.
Final Thoughts: Security Meets Everyday Practicality
A reinforced phone lanyard isn't just an accessory—it's a proactive defense against loss, damage, and distraction. By investing a small amount of time and effort into upgrading its components, you gain confidence that your device will stay securely by your side, no matter how active your day becomes. Whether you're navigating city streets, managing events, or simply juggling groceries and kids, a thoughtfully reinforced lanyard blends seamlessly into your routine while offering critical protection.


 浙公网安备
33010002000092号
浙公网安备
33010002000092号 浙B2-20120091-4
Comments
No comments yet. Why don't you start the discussion?