
A beautifully baked sourdough loaf with an open crumb and golden hue is a baker’s pride. But when the crust turns out so hard it could double as a doorstop, frustration quickly follows. While a crisp crust is part of sourdough’s charm, excessive hardness makes slicing difficult and eating uncomfortable. The good news: this issue is both preventable and fixable. Understanding the science behind crust formation—how moisture, heat, fermentation, and baking techniques interact—allows you to adjust your process for a more enjoyable texture.
Why Sourdough Crust Forms (And When It Gets Too Hard)
The crust of any bread forms during baking through a process called the Maillard reaction and caramelization, where sugars and proteins on the surface react under high heat. In sourdough, this is intensified by steam, oven temperature, and the dough’s hydration level. As water evaporates from the dough's surface, a hardened shell develops. This is normal. However, when the crust becomes excessively thick, dry, or tough, it signals an imbalance in one or more factors in your baking process.
Crust hardness isn’t always a flaw—it can be a stylistic choice. Some bakers prefer a robust, crackling crust reminiscent of traditional European loaves. But if you're aiming for a balanced texture where the crust gives way easily to a soft interior, then addressing excessive hardness is essential.
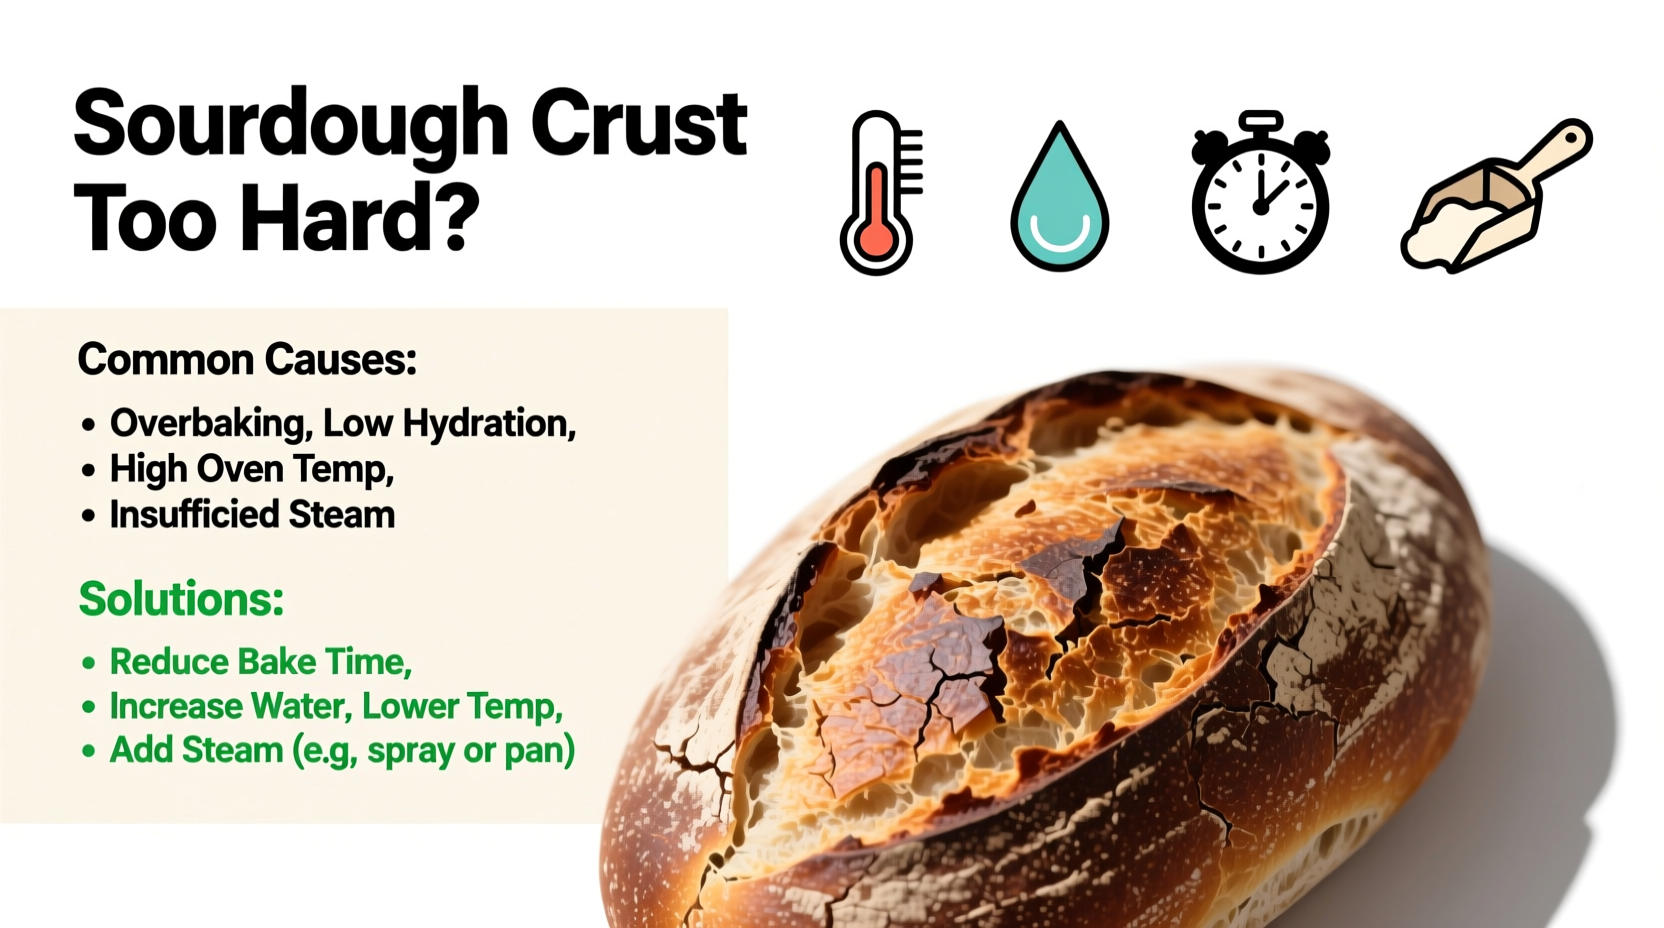
Common Causes of Overly Hard Sourdough Crust
Several interrelated factors contribute to an overly hard crust. Pinpointing the root cause requires evaluating your entire process—from starter strength to cooling method.
1. Excessive Baking Time or Temperature
Baking at too high a temperature or for too long drives off more moisture, leading to a thicker, drier crust. Many home bakers use 450°F (230°C) or higher, which is effective for oven spring but can over-bake the exterior if not monitored.
2. Lack of Steam During Baking
Steam delays crust formation by keeping the dough surface moist during the first phase of baking. Without adequate steam, the crust sets too early and continues to dry out under prolonged heat, resulting in hardness.
3. Low Dough Hydration
Dough with low hydration (below 65%) has less internal moisture to begin with. As it bakes, there’s less water available to migrate toward the surface, increasing the likelihood of a dense, hard crust.
4. Over-Fermentation or Under-Fermentation
Both extremes affect crust quality. Under-fermented dough lacks sufficient gas and enzymatic activity, leading to poor oven spring and a denser structure that bakes into a tougher crust. Over-fermented dough collapses easily and may caramelize too quickly, forming a dark, hard shell.
5. Improper Cooling Process
Cooling bread directly on a wire rack without covering allows moisture to escape rapidly from the crust. While some evaporation is normal, rapid cooling in a dry environment can overdry the surface.
Solutions to Soften or Prevent a Rock-Hard Crust
Adjusting your technique doesn’t mean sacrificing flavor or structure. With targeted changes, you can maintain a flavorful, artisanal loaf with a more approachable crust.
Optimize Steam in the Oven
Use a Dutch oven for baking—it traps the dough’s natural moisture, creating steam. If you don’t have one, place a metal pan on the oven floor and pour 1 cup of boiling water into it just after loading the dough. Close the oven quickly to trap the steam.
Reduce Baking Temperature After Initial Bake
Start baking at 450°F (230°C) with steam for 20 minutes, then reduce the temperature to 375°F (190°C) and remove the lid (or uncover) for the remaining 20–25 minutes. This allows the interior to finish baking without further drying the crust.
Increase Dough Hydration
If you’re comfortable handling wetter dough, increase hydration to 70–75%. Higher hydration leads to more steam inside the loaf during baking, contributing to a thinner, more flexible crust. Use a strong flour (like bread flour or high-protein organic flour) to support the added water.
Ensure Proper Fermentation
Ferment your dough until it’s puffy, slightly domed, and passes the poke test: gently press the dough—if it slowly springs back, it’s ready. Under-proofed dough feels tight; over-proofed dough collapses. Both lead to suboptimal crust development.
Wrap Loaves Briefly After Cooling
Once the loaf is cool enough to handle (about 30–45 minutes post-bake), wrap it in a clean cotton towel or beeswax wrap for 1–2 hours. This reintroduces slight humidity to the crust, softening it without making it soggy.
“Crust should complement the crumb, not dominate it. A well-balanced loaf sings with harmony between chew and tenderness.” — Daniel Leader, author of *Local Breads* and founder of Bread Alone Bakery
Step-by-Step Guide to Achieving a Balanced Crust
- Mix and ferment at 70–75% hydration using a reliable recipe and strong flour.
- Proof until aerated and responsive, avoiding under- or over-proofing.
- Preheat Dutch oven at 450°F (230°C) for at least 30 minutes before baking.
- Bake covered for 20 minutes to trap steam and delay crust formation.
- Uncover and reduce heat to 375°F (190°C); bake 20–25 minutes more.
- Cool on a rack for 15 minutes, then tent loosely with foil for another 15–20 minutes.
- Store properly: Wrap in cloth or paper (not plastic) once fully cooled to maintain balance.
Do’s and Don’ts: Crust Management Table
| Do’s | Don’ts |
|---|---|
| Use a Dutch oven for steam retention | Open the oven frequently during early bake |
| Reduce oven temp after initial steam phase | Bake uncovered at high heat the entire time |
| Tent loaf during early cooling | Cool bread in a drafty area or under a fan |
| Store cooled bread in breathable wrap | Store in plastic bags immediately after cooling |
| Adjust hydration gradually based on flour type | Jump to 80%+ hydration without experience |
Mini Case Study: From Brick to Breakthrough
Sarah, a home baker in Portland, struggled for months with sourdough that looked beautiful but was nearly impossible to slice without a serrated knife. Her crust was dark, thick, and loud when tapped—more like pottery than bread. She followed recipes closely but baked in a standard convection oven without steam. After switching to a preheated Dutch oven and lowering the temperature after 20 minutes, her results transformed. By tenting the loaf with foil during cooling, she achieved a crust that cracked pleasantly when pressed but didn’t resist a butter knife. “It wasn’t one change,” she said. “It was combining steam, lower finishing heat, and smart cooling that finally gave me the loaf I wanted.”
Frequently Asked Questions
Can I soften a hard crust after baking?
Yes. Lightly mist the crust with water and warm the loaf in a 300°F (150°C) oven for 5–8 minutes. The steam generated will slightly rehydrate the surface. Alternatively, wrapping a cooled loaf in a damp cloth for 10 minutes can help.
Is a hard crust a sign of underbaked bread?
Not necessarily. A hard crust can occur even with a fully baked interior. Check doneness by internal temperature (205–210°F or 96–99°C). If the center is done but the crust is too hard, the issue lies in surface drying, not underbaking.
Does flour type affect crust hardness?
Absolutely. Whole grain flours absorb more water and can produce denser, harder crusts if hydration isn’t adjusted. High-protein white bread flours create stronger gluten networks, supporting higher hydration and softer crusts when managed correctly.
Conclusion: Master the Balance
A sourdough loaf should delight the senses—not challenge your jawline. A hard crust is rarely a terminal flaw; it’s feedback from your process. By adjusting hydration, managing steam, refining fermentation, and cooling thoughtfully, you can consistently produce loaves with a crust that’s crisp yet yielding, flavorful but not formidable. These adjustments don’t require special equipment—just attention to detail and a willingness to experiment.


 浙公网安备
33010002000092号
浙公网安备
33010002000092号 浙B2-20120091-4
Comments
No comments yet. Why don't you start the discussion?