
There’s a quiet satisfaction in baking sourdough—the rhythm of feeding the starter, the smell of fermentation, and the crackle of a well-baked crust. But when your dough refuses to rise, that joy can quickly turn into frustration. You’re not alone. Many home bakers face this issue, often due to overlooked details in temperature, timing, or starter health. The good news? Most problems have simple solutions. Understanding why sourdough fails to rise is the first step toward consistent success.
Why Sourdough Fails to Rise: The Core Principles
Sourdough relies on natural fermentation driven by wild yeast and lactic acid bacteria present in the starter. For the dough to rise, these microorganisms must be active and strong enough to produce carbon dioxide, which gets trapped in the gluten network. If any part of this system falters—whether it's an inactive starter, cold environment, or underdeveloped gluten—the dough won’t expand properly.
The key factors influencing rise are:
- Starter strength and maturity: Is it peaking at the right time?
- Dough temperature: Too cold slows fermentation; too hot kills microbes.
- Flour quality and hydration: Protein content affects gluten development.
- Fermentation time: Underproofed or overproofed dough won’t rise in the oven.
- Kneading and shaping technique: Poor structure means gas escapes instead of lifting the loaf.
Addressing these elements systematically eliminates guesswork and builds confidence in your process.
Common Causes and Their Simple Fixes
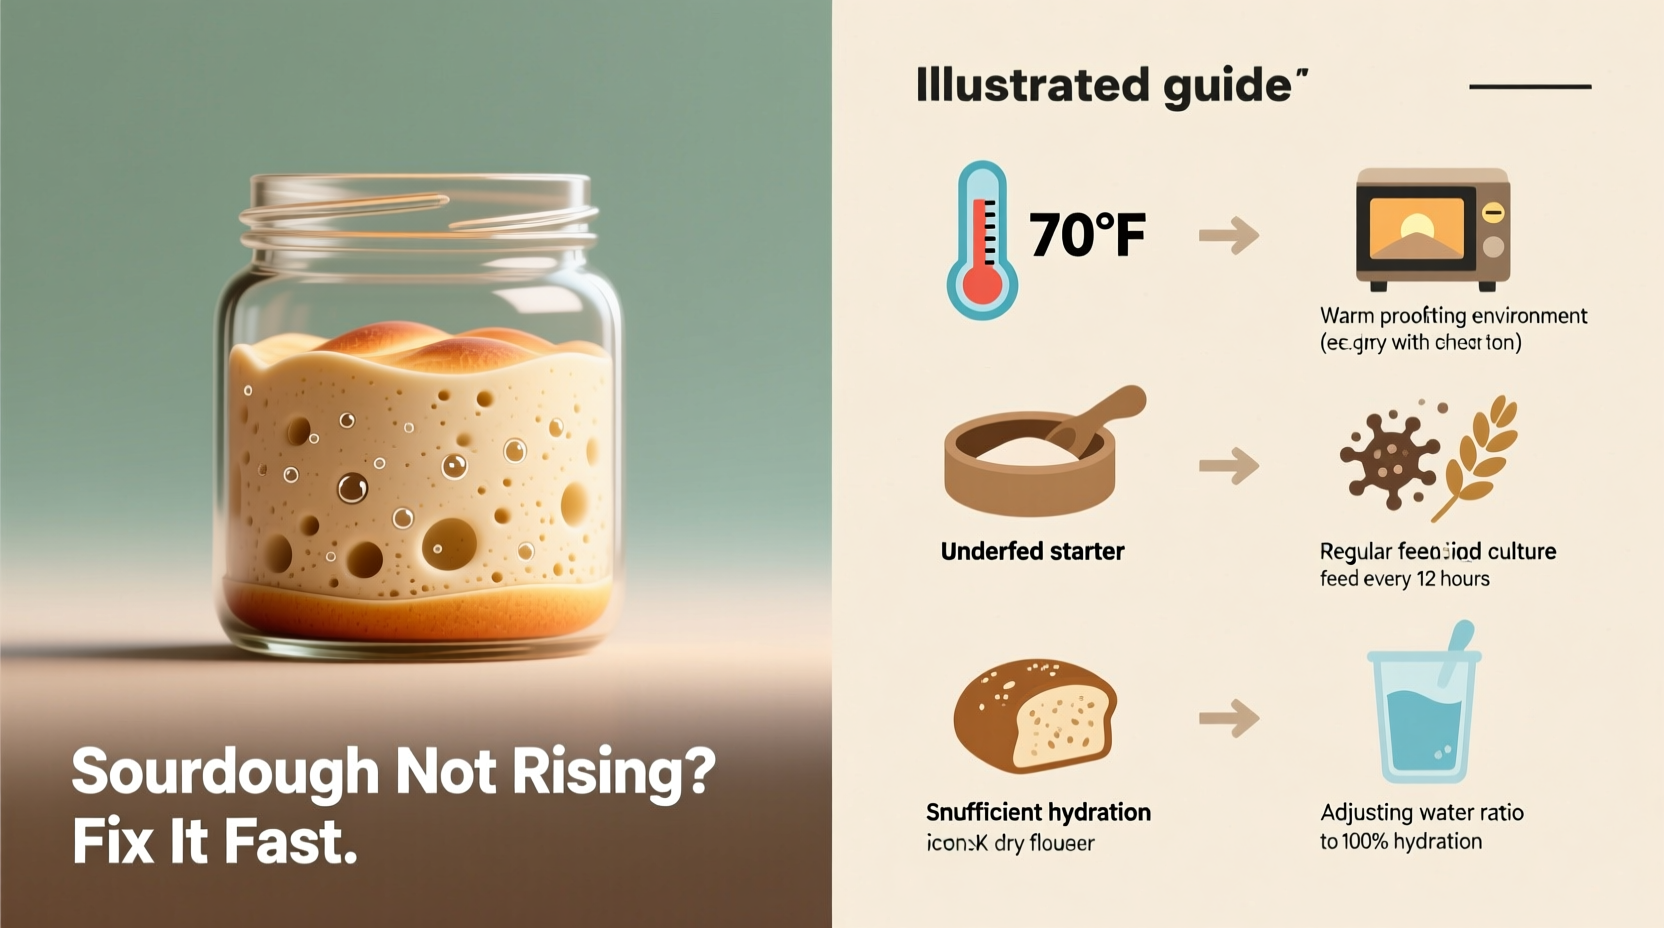
1. Inactive or Weak Starter
If your starter doesn’t double within 4–8 hours after feeding, it lacks the strength to leaven dough. This is the most frequent reason for flat loaves.
To revive a sluggish starter:
- Feed twice daily at room temperature for 2–3 days.
- Use whole rye or whole wheat flour for one or two feedings—these flours contain more nutrients for microbes.
- Ensure it peaks predictably before baking. Peak time is when it reaches maximum volume and just begins to fall.
2. Cold Kitchen Environment
Yeast and bacteria thrive between 70°F and 78°F (21°C–26°C). Below this range, fermentation slows dramatically.
In winter, countertops can be as cold as 60°F, stalling proofing entirely. To compensate:
- Place dough near a warm appliance (like the oven with the light on).
- Use a proofing box, heating mat, or even a cooler with a mason jar of hot water.
- Extend bulk fermentation time—sometimes doubling it—to accommodate slower activity.
3. Over- or Under-Proofing
Both extremes result in poor oven spring. Under-proofed dough hasn’t built enough gas; over-proofed dough has weakened gluten and collapses when scored or baked.
Use the “poke test” to check readiness: Gently press the dough with a floured finger. If it springs back slowly and leaves a slight indentation, it’s ready. If it fills back immediately, it needs more time. If the dent remains and doesn’t rebound, it’s over-proofed.
4. Low-Protein Flour or Poor Gluten Development
All-purpose flour works, but bread flour (with 12–13% protein) creates stronger gluten, essential for trapping gas. Weak gluten = flat bread.
Improve structure through:
- Autolyse: Let flour and water rest 30–60 minutes before adding starter and salt. This hydrates gluten proteins early.
- Stretch and folds: Perform 4 sets during bulk fermentation, spaced 15–30 minutes apart.
- Adequate kneading: If mixing by hand, knead 10–15 minutes until smooth and elastic.
5. Incorrect Hydration Level
Too much water weakens structure; too little restricts expansion. Beginners should start with 70–75% hydration (e.g., 700g water per 1000g flour).
Adjust based on flour type—whole grains absorb more water, so you may need slightly higher hydration. Conversely, high extraction flours may require less.
“Many beginners mistake a sticky dough for a wet one. Stickiness often improves with better gluten development, not reduced hydration.” — Daniel Leader, author of *Local Breads*
Troubleshooting Table: Diagnose Your Dough
| Symptom | Most Likely Cause | Easy Fix |
|---|---|---|
| Dough didn’t rise at all | Inactive starter or cold environment | Refresh starter for 2 days; move to warmer spot |
| Dough rose then collapsed | Over-proofing | Reduce final proof time; use fridge for controlled rise |
| Loaf spread sideways, no height | Poor shaping or weak gluten | Practice tighter shaping; add stretch-and-folds |
| Very dense crumb, few air pockets | Under-proofed or low starter activity | Extend bulk fermentation; confirm starter peak |
| Crust too thick or burnt | Oven too hot or no steam | Bake at 450°F with steam for first 20 min |
Step-by-Step: Reviving a Failed Bake
Suppose your latest loaf came out dense and flat. Here’s how to troubleshoot and correct it for next time:
- Assess the starter: Was it bubbly and doubled before use? If not, discard half and feed 1:1:1 (starter:flour:water) every 12 hours for two days.
- Check room temperature: Use a thermometer. If below 70°F, plan longer fermentation or create a warm zone.
- Review your flour: Switch to bread flour if using low-protein alternatives.
- Adjust fermentation times: Begin checking dough earlier. Record times and conditions for consistency.
- Practice shaping: Watch video tutorials on tight boule shaping to build surface tension.
- Bake with steam: Place a pan of boiling water in the oven or spritz the dough before closing the door.
Repeat the bake with one change at a time to isolate what works.
Mini Case Study: From Flat Loaf to Perfect Crumb
Sarah, a home baker in Vermont, struggled for weeks with flat sourdough. Her kitchen stayed around 64°F in winter, and her starter barely rippled after feeding. She followed recipes exactly but saw no rise.
After testing her starter’s activity, she began feeding it with rye flour and keeping it near a radiator. Within three days, it doubled in four hours. She also started doing stretch-and-folds every 30 minutes during bulk fermentation and moved final proofing into a turned-off oven with a bowl of hot water.
Her next loaf had open crumb, a crisp crust, and rose nearly two inches in the oven. The difference wasn’t magic—it was methodical adjustments based on environmental reality.
Essential Checklist Before Baking
- ✅ Starter doubled within 6–8 hours of last feeding
- ✅ Room temperature above 70°F (or plan extended time)
- ✅ Using bread flour or high-protein alternative
- ✅ Autolyse completed (30+ minutes)
- ✅ Completed 3–4 sets of stretch and folds
- ✅ Final proof checked with poke test
- ✅ Oven preheated with Dutch oven inside for 45 minutes
Frequently Asked Questions
Can I bake sourdough if my starter isn’t bubbling?
No. A non-bubbling starter lacks active yeast and won’t leaven bread. Feed it for 24–48 hours at room temperature until vigorous. Discard and restart only if contaminated (pink/orange mold, foul smell).
Why does my dough rise in the fridge but not at room temperature?
This usually means your starter isn’t strong enough to ferment quickly at room temp. Cold slows everything down, masking weakness. Strengthen your starter first, then shorten room-temp fermentation.
How long should sourdough rise?
Bulk fermentation typically takes 4–6 hours at 75°F. Final proof is 1–2 hours at room temp or 10–14 hours in the fridge. Always rely on visual cues—jiggly, airy dough with defined bubbles—over strict timelines.
Final Tips for Reliable Results
Consistency beats perfection in sourdough. Track your variables: feeding schedule, room temperature, flour brand, and rise times. Small changes compound into big improvements.
Don’t rush the process. Sourdough rewards patience. Even experienced bakers adjust for seasons, humidity, and flour batches. Treat each bake as data, not failure.
And remember: a failed loaf still makes excellent toast, breadcrumbs, or crostini. Nothing is wasted in the journey to mastery.


 浙公网安备
33010002000092号
浙公网安备
33010002000092号 浙B2-20120091-4
Comments
No comments yet. Why don't you start the discussion?