
Turning a static slideshow into a dynamic, high-quality video can breathe new life into old photos or presentations. Whether you're creating a wedding highlight, a school project, or a business pitch, the right approach ensures professional results without requiring advanced editing skills. With the right tools and techniques, anyone can produce polished videos from image sequences in under an hour.
Why Convert Slideshows to Video?
Slideshow-to-video conversion is more than just a format change—it’s about engagement. Videos are easier to share across platforms like YouTube, Instagram, and email, and they naturally hold attention longer than still images. A well-edited video adds pacing, music, and transitions that transform a simple photo collection into a compelling visual story.
This process also preserves memories and messages in a universally compatible format. Unlike presentation software files (e.g., PowerPoint), video files play on nearly every device without compatibility issues.
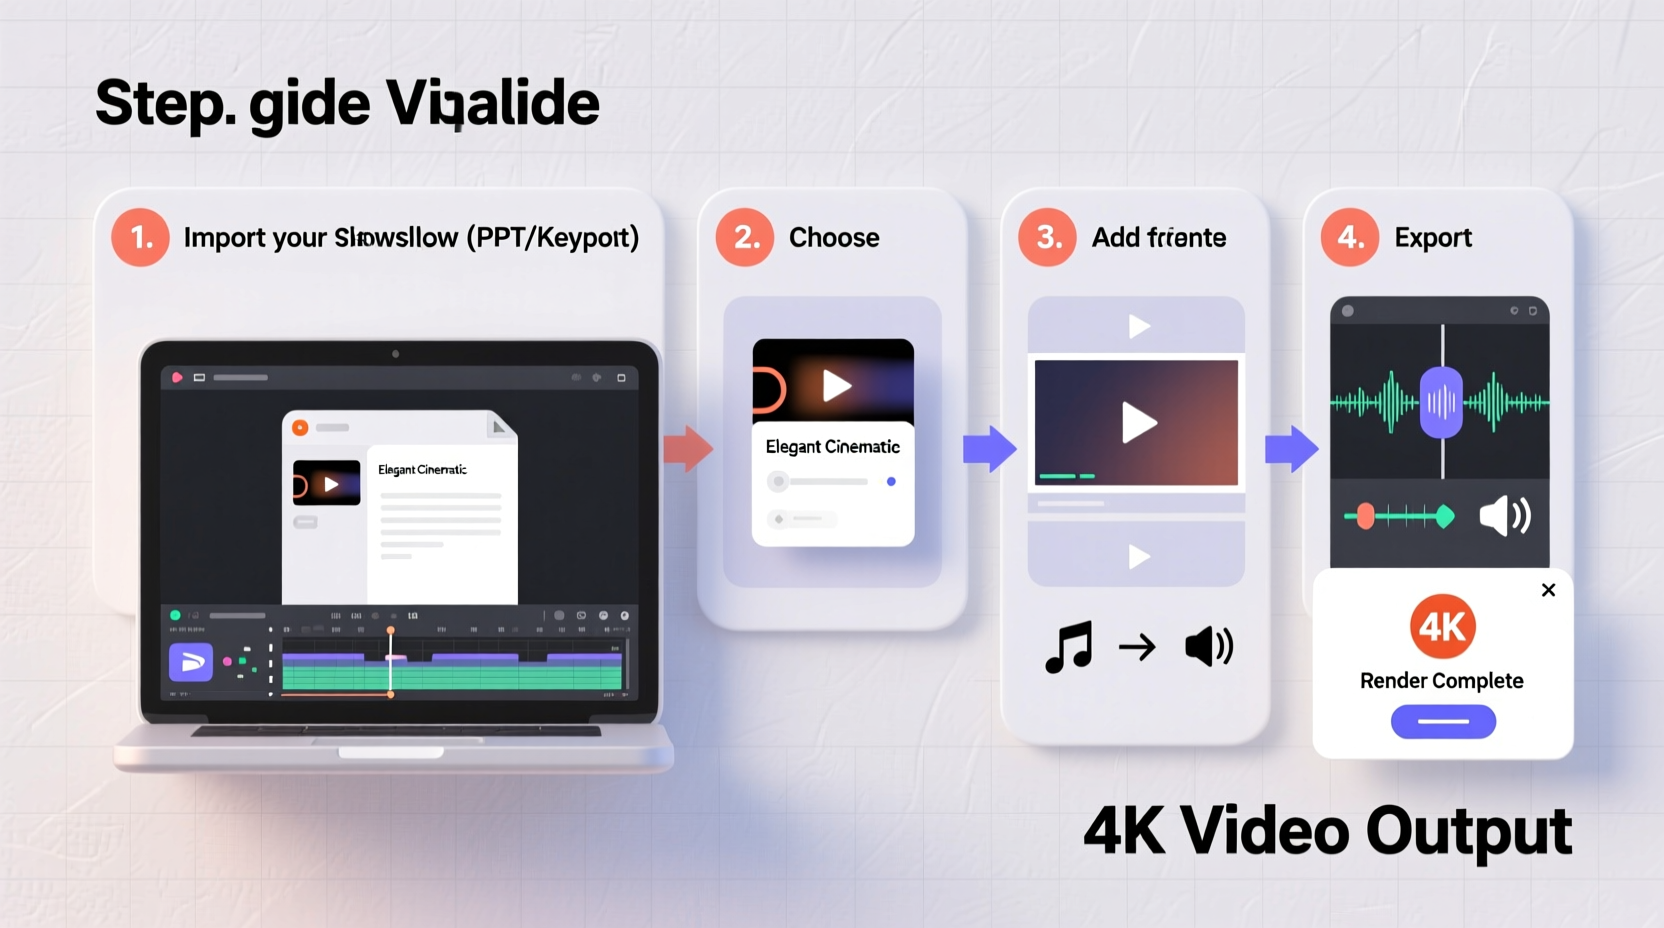
Step-by-Step Guide to Converting Your Slideshow
- Gather and organize your media: Collect all images, audio tracks, and text overlays you plan to include. Store them in a single folder with clear file names.
- Choose your conversion method: Decide whether to use built-in software (like PowerPoint), dedicated desktop apps (such as Adobe Premiere Pro), or online tools (like Canva or Clipchamp).
- Set the correct aspect ratio: Match your output to its intended platform—16:9 for YouTube, 9:16 for Instagram Stories, or 1:1 for Facebook posts.
- Adjust image duration: Set each slide to display between 3–7 seconds depending on content complexity. Use shorter durations for fast-paced montages.
- Add background music or narration: Import audio and adjust volume levels so voiceovers remain clear and music doesn’t overpower.
- Apply subtle transitions: Use fade or dissolve effects between slides. Avoid flashy animations that distract from the content.
- Export in high quality: Select at least 1080p resolution with H.264 encoding for optimal balance of quality and file size.
- Review and refine: Watch the full video once before sharing. Check sync, timing, and clarity.
Recommended Tools by Skill Level
| User Level | Tool | Best For | Output Quality |
|---|---|---|---|
| Beginner | PowerPoint + Export to Video | Simple photo slideshows with music | 1080p (H.264) |
| Intermediate | Canva / Clipchamp | Social media-ready videos with templates | 1080p, some 4K options |
| Advanced | Adobe Premiere Pro / Final Cut Pro | Precise control over timing, effects, color grading | Up to 4K HDR |
| All Levels | DaVinci Resolve (Free Version) | Professional-grade editing with no cost | Up to 4K |
Optimizing Image and Audio Quality
The final video is only as good as the source material. Blurry images or distorted audio will degrade even the most carefully edited production.
To maintain image clarity, ensure all photos are at least 1920x1080 pixels. If sourcing older images, upscale them using AI-based tools like Topaz Gigapixel or Adobe Super Resolution before importing. Avoid stretching low-resolution images to fit the frame—they’ll appear pixelated.
For audio, use royalty-free music from reputable sources such as Epidemic Sound, Artlist, or YouTube Audio Library. Narration should be recorded in a quiet space with minimal echo. Use a pop filter if available, and normalize audio levels during export to prevent sudden volume spikes.
“Even the simplest slideshow becomes powerful when paired with intentional pacing and emotional music.” — Daniel Ruiz, Multimedia Producer & Educator
Real Example: Family Reunion Slideshow Turned Tribute Video
Sarah Thompson wanted to honor her grandmother’s 90th birthday with a digital photo montage. She had over 80 images spanning five decades but no experience with video editing.
She used Microsoft PowerPoint to import the photos in chronological order, set each slide to display for 5 seconds, and added a soft piano track downloaded from the YouTube Audio Library. After applying a gentle fade transition between images, she exported the project as an MP4 file at 1080p resolution.
The result was a seven-minute tribute video that moved guests at the celebration. By following basic principles of timing and audio balance, Sarah created a lasting keepsake without needing specialized software.
Common Mistakes to Avoid
- Overloading with effects: Too many zooms, spins, or wipes make the video feel chaotic.
- Ignoring aspect ratios: Stretching a 4:3 slideshow to 16:9 distorts faces and objects.
- Mismatched audio levels: Loud music drowning out narration frustrates viewers.
- Long exports due to wrong settings: Using ultra-high bitrates unnecessarily increases render time.
- Skipping compression: Oversized files fail to upload to social media or email.
Do’s and Don’ts at a Glance
| Do | Don't |
|---|---|
| Use consistent image dimensions | Combine landscape and portrait photos without cropping |
| Add subtitles for key quotes or dates | Rely solely on visuals without context |
| Test playback on mobile devices | Assume desktop quality translates to phone screens |
| Save multiple versions (full, short, silent) | Keep only one copy of the final file |
FAQ
Can I convert a PowerPoint directly into a video?
Yes. In PowerPoint, go to File > Export > Create a Video. Choose your timing (manually timed or narrated), select HD (1080p) quality, and export as MP4. This feature includes transitions and embedded audio.
How long should my slideshow video be?
Aim for 3–10 minutes for personal videos. Corporate or educational content can extend to 15 minutes if necessary. Attention spans drop significantly beyond that unless storytelling is highly engaging.
What’s the best free tool for turning slideshows into videos?
DaVinci Resolve offers professional editing, color correction, and audio mixing for free. While it has a steeper learning curve, its capabilities far exceed most paid consumer apps.
Final Checklist Before Exporting
- ✅ Media Ready?
- All images are high resolution and properly named.
- ✅ Timing Set?
- Each slide shows long enough to be read and absorbed.
- ✅ Audio Balanced?
- Music supports but doesn’t overpower voice or silence.
- ✅ Transitions Subtle?
- Fades or dissolves used consistently; no distracting effects.
- ✅ Format Correct?
- Aspect ratio matches destination platform (e.g., 16:9 for YouTube).
- ✅ Backup Saved?
- Project file and assets stored separately from the exported video.
Conclusion: Turn Memories Into Motion
Converting a slideshow into a high-quality video doesn’t require expensive gear or technical expertise. With organized files, thoughtful pacing, and the right export settings, you can create videos that inform, inspire, and endure. Whether commemorating a milestone or delivering a message, the power lies in simplicity and intention.


 浙公网安备
33010002000092号
浙公网安备
33010002000092号 浙B2-20120091-4
Comments
No comments yet. Why don't you start the discussion?