
A professional cover page is more than just the first impression—it’s a statement of credibility, clarity, and purpose. Whether you're submitting a business proposal, academic paper, project report, or internal memo, a well-designed cover page sets the tone before the reader even begins. It communicates professionalism, attention to detail, and respect for the audience. Yet, many people either skip this element entirely or use generic templates that fail to reflect the document's importance.
This guide walks through the essential steps to create a polished, effective cover page in any word processor—Microsoft Word, Google Docs, or similar platforms. You’ll learn not only the technical process but also the design principles that make a cover page truly stand out.
Why a Cover Page Matters
Think of your document as a product. The cover page is its packaging. A poorly designed or missing cover page can undermine otherwise excellent content. In academic settings, it ensures adherence to style guidelines like APA, MLA, or Chicago. In business, it reinforces brand identity and organizational standards. Even in informal reports, a clean cover adds structure and formality.
According to Dr. Laura Simmons, a communications specialist at Stanford University:
“Documents with professionally formatted cover pages are perceived as more credible and thoroughly prepared. They signal that the author values precision and presentation.” — Dr. Laura Simmons, Communication Design Expert
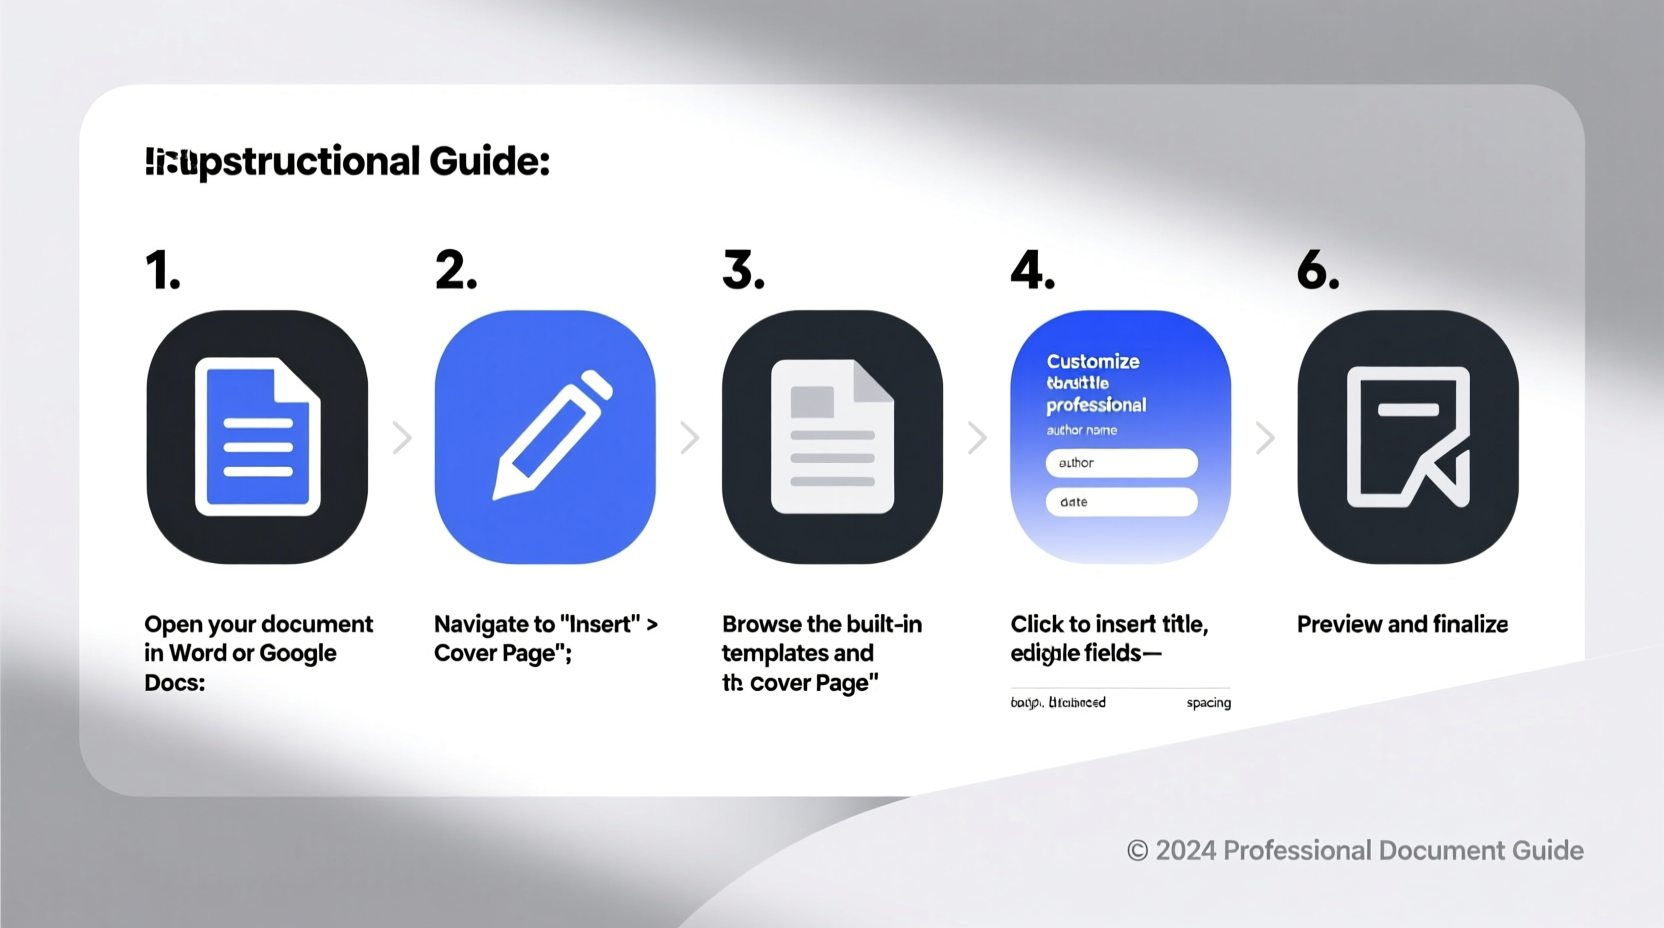
Step-by-Step Guide to Creating a Professional Cover Page
Follow these seven key steps to build a cover page that enhances your document’s impact.
- Determine the Purpose and Audience
Before opening your word processor, ask: Who will read this? Is it a formal report for executives, a research paper for peer review, or an internal team update? The tone and content of your cover should match the context. - Gather Required Information
Collect all necessary elements. Common components include:- Title (main and subtitle, if applicable)
- Author(s) name and affiliation
- Organization or department
- Date of submission or publication
- Course name and code (for academic work)
- Instructor or recipient name
- Logo or institutional branding (if appropriate)
- Open a New Section in Your Document
To prevent formatting conflicts with the main body, insert a section break before the cover page. In Microsoft Word: Go to Layout > Breaks > Next Page. This isolates headers, footers, and page numbering so they don’t appear on the cover. - Insert a Blank Cover Page (or Build from Scratch)
In Word, use Insert > Cover Page to choose from built-in templates. For full control, start blank. Press Ctrl + Enter to jump to a new page, then center-align all text. - Design the Layout with Visual Hierarchy
Arrange elements using visual weight:- Place the title at the top third of the page—largest font (16–24 pt).
- Subtitles (if used) should be smaller and italicized.
- Author and institutional details follow below, using 12–14 pt font.
- Align everything centrally unless your organization uses left-aligned branding.
- Add Branding Elements Carefully
If including a logo, place it at the top center or top left. Resize it proportionally—never stretch. Ensure contrast: dark logos on light backgrounds, or vice versa. Avoid clutter; one logo is sufficient. - Review Spacing and Finalize Formatting
Use paragraph spacing (not multiple line breaks) to separate sections. Set line spacing to 1.5 or double between major blocks. Avoid bolding every line—reserve emphasis for the title and key identifiers.
Do’s and Don’ts: Cover Page Best Practices
| Do’s | Don’ts |
|---|---|
| Use clear, legible fonts (e.g., Arial, Times New Roman, Georgia) | Use decorative or script fonts that reduce readability |
| Center-align content for formal documents | Left-align unless required by brand guidelines |
| Include only essential information | Crowd the page with unnecessary details or graphics |
| Maintain consistent margins (1 inch standard) | Shrink margins to fit more content |
| Proofread names, titles, and dates | Submit with spelling errors or incorrect affiliations |
Real Example: Academic Report Cover Page
Sophia Chen, a graduate student in environmental science, was preparing her thesis proposal. Her initial draft had no cover page—just the title typed at the top of the first page. After feedback from her advisor, she redesigned it following these steps:
- Inserted a section break and created a dedicated cover.
- Used the university’s official template with centered layout.
- Added the university logo at the top, her full title in 20 pt bold, followed by her name, department, course code, instructor, and submission date.
- Applied 2x spacing between sections and used Times New Roman throughout.
The revised version immediately appeared more authoritative. Her committee noted the improvement in professionalism during her defense, even commenting that the document “felt complete from the first glance.”
Checklist: Building Your Cover Page
Use this checklist before finalizing your document:
- ✅ Created a separate section for the cover page
- ✅ Included title and subtitle (if applicable)
- ✅ Listed author name and affiliation clearly
- ✅ Added date and recipient/instructor name
- ✅ Inserted logo or branding (if permitted)
- ✅ Centered all content appropriately
- ✅ Used professional, readable fonts
- ✅ Applied consistent spacing and alignment
- ✅ Proofread all text for accuracy
- ✅ Ensured no page number appears on the cover
Frequently Asked Questions
Is a cover page always necessary?
No—not every document requires one. Short memos, emails, or internal notes often don’t need a cover. However, formal reports, proposals, academic papers, and external submissions benefit significantly from a cover page. When in doubt, include one; it’s easier to remove than to apologize for omission.
Can I use color on my cover page?
Yes, but sparingly. Stick to your organization’s color palette or use black and white for maximum professionalism. If adding color, apply it only to the title, logo, or a subtle horizontal rule. Avoid background fills or gradients unless part of an approved template.
Should the cover page be numbered?
No. The cover page is typically unnumbered. Page numbering usually starts on the second page (the introduction or table of contents). To achieve this, go to Insert > Page Number > Format Page Numbers, and set \"Start at\" to 0, so the next page shows as page 1.
Final Thoughts and Action Steps
A professional cover page isn’t an afterthought—it’s a critical component of effective communication. It frames your work, establishes authority, and reflects your commitment to quality. By investing just 10–15 minutes in crafting a strong cover, you elevate the entire perception of your document.
Today, open your current or most recent document. Evaluate whether it has a proper cover page. If not, apply the steps outlined here: insert a section break, gather your information, align content with visual hierarchy, and finalize formatting. Save the result as a reusable template for future projects.


 浙公网安备
33010002000092号
浙公网安备
33010002000092号 浙B2-20120091-4
Comments
No comments yet. Why don't you start the discussion?