
Building block creations are no longer limited to spaceships or castles. With a little creativity and precision, you can transform colorful interlocking bricks into functional art—like a striking flower vase that doubles as a centerpiece. Whether you're a parent crafting with kids, a hobbyist exploring modular design, or someone looking for a unique gift idea, this guide walks you through assembling an elegant, stable, and visually appealing building block flower vase from start to finish.
The beauty of this project lies in its simplicity and adaptability. No advanced engineering skills required. Just follow these structured steps, use common brick types, and create a piece that holds real flowers while showcasing your attention to detail.
Selecting the Right Building Blocks
Not all bricks are created equal when it comes to structural integrity and aesthetic appeal. For a flower vase, stability and water resistance are key considerations—even though the blocks themselves won’t hold water directly, the internal liner must fit securely without putting stress on weak joints.
Begin with high-quality interlocking plastic bricks from reputable brands known for tight tolerances and color consistency. Avoid older or worn pieces that may not connect firmly, as this compromises the vase’s durability.
- Use standard 2x4 and 2x2 bricks for base layers.
- Incorporate transparent or translucent bricks for a stained-glass effect.
- Include slope or arch pieces for decorative rim detailing.
- Avoid flexible or thin pieces that can warp under weight.
Design Planning: Shape, Size, and Stability
Before placing the first brick, decide on the vase’s dimensions and shape. A typical tabletop vase ranges from 4 to 6 inches in height and 3 inches in diameter at the base. Taller designs require wider bases for balance.
Consider cylindrical, square, or hexagonal profiles. Cylindrical vases offer elegance but require specialized curved bricks or clever layer staggering. Square vases are easier for beginners and allow symmetrical pattern work.
Ensure the inner cavity is wide enough to accommodate a small glass or plastic insert (typically 2–2.5 inches in diameter) that will hold water and stems. This insert prevents moisture damage to the bricks.
“Modular design thrives on repetition and symmetry. Plan your color transitions and layer patterns in advance for a polished look.” — Daniel Reyes, Toy Architecture Designer
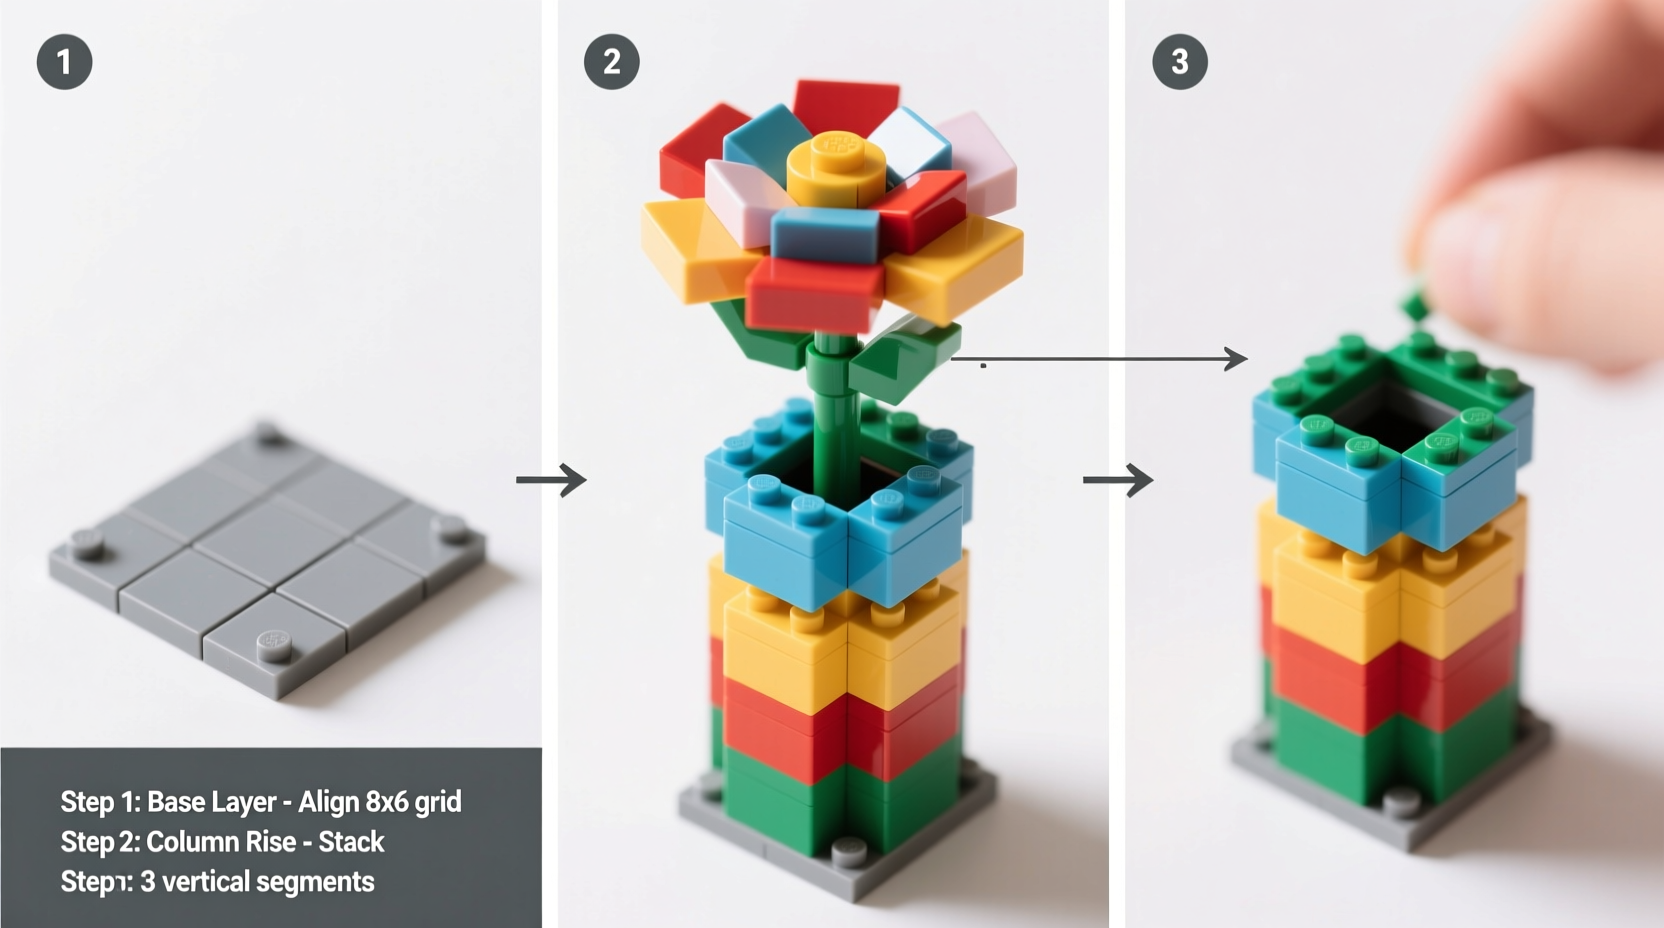
Step-by-Step Assembly Process
Follow this timeline to build a sturdy, attractive vase in under two hours. This method assumes a square-based design using common bricks.
- Build the Base (15 minutes): Start with a 6x6 brick foundation. Use multiple layers (3–4) of full-sized bricks to create a solid, non-toppling base. Alternate brick directions between layers for strength.
- Create the Walls (30 minutes): Stack walls upward using 2x4 and 2x2 bricks. Maintain consistent thickness (2 bricks per side). Leave the center hollow, approximately 2.5 inches wide. Offset each layer like masonry for added stability.
- Incorporate Design Elements (20 minutes): Add color patterns, such as alternating bands or floral motifs using smaller colored bricks. Use corner slopes to soften edges or create a fluted appearance.
- Form the Rim (10 minutes): Finish the top edge with inward-facing 1x2 bricks to create a lip that helps secure the inner container. Optionally, add small flag or flower accessories for flair.
- Insert the Liner (5 minutes): Place a narrow, waterproof container—such as a small glass vial or repurposed spice jar—into the center cavity. Ensure it sits flush with the top or slightly below to prevent overflow.
Do’s and Don’ts: Best Practices Table
| Do’s | Don’ts |
|---|---|
| Use a multi-layered base for stability | Don’t make the vase taller than 7 inches without widening the base |
| Incorporate symmetry in color and pattern | Don’t over-tighten bricks with tools—hand pressure is sufficient |
| Seal the bottom with a flat plate to prevent debris entry | Don’t expose the assembled vase to prolonged moisture or direct sunlight |
| Add personal touches like initials or themed bricks | Don’t skip dry-fitting components before final assembly |
Real Example: A Mother-Daughter Weekend Project
Sarah, a graphic designer from Portland, wanted a creative weekend activity with her 9-year-old daughter, Mia. They decided to build matching vases using pastel-colored bricks from their existing collection. Sarah sketched a simple hexagonal design with alternating pink and lavender bands.
They spent Saturday morning sorting bricks and testing configurations. By afternoon, both vases were complete. They inserted small glass bottles and filled them with daisies from their garden. The finished pieces now sit on their kitchen windowsill, bringing daily joy and a sense of shared accomplishment.
“It wasn’t just about the vase,” Sarah said. “It was about slowing down, creating something together, and seeing her problem-solving skills grow.”
Essential Checklist Before Display
- ✅ Confirm the inner liner fits snugly and stands upright.
- ✅ Check that the base is level and doesn’t wobble on flat surfaces.
- ✅ Verify all decorative elements are securely attached.
- ✅ Wipe down exterior bricks with a dry microfiber cloth for shine.
- ✅ Place the vase in a location away from direct heat or humidity.
Frequently Asked Questions
Can I use real flowers in a building block vase?
Yes, but only with a waterproof inner container. Never pour water directly into the brick structure, as moisture can weaken connections and promote mold.
How do I clean the vase if it gets dusty?
Use a soft brush or compressed air to remove dust between bricks. Wipe surfaces with a dry or slightly damp cloth. Avoid soaking or submerging any part of the assembly.
Is this project suitable for young children?
Children aged 6 and up can participate with supervision. Focus on simpler shapes and larger bricks. Reserve intricate detailing for adult-led stages.
Final Thoughts and Creative Encouragement
Assembling a building block flower vase blends play with purpose. It challenges spatial thinking, rewards patience, and results in a functional keepsake. What begins as a simple stack of plastic bricks becomes a symbol of creativity and care—a conversation starter that holds more than just flowers.
Once you’ve mastered the basics, experiment with new forms: try triangular silhouettes, mosaic patterns, or even motorized rotating bases. Share your designs online, inspire others, or host a family build-off. The only limit is imagination.


 浙公网安备
33010002000092号
浙公网安备
33010002000092号 浙B2-20120091-4
Comments
No comments yet. Why don't you start the discussion?