
Video is now central to communication—whether you're creating content for social media, uploading tutorials, or sharing presentations. But poor video quality can undermine even the most compelling message. Grainy visuals, choppy playback, or oversized files that won’t upload can frustrate viewers and limit reach. The good news? Optimizing video quality doesn't require expensive gear or advanced editing skills. With the right approach, anyone can enhance their videos quickly and effectively.
This guide walks through practical steps to improve video resolution, reduce file size, maintain clarity, and ensure compatibility across platforms—all without relying on complex software.
Understand Video Quality Basics
Before making adjustments, it's essential to understand what determines video quality. Three core components shape how a video looks and performs:
- Resolution: The number of pixels in width and height (e.g., 1080p, 4K). Higher resolution means sharper image detail.
- Bitrate: The amount of data processed per second. A higher bitrate preserves more visual information but increases file size.
- Codec & Container: Codecs like H.264 compress video data efficiently; containers like MP4 or MOV package audio and video together.
Optimization isn’t about maximizing all values—it’s about balancing quality with usability. For example, a 4K video may look stunning but could be overkill for Instagram Reels, where screen space is limited and bandwidth matters.
“Optimal video quality means delivering the best possible image within technical constraints—not just pushing specs to the max.” — David Lin, Digital Media Engineer at StreamLabs
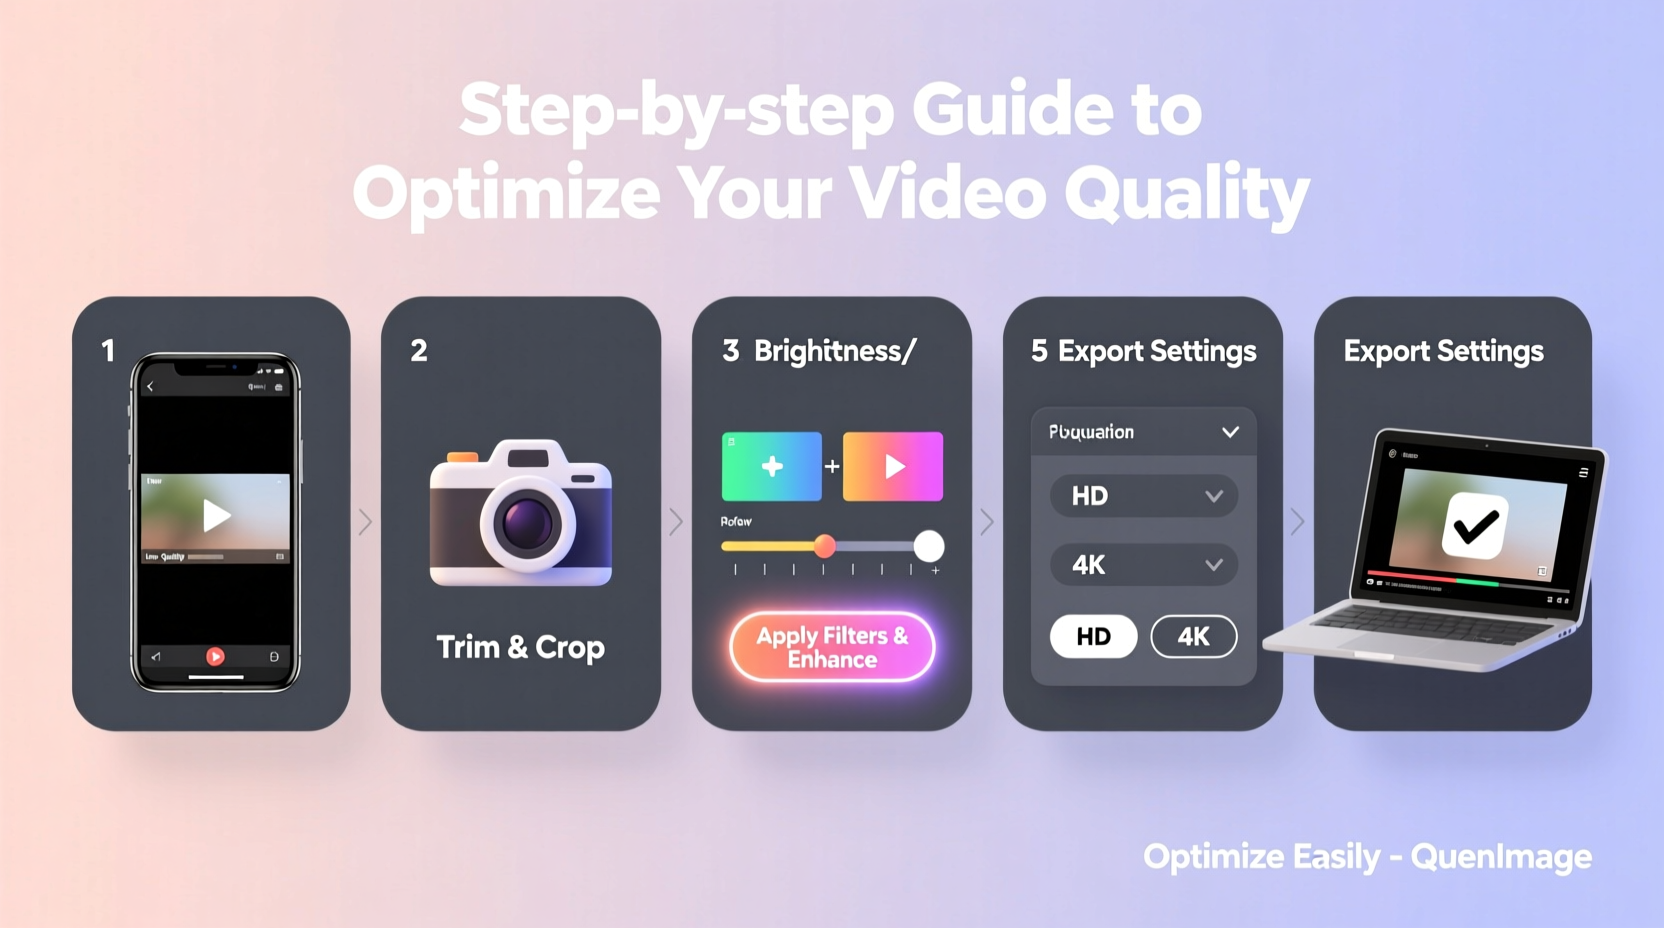
Step-by-Step Guide to Change and Optimize Video Quality
Follow this clear sequence to transform your videos from low-grade to professional-grade output.
- Evaluate Your Source Footage
Start by reviewing the original video. Is it shot in HD or 4K? Was lighting adequate? If the source is blurry or shaky, no amount of optimization will fully fix it. However, minor imperfections can often be corrected during processing. - Choose the Right Tool
You don’t need premium software. Free tools like HandBrake (for compression), VLC (for conversion), or Shotcut (for light editing) offer powerful features. For mobile users, apps like CapCut or InShot include built-in quality presets. - Select Output Resolution Based on Use Case
Match resolution to platform requirements:- YouTube: 1080p (Full HD) or 1440p (2K) recommended
- Instagram: 1080x1350px vertical for Reels
- TikTok: 1080x1920px (9:16 aspect ratio)
- Email or internal sharing: 720p often sufficient
- Adjust Bitrate Strategically
A common mistake is using excessively high bitrates. Instead, follow these general guidelines:
Lowering bitrate too much causes blockiness; increasing it beyond necessity wastes storage.Resolution Recommended Bitrate (H.264) Use Case 720p 5–8 Mbps Email, internal training 1080p 8–12 Mbps YouTube, webinars 4K 35–50 Mbps Professional production - Convert Using Efficient Settings
In HandBrake or similar tools:- Set preset to “Fast” or “Medium” for speed vs. compression balance
- Choose H.264 codec (widely supported)
- Select MP4 container (compatible with almost all devices)
- Enable “Constant Quality” mode (RF 18–22 ideal for most uses)
- Crop and Trim Unnecessary Parts
Removing blank openings, long pauses, or irrelevant segments shortens runtime and lowers overall file size. Even a 20% reduction in length can significantly improve load times and viewer retention. - Add Minimal Compression for Web Uploads
Platforms like Facebook and LinkedIn automatically re-encode videos. To preserve quality:- Avoid double compression—upload once, share link elsewhere
- Use square or horizontal formats when vertical isn’t required
- Keep file under 2GB unless platform allows more
Checklist: Quick Optimization Routine
Use this checklist every time you prepare a video for sharing:
- ✅ Confirm resolution matches intended platform
- ✅ Reduce file size via bitrate adjustment or trimming
- ✅ Export in MP4 format with H.264 encoding
- ✅ Test playback on mobile and desktop
- ✅ Verify audio sync and volume levels
- ✅ Save optimized version with descriptive filename (e.g., \"tutorial_final_1080p.mp4\")
Real Example: From Blurry to Broadcast-Ready
Sarah runs a small fitness coaching business and recorded a workout demo on her phone indoors under dim lighting. The original file was 3.2GB in 4K, too large to email, and looked grainy when viewed on clients’ phones.
She used HandBrake to convert the video:
- Downscaled to 1080p
- Set constant quality RF 20
- Cropped black edges and trimmed intro/outro
- Exported as MP4 at 650MB
The result? Clear visuals, smooth playback, and easy sharing via Google Drive. Client feedback improved immediately—many commented on the professional appearance despite no new equipment being used.
Common Mistakes That Hurt Video Quality
Avoid these pitfalls that degrade quality even after optimization:
| Mistake | Why It Hurts Quality | Better Alternative |
|---|---|---|
| Upscaling low-res videos | Creates artificial pixels; results in blur or artifacts | Re-shoot if possible, or accept lower resolution |
| Using outdated codecs (e.g., AVI with old compression) | Larger files, poor streaming support | Stick with H.264 or H.265 for modern efficiency |
| Over-compressing for size | Loss of detail, pixelation, banding | Balance size and quality—test different settings |
| Ignoring aspect ratio | Black bars, cropping issues on social feeds | Match format to platform (e.g., 9:16 for TikTok) |
Frequently Asked Questions
Can I improve video quality without losing clarity?
Yes—by using proper encoding settings. Avoid upscaling low-resolution footage, but optimizing compression (like adjusting bitrate in H.264) can maintain clarity while reducing file size. Tools like Topaz Video Enhance AI use machine learning to upscale intelligently, though they work best with moderate improvements rather than extreme jumps (e.g., SD to 4K).
Why does my video look worse after uploading?
Social platforms compress videos upon upload to save bandwidth. To minimize quality loss:
- Upload directly instead of sharing from another platform
- Use recommended resolutions and bitrates
- Avoid rapid scene changes or flashing effects, which are harder to compress
What’s the fastest way to shrink a large video file?
Use HandBrake with the “Fast 1080p30” preset. This automatically applies efficient compression. Alternatively, trim silent or redundant parts first—sometimes cutting 30 seconds eliminates hundreds of megabytes.
Final Thoughts: Quality Meets Practicality
Great video quality isn’t reserved for professionals with high-end cameras. By understanding key settings and following a repeatable process, anyone can produce clean, well-optimized videos that engage audiences and perform reliably across devices.
The goal isn’t perfection—it’s effectiveness. A slightly compressed 1080p video that loads instantly and plays smoothly will always outperform a massive 4K file that buffers or fails to upload.


 浙公网安备
33010002000092号
浙公网安备
33010002000092号 浙B2-20120091-4
Comments
No comments yet. Why don't you start the discussion?