
Crafting wearable art combines function and beauty in a way few accessories can. The butterfly brooch watch is one such piece—elegant, symbolic, and deeply personal. More than just a timepiece, it's a statement of craftsmanship and creativity. Whether you're an experienced jeweler or a passionate hobbyist, creating a butterfly brooch watch allows you to blend mechanical precision with artistic flair. This guide walks through the entire process—from concept to completion—with practical advice, expert insights, and design techniques that elevate your work from handmade to heirloom-quality.
Understanding the Butterfly Brooch Watch Concept
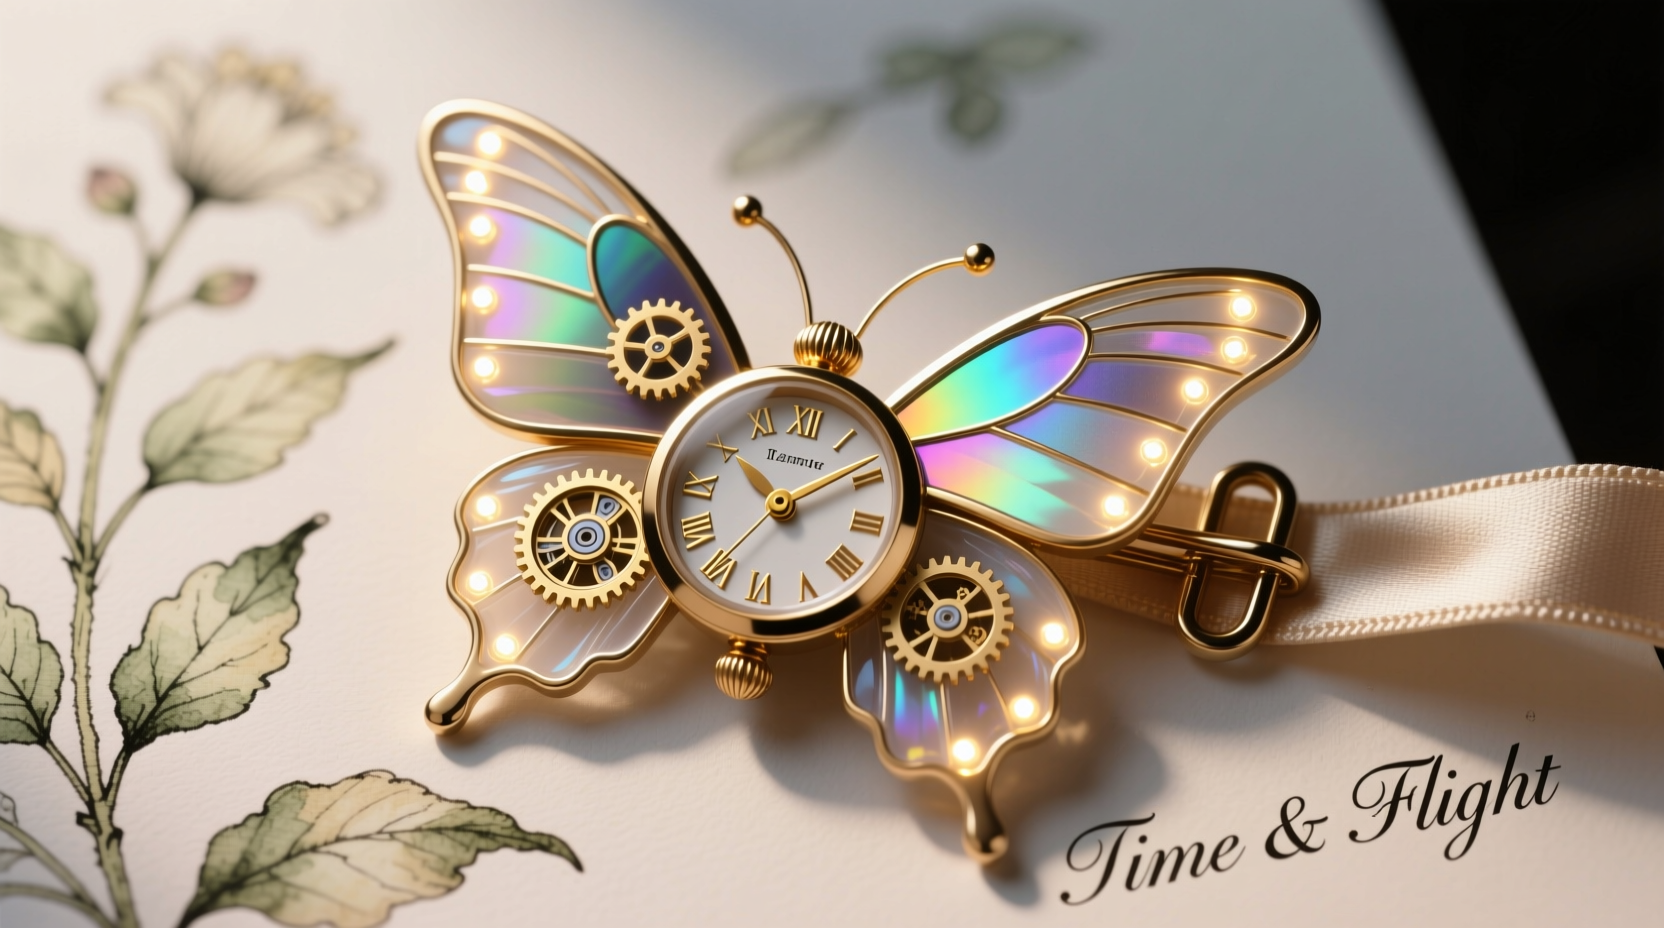
The butterfly brooch watch merges two classic elements: the delicate symbolism of the butterfly and the functional elegance of a pocket or wristwatch. Historically, butterflies represent transformation, freedom, and beauty—qualities that resonate in fashion and jewelry design. When fused with a watch, the metaphor extends to the passage of time and personal evolution.
Unlike mass-produced accessories, a handcrafted version offers full creative control. You choose the materials, movement type, wing design, and clasp mechanism. The result is a wearable sculpture—unique in form and meaning.
Materials and Tools Checklist
Before beginning construction, gather all necessary components. Precision tools and high-quality materials ensure durability and aesthetic appeal.
Essential Materials:
- Filigree or laser-cut butterfly base (brass, silver, or gold-plated)
- Miniature quartz watch movement (12–16mm diameter)
- Watch hands (hour, minute, second)
- Dial face (customizable or pre-printed)
- Battery (typically SR626SW)
- Pendant bale or pin clutch for brooch attachment
- Jewelry-grade adhesive (E6000 or GS-Hydro)
- Jump rings, chain scraps, or decorative wire for detailing
- Gemstones, rhinestones, or enamel paints (optional)
Required Tools:
- Tweezers (precision tip)
- Needle files and sanding sticks
- Watch case opener and resealer
- Small screwdriver set (jewelry grade)
- Glue applicator (fine-tip syringe)
- Wire cutters and pliers
- Magnifying lamp or visor
“Handmade watches succeed when mechanics meet artistry. A butterfly’s wings should move the eye, not distract from time.” — Lena Moreau, Artisan Watchmaker & Jewelry Designer
Step-by-Step Assembly Process
Creating a butterfly brooch watch requires careful sequencing. Rushing any stage risks misalignment or damage to fragile components.
Step 1: Design and Prepare the Butterfly Base
Select or create a butterfly silhouette with a central cavity large enough to house the watch movement (minimum 18mm diameter). If using metal filigree, file sharp edges and polish surfaces. For symmetry, trace the design onto paper first and refine proportions.
Step 2: Install the Watch Movement
Insert the quartz movement into the back of the butterfly base. Ensure the stem aligns perfectly with the center. Secure it using a small amount of jewelry adhesive around the rim—avoid getting glue on gears. Let dry for at least 30 minutes.
Step 3: Attach the Dial and Hands
Place the dial face over the movement shaft. Using tweezers, gently press the hour hand, then the minute hand, and finally the second hand onto the central pinion. Rotate manually to confirm no friction between layers.
Step 4: Insert the Battery
Slide the battery into the compartment at the back of the movement. Most mini movements have a spring-loaded holder. Once inserted, verify the second hand moves smoothly.
Step 5: Seal and Reinforce
If the movement lacks a protective casing, apply a clear epoxy dome over the front (optional for moisture resistance). Alternatively, use a glass or acrylic watch crystal if the design includes a bezel.
Step 6: Add Brooch Mechanism
Solder or glue a standard pin clutch to the back of the butterfly base. Position it parallel to the wings’ body axis for balanced wear. Test stability by clipping onto fabric.
Step 7: Embellish the Wings
This is where individuality shines. Use micro-pave rhinestones along wing veins, paint gradients with enamel, or layer translucent resin tints for iridescence. Allow 24 hours drying time for painted finishes.
Design Tips for a Unique Finish
A truly stunning piece stands out through thoughtful details. Consider these advanced techniques:
- Asymmetry with Purpose: One wing may feature gemstones while the other uses engraved texture, creating visual interest without imbalance.
- Color Psychology: Blue symbolizes calm; red, passion. Choose hues that reflect the intended emotional tone.
- Mixed Media: Combine metal with polymer clay wings or resin inlays for contrast.
- Motion Elements: Suspend tiny charms beneath the wings so they flutter slightly when worn.
- Personalization: Engrave initials or a date on the back plate using a micro-engraving tool.
| Design Choice | Effect | Best For |
|---|---|---|
| Iridescent resin wings | Shimmer under light | Evening wear, bridal pieces |
| Vintage pocket watch conversion | Rustic charm | Steampunk or antique styles |
| LED-lit edge | Glowing outline | Statement fashion shows |
| Detachable pendant chain | Wearable as necklace or brooch | Versatile styling |
Real Example: Maria’s Garden-Inspired Brooch Watch
Maria, a Toronto-based artisan, created a butterfly brooch watch inspired by her grandmother’s garden. She used oxidized brass for the body, added crushed abalone shell inlays for wing color, and embedded a working moon-phase dial beneath the main face. The pin clutch was hidden beneath layered wings that opened slightly like real butterflies. Worn at a local craft fair, the piece drew immediate attention and led to three custom commissions. Her secret? “I treated the watch as the heartbeat and the wings as its breath,” she said. “Every detail served that idea.”
Frequently Asked Questions
Can I use a smartwatch module instead of a quartz movement?
Currently, most smart modules are too large and require charging ports, making integration into a butterfly design impractical. Stick with analog quartz movements for now—they’re reliable, thin, and widely available.
How do I protect the watch from moisture?
Avoid wearing it in rain or while washing hands. For extra protection, apply a nano-coating spray designed for electronics, or seal the back with a removable resin cap.
Is it possible to make this without soldering?
Yes. High-strength epoxies like GS-Hydro can bond metal components securely. Just ensure surfaces are clean and roughened slightly for adhesion.
Final Thoughts and Creative Call-to-Action
Crafting a butterfly brooch watch is more than assembling parts—it’s about telling a story through motion, material, and meaning. Each decision, from wing shape to hand style, contributes to a narrative only you can express. Whether made as a gift, a personal keepsake, or a signature piece for your portfolio, this project rewards patience and imagination.


 浙公网安备
33010002000092号
浙公网安备
33010002000092号 浙B2-20120091-4
Comments
No comments yet. Why don't you start the discussion?