
Photos capture moments, but videos bring them to life. Converting your still images into dynamic videos is one of the most effective ways to share stories, evoke emotion, and engage audiences—whether on Instagram, YouTube, or at a family gathering. With intuitive software and smart editing techniques, you don’t need professional skills to create compelling visual narratives. This guide walks you through the entire process, from selecting the right photos to publishing a polished video that holds attention.
1. Select and Organize Your Photos Strategically
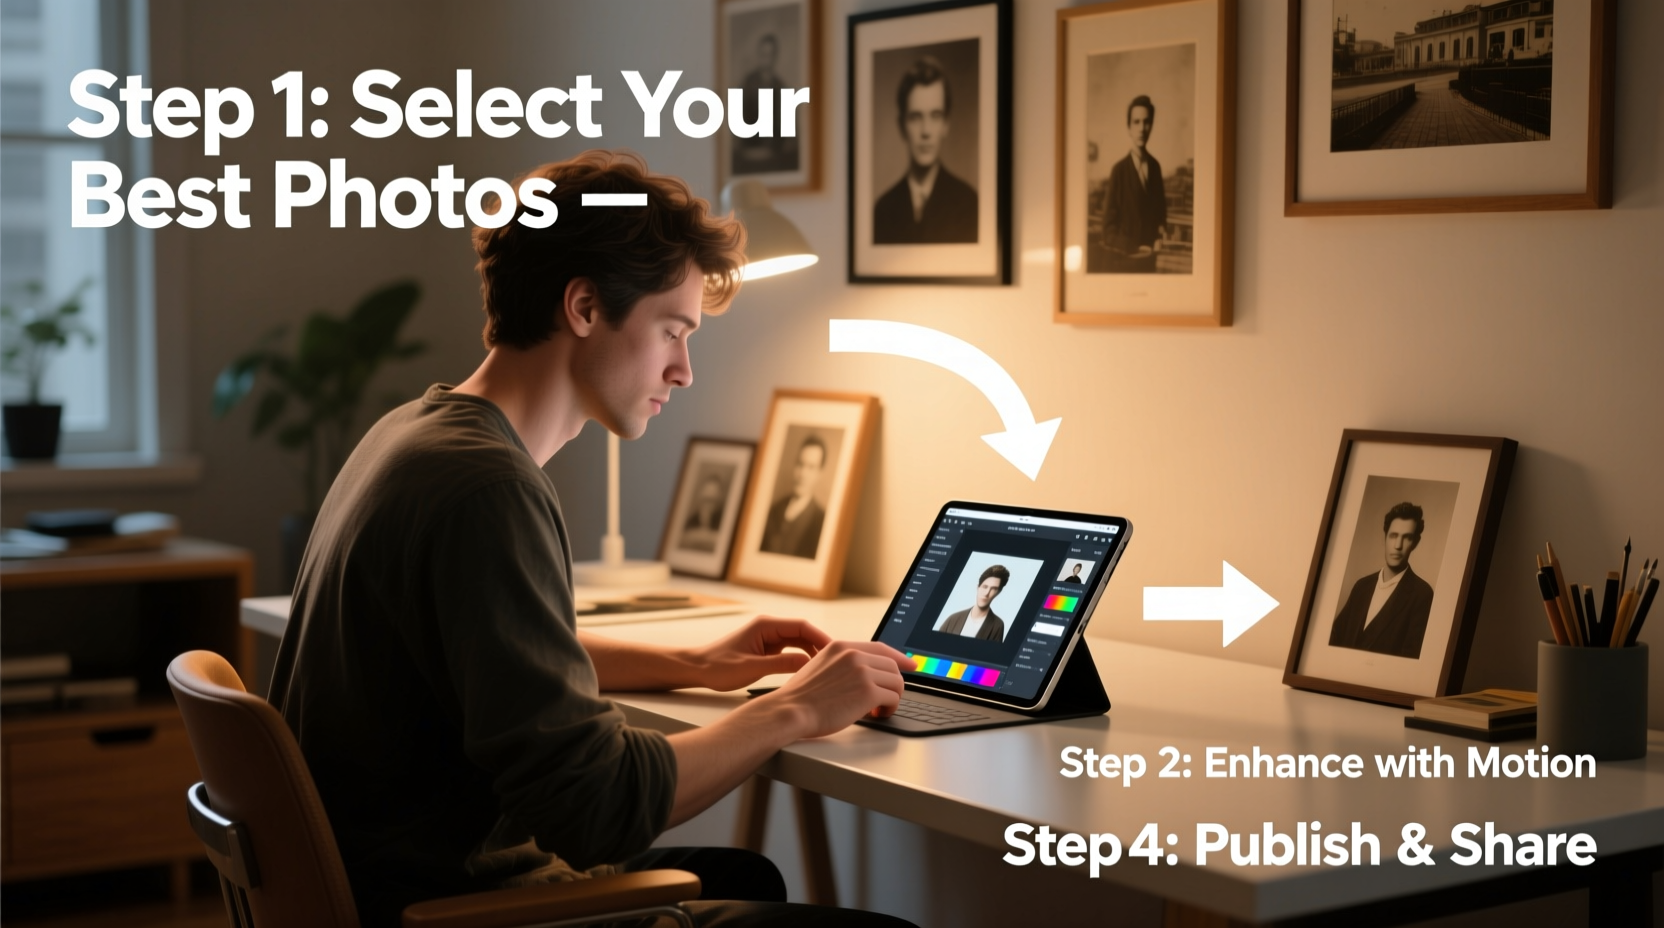
The foundation of any great photo-based video is thoughtful curation. Not every photo deserves a spotlight. Start by choosing images that tell a story or convey emotion—moments with clear context, strong composition, and consistent lighting work best.
Create a narrative arc: Begin with an establishing shot, move through key moments, and end with a meaningful conclusion. For example, a vacation video might open with a wide-angle shot of a destination, include candid moments, and close with a sunset image.
- Stick to 15–30 high-quality images for a 1- to 3-minute video.
- Avoid blurry, overexposed, or redundant shots.
- Ensure visual consistency—similar color tones or themes enhance flow.
2. Choose the Right Video Creation Tool
Today’s editing tools make it easy to animate photos without technical expertise. The best platform depends on your skill level, device, and output goals.
| Tool | Best For | Platform | Learning Curve |
|---|---|---|---|
| Canva | Social media clips, quick edits | Web, iOS, Android | Beginner |
| Adobe Express | Polished videos with music and effects | Web, Desktop, Mobile | Beginner to Intermediate |
| iMovie | Mac/iOS users wanting timeline control | Mac, iPhone, iPad | Beginner |
| CapCut | Viral-style reels and TikTok content | Mobile, Desktop | Beginner |
| DaVinci Resolve | Advanced color grading and cinematic results | Windows, Mac, Linux | Intermediate to Advanced |
For most users, Canva or CapCut offers the ideal balance of simplicity and creative control. Both support drag-and-drop editing, transitions, text overlays, and royalty-free music.
3. Apply Dynamic Transitions and Effects
Static slideshows feel outdated. To keep viewers engaged, use motion creatively. The Ken Burns effect—where the camera slowly zooms or pans across a still image—is a classic technique used in documentaries and social content.
- Import your photos into your chosen editor.
- Select each image and adjust its start and end position to simulate movement.
- Add subtle transitions like fade, slide, or dissolve between clips (avoid flashy effects unless stylistically appropriate).
- Keep transition duration short—0.5 to 1 second—to maintain pace.
Sync movements with music beats or emotional shifts in narration. For instance, a zoom-in works well during a poignant moment, while a quick swipe suits upbeat scenes.
4. Enhance with Music, Voiceover, and Text
Audio transforms a slideshow into an immersive experience. A well-chosen soundtrack sets the mood—upbeat for celebrations, soft piano for memorials.
Use royalty-free music from platforms like YouTube Audio Library, Epidemic Sound, or Artlist. Match tempo to pacing: faster beats for energetic sequences, slower melodies for reflective moments.
For deeper engagement, consider adding voiceover. Narrate personal memories, explain context, or share quotes. Record in a quiet space using your phone or computer microphone. Most editors allow direct audio import or voice recording.
“Emotion lives in the silence between images. Music and voice give photos meaning beyond what the eye sees.” — Lena Torres, Visual Storyteller & Digital Archivist
Text overlays help highlight dates, locations, or quotes. Use clean fonts and limit on-screen text to 7–10 words per screen. Animate text entries subtly—fade or slide in—to avoid overwhelming viewers.
Mini Case Study: Turning Family Photos into a Tribute Video
Sarah wanted to honor her grandmother’s 80th birthday. She gathered 25 photos spanning five decades, organized chronologically, and imported them into Canva. She applied gentle zoom effects to each image, selected a nostalgic instrumental track, and added voiceover recordings of family members sharing short messages. Titles displayed years and locations. The final 2-minute video was shared at the party and moved everyone to tears. Within a week, it had been viewed over 500 times by extended family online.
This success came not from advanced tools, but from intentional storytelling and emotional authenticity.
5. Optimize and Share Your Video
A finished video must be formatted correctly for its destination. Each platform has preferred dimensions and length limits:
- Instagram Feed: 1:1 (square) or 4:5 (portrait), up to 60 seconds
- TikTok/Reels: 9:16 (vertical), 15–90 seconds
- YouTube: 16:9 (landscape), no strict limit
- Email or WhatsApp: MP4 under 25MB for smooth delivery
Export your video in MP4 format with H.264 compression for broad compatibility. If file size is too large, reduce resolution (1080p is usually sufficient) or trim unnecessary segments.
Checklist: Final Review Before Publishing
- ✅ All photos are in correct order and properly cropped
- ✅ Transitions are smooth and consistent
- ✅ Audio levels are balanced (music doesn’t overpower voice)
- ✅ Text is readable and free of typos
- ✅ Video meets platform-specific size and aspect ratio requirements
- ✅ File is exported in high quality but manageable size
Frequently Asked Questions
How long should a photo video be?
For social media, aim for 30 to 90 seconds. For personal events like weddings or tributes, 2 to 5 minutes is ideal. Attention spans are short—get to the point quickly and maintain momentum.
Can I make a video from photos on my phone?
Yes. Apps like Google Photos, Apple Photos, Canva, and CapCut let you create videos directly on smartphones. Just select photos, choose a theme or music, and export. It can take as little as 10 minutes.
Do I need to edit every photo before making the video?
Not necessarily, but basic adjustments help. Fix exposure, crop for better framing, and ensure consistent color tone. Many video tools include built-in photo enhancement features, so you can edit within the app.
Conclusion: Turn Memories Into Meaningful Stories
Every photo holds a frozen moment, but when woven together with motion, sound, and rhythm, they become a living story. You don’t need expensive gear or years of training—just intention, organization, and the right tools. By following these steps, you can transform ordinary albums into extraordinary videos that inform, entertain, and endure.


 浙公网安备
33010002000092号
浙公网安备
33010002000092号 浙B2-20120091-4
Comments
No comments yet. Why don't you start the discussion?