
Adding a pom pom to your keychain is more than just a decorative touch—it’s a personal statement. Whether you're aiming for a pop of color, a playful texture, or a unique gift idea, this simple customization elevates an everyday object into something expressive. The process is beginner-friendly, requires minimal tools, and can be completed in under 15 minutes. With the right materials and technique, you’ll create a durable, eye-catching accessory that reflects your style.
Why Add a Pom Pom to Your Keychain?
Pom poms are not just for winter hats and cheerleading uniforms. Their soft texture and vibrant colors make them ideal for small accessories like keychains. Beyond aesthetics, attaching a pom pom serves practical purposes: it makes your keys easier to spot in a crowded bag, adds grip when pulling keys from a pocket, and introduces a tactile element that many find satisfying.
Customization has become a hallmark of modern personal organization. According to lifestyle designer Mira Chen, “Small embellishments like pom poms allow people to reclaim ownership over mass-produced items. It’s self-expression at its most accessible.”
“Personalizing everyday objects builds emotional connection and reduces clutter because you’re less likely to misplace something that feels uniquely yours.” — Mira Chen, Lifestyle Design Consultant
Materials You’ll Need
Gathering the right supplies ensures a smooth and successful project. Most items can be found at craft stores or repurposed from household materials.
- One pom pom (1–2 inches in diameter works best)
- A metal keychain ring (preferably with a swivel clasp)
- Jump ring (3–5mm size, metal)
- Pliers (flat-nose or round-nose)
- Scissors (if trimming the pom pom)
- Glue (optional, fabric or E6000 recommended)
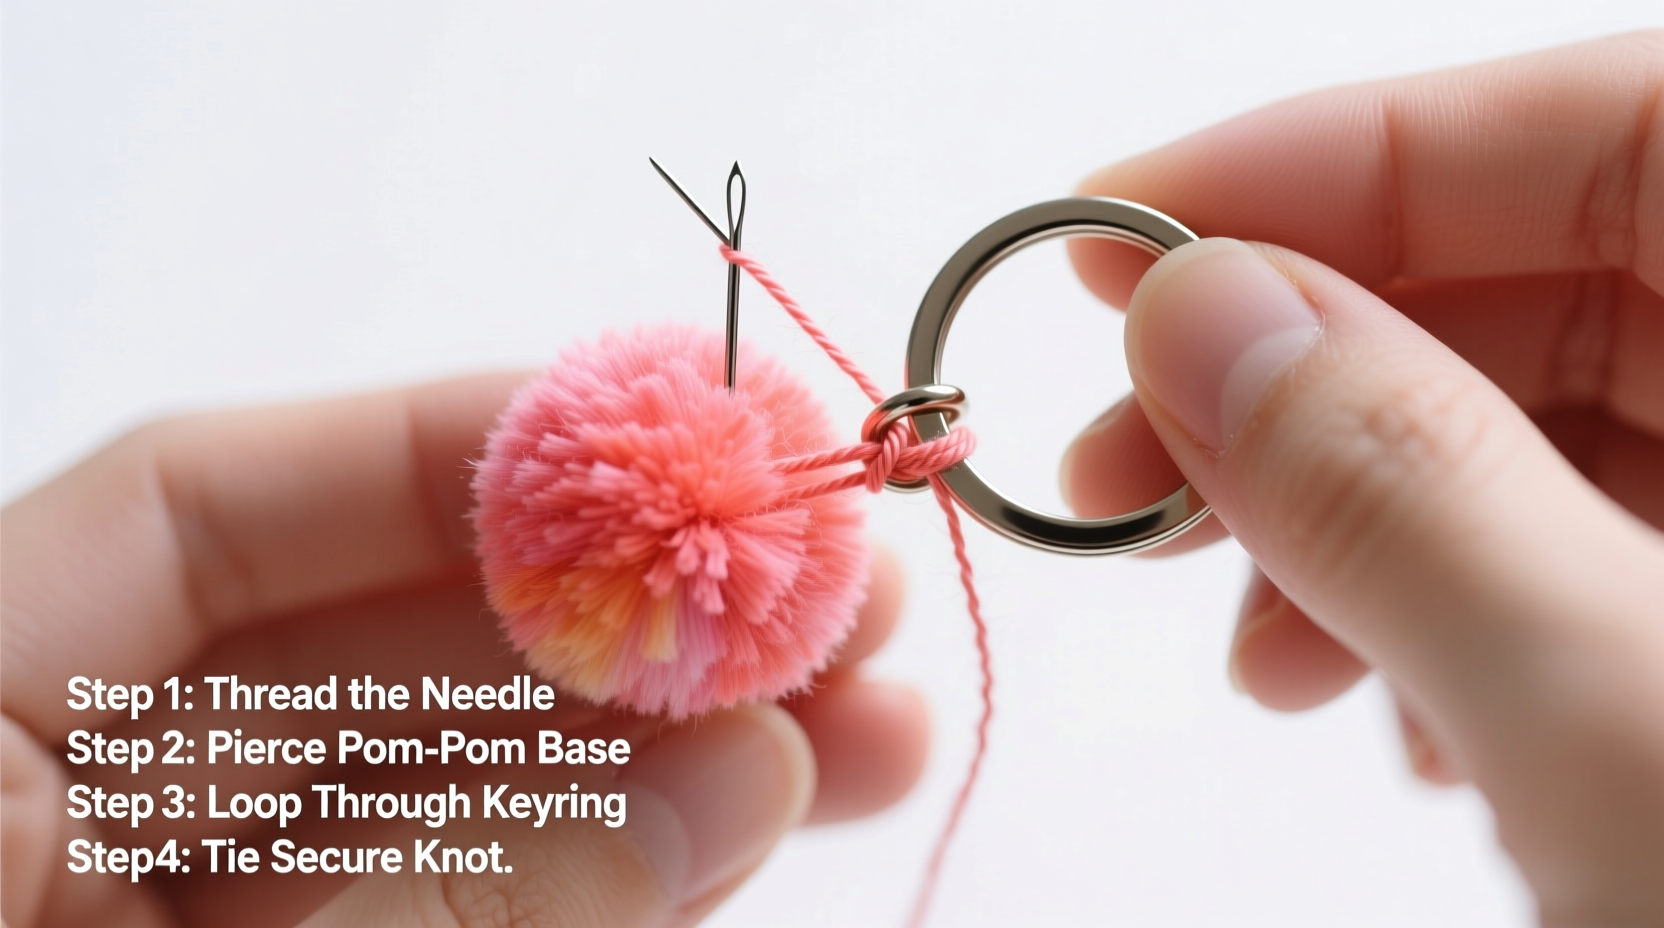
Step-by-Step Guide to Attaching the Pom Pom
Follow these clear, sequential steps to securely attach your pom pom to a keychain with professional-looking results.
- Select your pom pom and inspect it. Ensure there are no loose fibers or weak spots. Trim any stray threads for a neat appearance.
- Cut a small slit or locate the central loop. Many pom poms come with a built-in string loop at the top. If not, gently part the fibers at the base to expose the knot or core where the yarn was tied.
- Open the jump ring using pliers. Hold the ring with two pairs of pliers—one on each side—and twist sideways to create an opening. Do not pull the ends apart, as this can weaken the metal.
- Thread the pom pom onto the jump ring. If your pom has a loop, slide the jump ring through it. If not, wrap thin wire or thread around the base of the pom pom, secure it tightly, and attach the jump ring to that anchor point.
- Attach the jump ring to the keychain. Slide the open end of the jump ring through the keychain’s main loop, then close it securely by twisting the ends back into place with pliers.
- Optional: Add adhesive. For extra security, apply a tiny drop of fabric glue where the pom pom meets the attachment point. Allow 10–15 minutes to dry before use.
Do’s and Don’ts: Pom Pom Keychain Best Practices
| Do’s | Don’ts |
|---|---|
| Use pliers to open and close jump rings properly | Yank the pom pom once attached—it may loosen the connection |
| Match pom pom color to your bag or seasonal wardrobe | Use oversized pom poms that make the keychain bulky |
| Add a clear nail polish sealant to prevent fraying (for yarn pom poms) | Expose glued joints to water immediately after assembly |
| Carry extras for quick swaps between seasons | Forget to check metal quality—cheap jump rings may corrode |
Real-Life Example: A Teacher’s Classroom Keychain Upgrade
Sophie Ramirez, a third-grade teacher in Portland, wanted a way to distinguish her classroom keys from others in the staff room. She used red, blue, and yellow pom poms to represent her class theme: “Primary Colors Crew.” Each month, students voted on a new color, and Sophie swapped out the pom pom during her weekly desk cleanup.
“It became a ritual,” she said. “The kids loved seeing their choice on my keys. Parents started asking where they could get similar ones.” Within weeks, three other teachers adopted the idea, turning a simple DIY project into a school-wide trend.
Customization Ideas and Creative Variations
Once you’ve mastered the basic attachment, explore creative ways to personalize your design:
- Dual-tone pom poms: Layer two different colored pom poms on the same jump ring for a dimensional look.
- Themed combinations: Pair holiday-colored pom poms with engraved tags (e.g., a red-and-green pom for December, a pastel one for spring).
- Texture mixing: Combine a fluffy pom with a metallic charm or bead for contrast.
- Mini pom clusters: Attach three small pom poms to a single jump ring for a fuller effect.
For gift-giving, match the pom pom color to the recipient’s favorite hue or monogram their initials on a tag beside the pom. This level of detail transforms a five-minute craft into a meaningful present.
Frequently Asked Questions
Can I wash a pom pom keychain?
Spot clean only. Submerging it in water may cause the fibers to mat or the glue to weaken. Use a damp cloth with mild soap to wipe the surface gently, then air dry completely.
How long do homemade pom pom keychains last?
With proper care, they can last 6–12 months or longer. Avoid constant friction against rough surfaces, and replace the pom pom if it begins to shed excessively.
What if my pom pom doesn’t have a loop?
No problem. Wrap embroidery floss or thin wire tightly around the base of the pom pom several times, knot securely, and tie a small loop for the jump ring to attach to. Reinforce with a drop of glue for durability.
Quick Checklist for Success
- ✅ Choose a high-quality pom pom (1–2 inches)
- Ensures durability and visual balance.
- ✅ Use a sturdy jump ring and pliers
- Prevents accidental detachment.
- ✅ Align the pom pom orientation
- Make sure it hangs straight when attached.
- ✅ Secure with glue (optional but recommended)
- Adds longevity, especially for frequently used keychains.
- ✅ Test before daily use
- Gently tug to confirm stability.
Final Thoughts and Call to Action
Attaching a pom pom to your keychain is a small act with big impact. It takes little time, costs almost nothing, and instantly injects personality into an overlooked item. Whether you're customizing for yourself or creating thoughtful gifts, this project proves that creativity thrives in simplicity.
Now that you know the steps, gather your supplies and make your first pom pom keychain today. Try one color this week, switch it next month. Share your designs with friends or post them online—tag someone who needs a splash of joy on their keys.


 浙公网安备
33010002000092号
浙公网安备
33010002000092号 浙B2-20120091-4
Comments
No comments yet. Why don't you start the discussion?