
Maintaining proper tire pressure is one of the most overlooked yet critical aspects of cycling performance. Underinflated tires increase rolling resistance, reduce control, and raise the risk of flats. Overinflated tires sacrifice comfort and traction. The solution? A consistent, correct inflation routine using the right tools and technique. Whether you're a commuter, weekend rider, or fitness cyclist, knowing how to properly fill your bicycle tire ensures a smoother, safer, and more efficient ride.
Understand Your Tire Valve Type
Bicycle tires use one of two primary valve systems: Schrader or Presta. Identifying which type your bike uses is the first step in successful inflation.
- Schrader valves are wider and resemble those on car tires. Common on mountain bikes, hybrids, and kids’ bikes, they feature a spring-loaded pin in the center that seals automatically when the pump is removed.
- Presta valves are slimmer, longer, and found on most road bikes and higher-end models. They require you to unscrew the tip before inflating and screw it back down afterward to seal.
Using the wrong pump head or failing to prepare the valve correctly can lead to frustration or damage. Most modern floor pumps support both types, often with a dual-head design or a simple switch mechanism.
Check Recommended Tire Pressure
Tire pressure is measured in PSI (pounds per square inch) or BAR. The ideal range varies significantly depending on tire width, rider weight, terrain, and bike type. Never inflate blindly—your tire sidewall holds the key.
Look along the side of the tire for a label indicating the recommended PSI range, typically something like “40–65 PSI” or “3.0–4.5 BAR.” Exceeding the maximum can cause blowouts; falling below leads to pinch flats and sluggish performance.
| Bike Type | Tire Width (mm) | Typical PSI Range | Notes |
|---|---|---|---|
| Road Bike | 23–28 | 80–130 | Higher pressure reduces rolling resistance on pavement. |
| Hybrid Bike | 32–45 | 50–70 | Balances speed and comfort on mixed surfaces. |
| Mountain Bike | 1.9–2.5 inches (~48–63mm) | 25–35 | Lower pressure improves grip and absorbs trail impacts. |
| Commuter/Folding Bike | 28–40 | 60–80 | Durable, puncture-resistant tires often prefer mid-range pressure. |
“Tire pressure isn’t one-size-fits-all. Heavier riders may need the upper end of the range, while lighter riders or those prioritizing comfort should lean toward the lower limit.” — David Lin, Bicycle Mechanic & Ride Dynamics Instructor
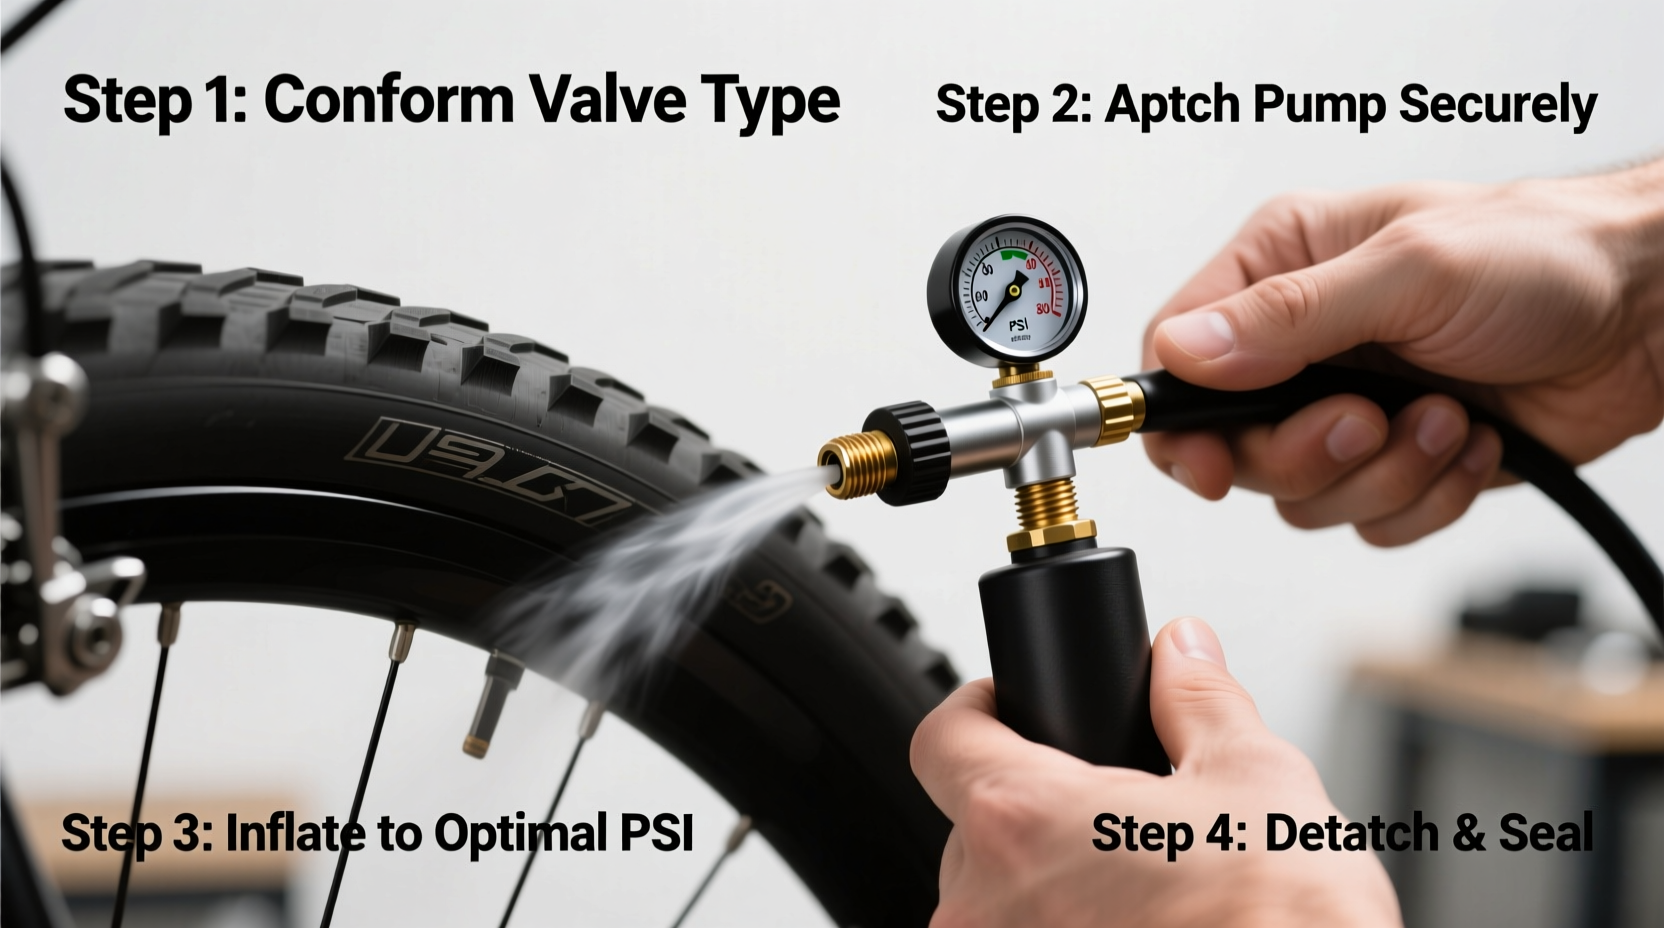
Step-by-Step Guide to Filling Your Bicycle Tire
Follow this detailed process to ensure safe, accurate inflation every time.
- Inspect the tire for cuts, embedded debris, or bulges. Remove any glass or thorns. If the tire looks damaged, replace or patch it before inflating.
- Remove the valve cap and, for Presta valves, unscrew the small lock nut at the tip. Do not remove the entire valve stem.
- Attach the pump securely. For Presta, press firmly to open the valve; for Schrader, simply push until seated. Ensure no air leaks from the connection.
- Inflate gradually, checking pressure with a built-in gauge if available. Floor pumps with gauges offer the most accuracy.
- Monitor pressure closely as you approach the target. Over-pumping is common without a reliable gauge.
- Disconnect the pump and, for Presta valves, tighten the lock nut by hand to seal. Replace the valve cap to keep dirt out.
- Double-check firmness by pressing the tire with your thumb. It should feel solid but not rock-hard—especially on wider tires.
Essential Tools and Maintenance Tips
A good pump makes all the difference. Consider these features when selecting one:
- Floor pump with gauge: Best for home use. Stable base and high-pressure capability suit road bikes.
- Mini pump or CO₂ inflator: Ideal for on-the-go repairs, though less efficient for full inflation from flat.
- Pressure rating: Ensure the pump exceeds your tire’s max PSI.
- Valve compatibility: Dual-head or reversible chuck prevents frustration.
Store your pump indoors, away from moisture. Wipe the hose and chuck after use to prevent grit buildup. Periodically check the pump’s seal and hose for cracks.
Real Example: Sarah’s Commute Transformation
Sarah, a daily urban commuter, used to experience frequent flats and a bumpy ride. She assumed her tires were fine because they “didn’t look flat.” After learning about proper pressure, she checked her hybrid bike’s tires and found them at just 35 PSI—well below the recommended 60. Using a floor pump with a gauge, she brought both tires up to 65 PSI. The change was immediate: her ride felt faster, smoother, and required less effort. Over three months, she avoided flats entirely and reduced her commute time by four minutes.
Common Mistakes and How to Avoid Them
Even experienced cyclists make errors when inflating tires. Here are the most frequent issues—and how to fix them.
| Mistake | Why It’s Bad | How to Fix |
|---|---|---|
| Guessing pressure instead of measuring | Leads to under- or over-inflation, affecting safety and wear | Use a pump with a calibrated gauge or a separate digital pressure meter |
| Forgetting to open Presta valve | Pump won’t engage; may damage pump head | Always unscrew the tip counterclockwise before attaching pump |
| Over-tightening the Presta lock nut | Can strip threads or make future inflation difficult | Tighten only finger-tight; no tools needed |
| Using a worn or leaking pump | Wastes effort and fails to reach proper pressure | Inspect seals regularly; replace pump if inconsistent |
FAQ
How often should I check my bike tire pressure?
Tires naturally lose air over time. Check pressure at least once a week for road bikes and every two weeks for hybrids or mountain bikes. More frequent checks are wise if you ride daily or notice softness.
Can I use a car air pump on my bike tire?
You can—if the nozzle fits and you have precise control. However, car compressors deliver high volume quickly, making overinflation likely, especially with narrow road tires. Use short bursts and monitor closely. Not recommended for Presta without an adapter.
Why does my tire keep losing air even with no visible puncture?
Small leaks can occur through the valve core, rim tape, or bead seal. Try submerging the inflated tube in water to spot bubbles. Replacing the valve core (for Presta) or ensuring proper tube seating during installation often resolves slow leaks.
Final Checklist Before Every Ride
- ✅ Tires free of cuts, glass, or embedded objects
- ✅ Valve caps removed and Presta valves unlocked
- ✅ Pump compatible and in working condition
- ✅ Correct PSI confirmed via gauge (not guesswork)
- ✅ Valves sealed and caps replaced after inflation
Conclusion
Properly inflated tires transform your cycling experience. They improve efficiency, enhance handling, extend tire life, and reduce the chance of mechanical issues on the road or trail. Taking just five minutes to check and fill your tires correctly pays dividends in performance and safety. Don’t let poor pressure sabotage your ride—make inflation part of your regular routine.


 浙公网安备
33010002000092号
浙公网安备
33010002000092号 浙B2-20120091-4
Comments
No comments yet. Why don't you start the discussion?