
Combining two videos smoothly is no longer limited to high-end studios. With the right tools and techniques, anyone can produce polished, professional-grade edits that flow naturally. Whether you're merging interview clips, stitching travel footage, or creating social media content, seamless transitions and consistent pacing make all the difference. This guide walks through every stage—from preparation to export—so your final video looks intentional, cohesive, and visually engaging.
1. Prepare Your Footage for Seamless Editing
Before opening any editing software, take time to organize and evaluate your source material. Rushing into editing without proper prep leads to mismatched resolutions, inconsistent lighting, and awkward cuts. Start by transferring both videos to a dedicated project folder. Label them clearly—for example, “Interview_Shot_A” and “B-Roll_Park.” Review each clip frame by frame to identify the best in and out points.
Check technical specifications: resolution, frame rate, and aspect ratio. If one video is 1080p at 30fps and the other is 4K at 60fps, your editor will need to conform them. Doing this upfront prevents stuttering playback or scaling issues later. Use media inspection tools like MediaInfo (free) to verify properties without guesswork.
2. Choose the Right Editing Software
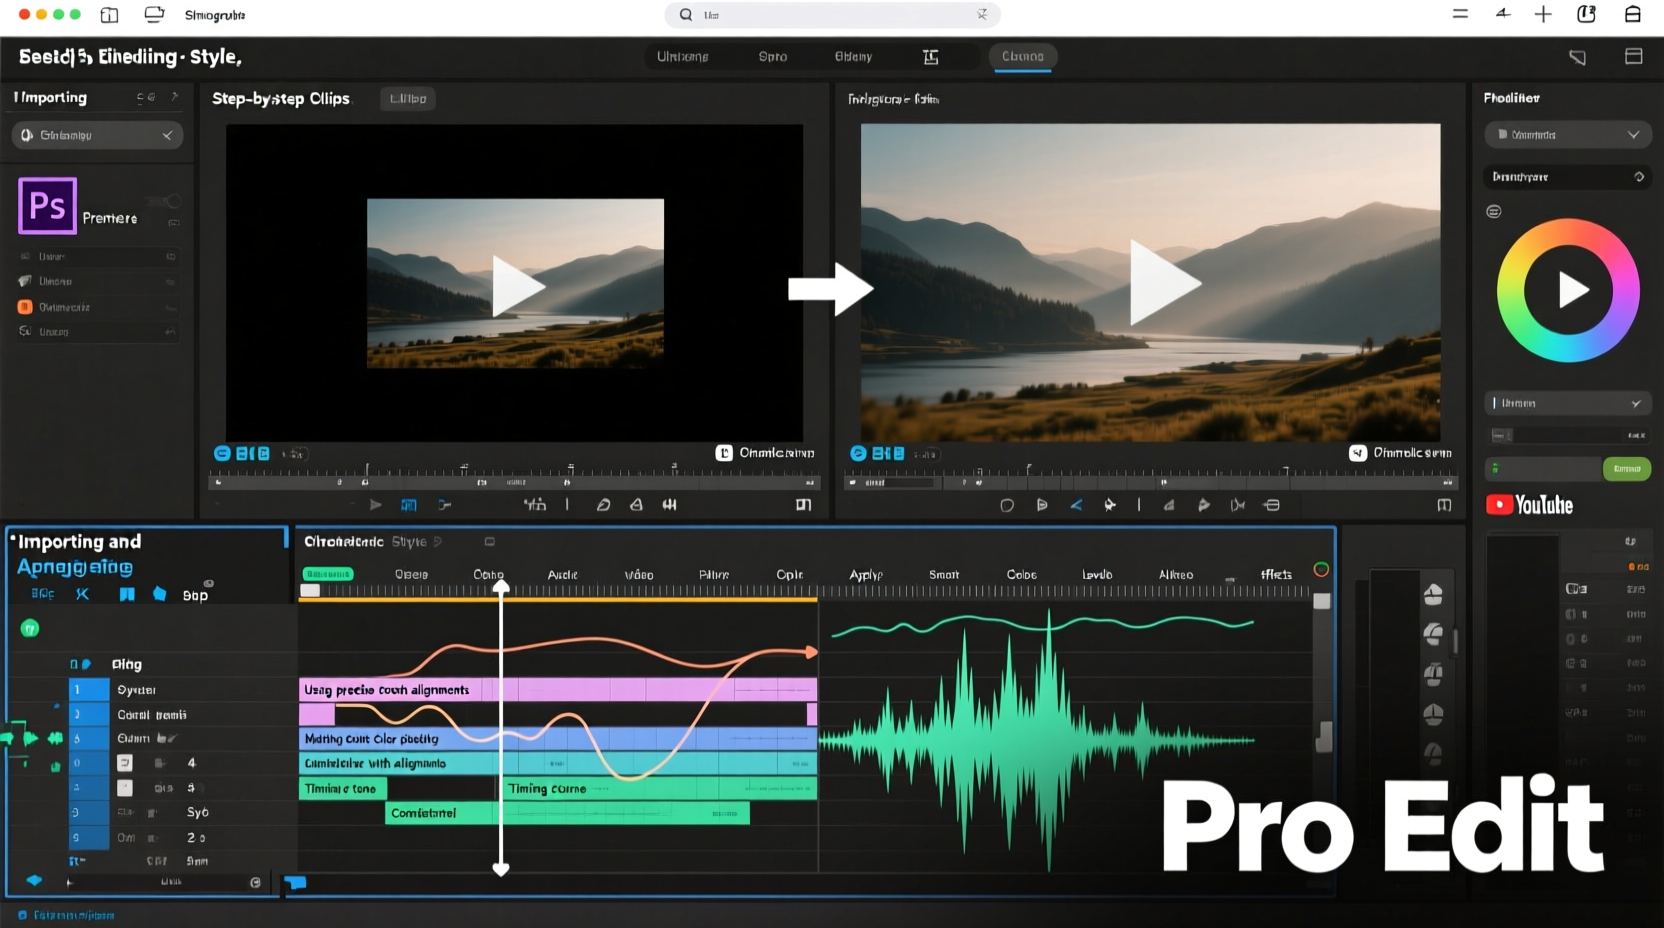
The tool you use impacts both efficiency and output quality. For beginners, free options like DaVinci Resolve or iMovie offer surprisingly robust features. Intermediate users benefit from Adobe Premiere Pro or Final Cut Pro X, which support advanced color grading, audio syncing, and multi-cam workflows. Each platform handles timeline management differently, but core principles remain consistent.
DaVinci Resolve stands out for its unified interface—editing, color correction, visual effects, and audio post-production are all under one roof. It’s free for most essential functions and runs well on mid-tier hardware. Premiere Pro integrates tightly with other Adobe apps, making it ideal if you’re already using Photoshop or After Effects.
“Editing isn’t just about cutting clips—it’s about rhythm, emotion, and continuity. The best transitions go unnoticed because they feel inevitable.” — Lena Patel, Video Editor & Content Strategist
3. Step-by-Step Guide to Combining Videos Seamlessly
Follow this structured workflow to merge two videos professionally. This process assumes you’re using a non-linear editor (NLE), whether desktop-based or web-enabled.
- Import and organize clips: Drag both videos into your project bin. Create labeled sequences or timelines for clarity.
- Match technical settings: Ensure both clips share the same sequence settings (frame rate, resolution). Adjust via “Interpret Footage” or conform options.
- Place clips on the timeline: Position the first video on Video Track 1. Place the second directly after it—or above it if layering.
- Cut at natural breakpoints: Trim each clip so the action ends cleanly—e.g., a person finishing a sentence or turning away from the camera.
- Add a transition: Apply a cross-dissolve, dip to black, or wipe depending on tone. Avoid flashy effects unless stylistically justified.
- Sync audio levels: Normalize volume across both clips. Sudden jumps in sound distract viewers. Use keyframes to fade in/out background noise.
- Color match: Use scopes and color wheels to balance exposure, white balance, and saturation between clips. A mismatch here breaks immersion instantly.
- Preview and refine: Play the combined segment multiple times. Watch on different screens—phone, tablet, monitor—to catch inconsistencies.
- Export with optimal settings: Choose H.264 for MP4 delivery. Match resolution to the highest-quality source unless downsizing for platforms like Instagram.
When Layering Instead of Cutting
If you want to overlay one video atop another—such as picture-in-picture commentary—adjust opacity or use masking tools. Position the secondary clip in a corner, resize proportionally, and add a subtle border or shadow to separate it from the background. Animate the entrance and exit to avoid abrupt appearances.
4. Common Pitfalls and How to Avoid Them
Even experienced editors make mistakes when combining footage. Awareness of these issues helps prevent rework.
| Issue | Why It Matters | Solution |
|---|---|---|
| Mismatched lighting direction | Subjects appear lit from opposite sides, breaking realism | Use color grading to simulate consistent shadows; adjust brightness selectively |
| Abrupt audio cuts | Jarring silence or loud spikes disrupt viewer focus | Fade audio over 0.5–1 second before and after cuts |
| Overuse of transitions | Distracts from content; feels amateurish | Stick to simple fades or hard cuts unless stylized narrative demands more |
| Ignoring aspect ratios | Black bars or stretched visuals degrade quality | Scale and reframe clips uniformly; crop only if necessary |
5. Real Example: Merging Interview and B-Roll Footage
A freelance documentary creator films an environmental activist speaking in her studio (Clip A) and wants to intercut with nature shots she took during protests (Clip B). Initially, the jump from talking head to forest scenes feels disjointed. To fix this:
- The editor identifies a phrase in the interview: “We must protect these forests.”
- They cut to a wide shot of trees immediately after saying “forests,” creating a contextual link.
- A 12-frame cross-dissolve softens the transition.
- Audio from Clip B—birds chirping—is faded in beneath the voiceover, maintaining continuity.
- Color grading warms both clips slightly, aligning the indoor fluorescent tones with outdoor daylight.
The result? A fluid narrative where visuals reinforce the spoken message without drawing attention to the edit itself.
Essential Checklist Before Exporting
Run through this list before rendering your final video:
- ✅ Are both videos aligned in resolution and frame rate?
- ✅ Does the transition serve the story, not just aesthetics?
- ✅ Is audio balanced and free of pops or distortion?
- ✅ Have you checked for flicker or banding in bright scenes?
- ✅ Is text (if any) legible across devices?
- ✅ Did you preview on mobile and desktop?
- ✅ Is file size optimized for intended platform (e.g., under 4GB for email, 2GB for YouTube)?
Frequently Asked Questions
Can I combine videos on my phone?
Yes. Apps like CapCut, InShot, and LumaFusion allow precise trimming, transitions, and audio adjustments. While less powerful than desktop software, they’re sufficient for basic merges, especially for social media.
Why does my merged video look choppy?
This usually happens when clips have different frame rates or weren’t properly conformed. Also check export settings—rendering at too low a bitrate causes compression artifacts. Use a constant bitrate of at least 10 Mbps for 1080p.
How long should a transition last?
For most content, keep transitions between 0.5 and 1.5 seconds. Fast-paced edits (e.g., TikTok) often use sub-second dissolves. Slow, cinematic pieces may extend to 2 seconds. Never let the transition overshadow the content.
Final Thoughts
Seamless video editing is less about having the latest software and more about attention to detail. Matching light, sound, motion, and pacing transforms disjointed clips into a unified story. The best edits disappear into the viewing experience, guiding the audience without calling attention to themselves. With practice, these techniques become instinctive—allowing you to focus not just on how videos are joined, but why.


 浙公网安备
33010002000092号
浙公网安备
33010002000092号 浙B2-20120091-4
Comments
No comments yet. Why don't you start the discussion?