
Filling a football with air is a routine task for players, coaches, and casual users alike. While many rely on electric or specialized sports pumps, not everyone has access to them—especially at home. The good news? A standard bicycle pump can be an effective, affordable, and readily available alternative. With the right technique and preparation, you can safely inflate your football to optimal pressure using just a cycle pump. This guide walks you through every detail—from identifying the correct equipment to avoiding common mistakes—so your ball performs as it should on the field.
Understanding Football Pressure and Equipment
A football's performance depends heavily on its internal air pressure. Under-inflated balls are sluggish, harder to control, and more prone to damage. Over-inflated balls become rock-hard, increasing injury risk and reducing bounce consistency. Most regulation footballs require a pressure between 8.5 and 15.6 psi (pounds per square inch), though exact values vary by size and league standards.
Using a bicycle pump introduces a challenge: most cycle pumps are designed for higher pressures (30–120 psi) used in bike tires, far exceeding what a football needs. Without care, this mismatch can lead to overinflation or valve damage. However, with the proper accessories and controlled effort, a cycle pump works efficiently—especially when paired with a needle adapter.
Essential Tools and Preparation
To use a cycle pump effectively, gather the following items before beginning:
- Bicycle pump – Any hand or floor pump with a dual-head (Schrader and Presta) nozzle works best.
- Basketball/football inflation needle – A plastic or metal needle that fits into the ball’s valve and connects to the pump nozzle.
- Soapy water or lubricant – Helps the needle slide into the valve smoothly and prevents tearing.
- Pressure gauge – Optional but highly recommended; some pumps have built-in gauges, or you can use a standalone one.
- Clean cloth – For wiping the ball and drying components after use.
The key is compatibility. Most football valves accept needles designed for basketballs or volleyballs. Ensure the needle fits snugly into your pump’s head. If your pump only accepts Schrader valves (common on bikes), confirm the needle has a Schrader base—most do.
“Even with non-specialized tools, consistent results come from precision and patience. Never rush inflation.” — Daniel Reeves, Sports Equipment Technician, NCAA Level 3 Certified
Step-by-Step Inflation Process
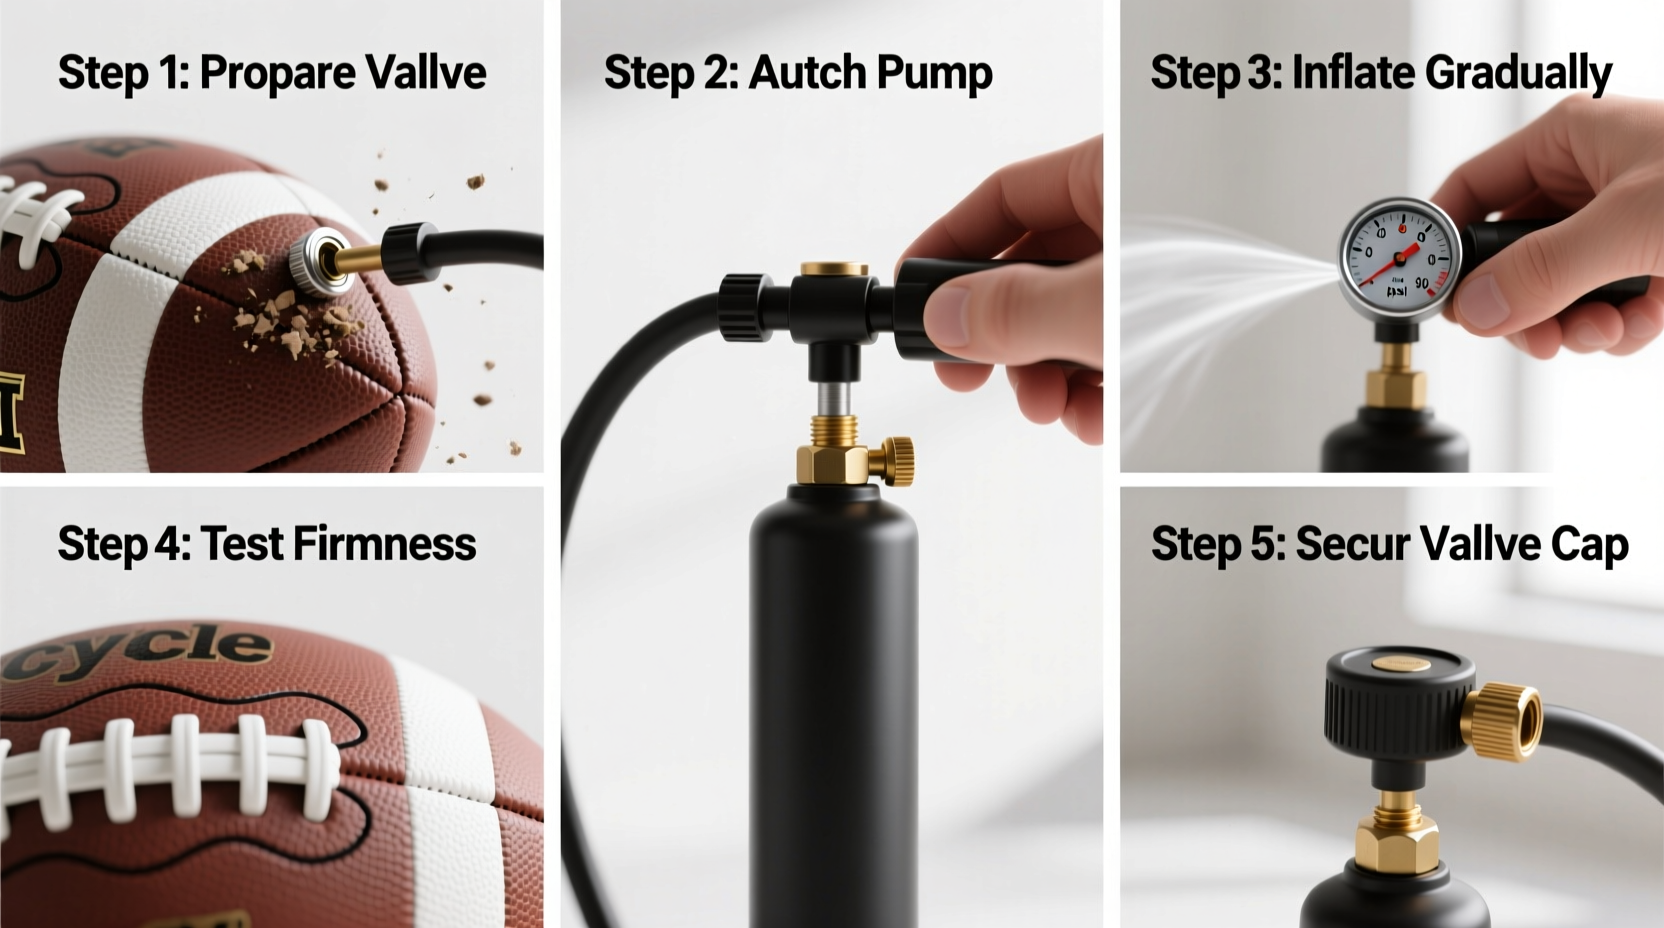
Follow this detailed sequence to inflate your football safely and efficiently using a cycle pump:
- Inspect the ball and valve: Check for cracks, leaks, or misshapen seams. Gently press the valve to ensure it springs back. If it sticks inward, the ball may need replacement.
- Lubricate the needle: Dip the inflation needle in soapy water or apply a drop of silicone-based lubricant. This reduces friction and protects the valve lining.
- Insert the needle straight: Align the needle with the valve opening and push it in slowly and straight—no twisting. Angled insertion can tear the internal seal.
- Attach the pump: Connect the pump nozzle securely onto the exposed end of the needle. Double-check that the connection is tight to prevent air leakage during pumping.
- Pump in short bursts: Use slow, controlled strokes. After every 10–15 pumps, pause and gently press the ball to assess firmness. Avoid long, rapid pumping sessions.
- Check pressure frequently: If using a gauge, monitor readings closely. Stop once you reach the manufacturer’s recommended PSI. When no gauge is available, perform the “squeeze test”: the ball should give slightly under palm pressure but snap back immediately.
- Remove the needle carefully: Twist gently while pulling straight out. Do not yank. Wipe the valve area afterward to remove residue.
- Test the ball: Bounce it on a hard surface. A properly inflated ball rebounds sharply to about waist height when dropped from shoulder level.
Common Mistakes and How to Avoid Them
Even experienced users make errors when improvising with non-specialized equipment. Below is a comparison of typical pitfalls and their solutions:
| Mistake | Why It’s Harmful | Solution |
|---|---|---|
| Using dry needle insertion | Causes micro-tears in valve, leading to slow leaks | Always lubricate with soapy water or silicone spray |
| Pumping too quickly | Overheats the pump mechanism and risks overinflation | Use slow, deliberate strokes with frequent pauses |
| Ignoring recommended PSI | Leads to poor performance or structural damage | Check label on ball; use gauge whenever possible |
| Leaving needle in too long | Dries out valve seal due to moisture loss | Limit inflation time; remove promptly after use |
| Storing ball fully inflated | Stretches bladder material over time | Deflate slightly (10–15%) if storing longer than two weeks |
Real-World Example: Weekend Coach’s Solution
Mark, a youth soccer coach in Manchester, faced a recurring issue: his team’s match ball lost pressure overnight before weekend games. Without access to an electric pump at home, he initially relied on mouth inflation, which was inconsistent and unhygienic. After researching alternatives, he purchased a universal inflation needle compatible with his existing bicycle floor pump.
Within minutes, he learned to lubricate the needle with dish soap and inflate the ball in controlled intervals. He now checks pressure with a $10 digital gauge and completes the process in under four minutes. His players noticed immediate improvements in ball response and accuracy during drills. “It cost less than a coffee,” Mark said, “but changed how we prepare every week.”
Frequently Asked Questions
Can I use any bicycle pump for a football?
Yes, provided it supports a Schrader valve connection and you use an appropriate inflation needle. Dual-head pumps (Schrader/Presta) offer the most flexibility. Avoid high-pressure track pumps unless used with extreme caution.
How do I know if my football is overinflated?
An overinflated ball feels rigid and doesn’t compress under firm thumb pressure. When dropped from chest height, it bounces excessively above head level. Overinflation stresses stitching and increases burst risk during play.
Is it safe to leave the needle attached between uses?
No. Leaving the needle inserted dries out the valve’s internal seal and may cause air leakage. Always remove it after inflation and store it separately in a small case or pouch.
Final Checklist Before You Begin
- ✅ Confirm recommended PSI on the ball
- ✅ Gather pump, needle, lubricant, and clean cloth
- ✅ Inspect ball for damage or leaks
- ✅ Lubricate the needle tip
- ✅ Insert needle straight—no twisting
- ✅ Pump in short, slow bursts
- ✅ Check firmness or use a gauge
- ✅ Remove needle carefully and wipe valve
- ✅ Test bounce and adjust if needed
Conclusion
Inflating a football at home doesn’t require expensive gear. With a standard cycle pump, the right needle, and careful attention to pressure, you can maintain your ball in peak condition affordably and efficiently. The process takes only minutes once mastered, and the benefits—consistent performance, extended ball life, and readiness for play—are immediate. Whether you're a player, parent, or coach, mastering this simple skill ensures your game starts on the right foot—literally.


 浙公网安备
33010002000092号
浙公网安备
33010002000092号 浙B2-20120091-4
Comments
No comments yet. Why don't you start the discussion?