
Opening windows during warm months brings fresh air into your home, but it also invites insects, debris, and even small animals indoors. A well-installed window screen offers the perfect compromise—allowing airflow while keeping pests out. Whether you're replacing worn-out screens or adding them to new windows, proper installation ensures durability, efficiency, and comfort. This comprehensive guide walks you through every phase of the process, from measuring and material selection to final installation and maintenance.
Why Window Screens Matter
Window screens are more than just insect barriers—they enhance indoor air quality, reduce reliance on air conditioning, and improve overall livability. According to the American Lung Association, increasing natural ventilation can lower indoor pollutant concentrations when outdoor air is clean. At the same time, a tightly woven mesh prevents mosquitoes, flies, and other pests from entering your space.
Screens also contribute to energy efficiency. By enabling cross-ventilation, they allow homeowners to cool interiors naturally during mild weather, reducing HVAC usage. For homes in wooded or rural areas, screens act as a first line of defense against not only bugs but also leaves, seeds, and airborne particulates.
“Properly installed screens can increase a home’s ventilation potential by up to 40% without compromising hygiene or comfort.” — Dr. Linda Reeves, Indoor Air Quality Specialist
Selecting the Right Screen Type and Materials
Not all window screens are created equal. The choice depends on your climate, window style, pet presence, and aesthetic preferences. Below is a breakdown of common screen types and their best applications:
| Type | Material | Best For | Lifespan |
|---|---|---|---|
| Fiberglass | Polyvinyl-coated fiberglass | General use, budget-friendly | 5–7 years |
| Aluminum | Woven aluminum mesh | Durability, pet owners | 8–10 years |
| Solar Screen | Open-weave polyester or PVC | Heat reduction, sun-exposed windows | 10+ years |
| Retractable | Roll-up fabric in housing frame | Large windows, modern aesthetics | 10–12 years |
Fiberglass is the most popular due to its affordability and resistance to warping. Aluminum offers superior strength, making it ideal for homes with pets or children. Solar screens reduce glare and heat gain by up to 65%, according to the Department of Energy, while retractable models offer unobstructed views when not in use.
Measuring and Preparing for Installation
Accurate measurements are critical. A screen that’s too large won’t fit; one that’s too small will leave gaps for insects. Always measure the inside dimensions of the window opening—not the glass or frame exterior.
Use a steel tape measure and record three points across both width and height (top, middle, bottom). Use the smallest measurement to ensure a snug fit. Most replacement screens require a 1/32” to 1/16” clearance for smooth insertion.
- Measure width at top, center, and bottom; record the narrowest.
- Measure height at left, center, and right; use the shortest value.
- Note the depth of the screen track—usually 5/16” or 3/8”.
- Check if the existing spline (rubber cord) is intact. Replace if cracked or missing.
If you’re building a custom screen, purchase a frame kit in your measured size. Kits typically include four frame pieces, corner splines, screen mesh, and a rubber spline. Tools needed: utility knife, spline roller tool, scissors, tape measure, and flat surface for assembly.
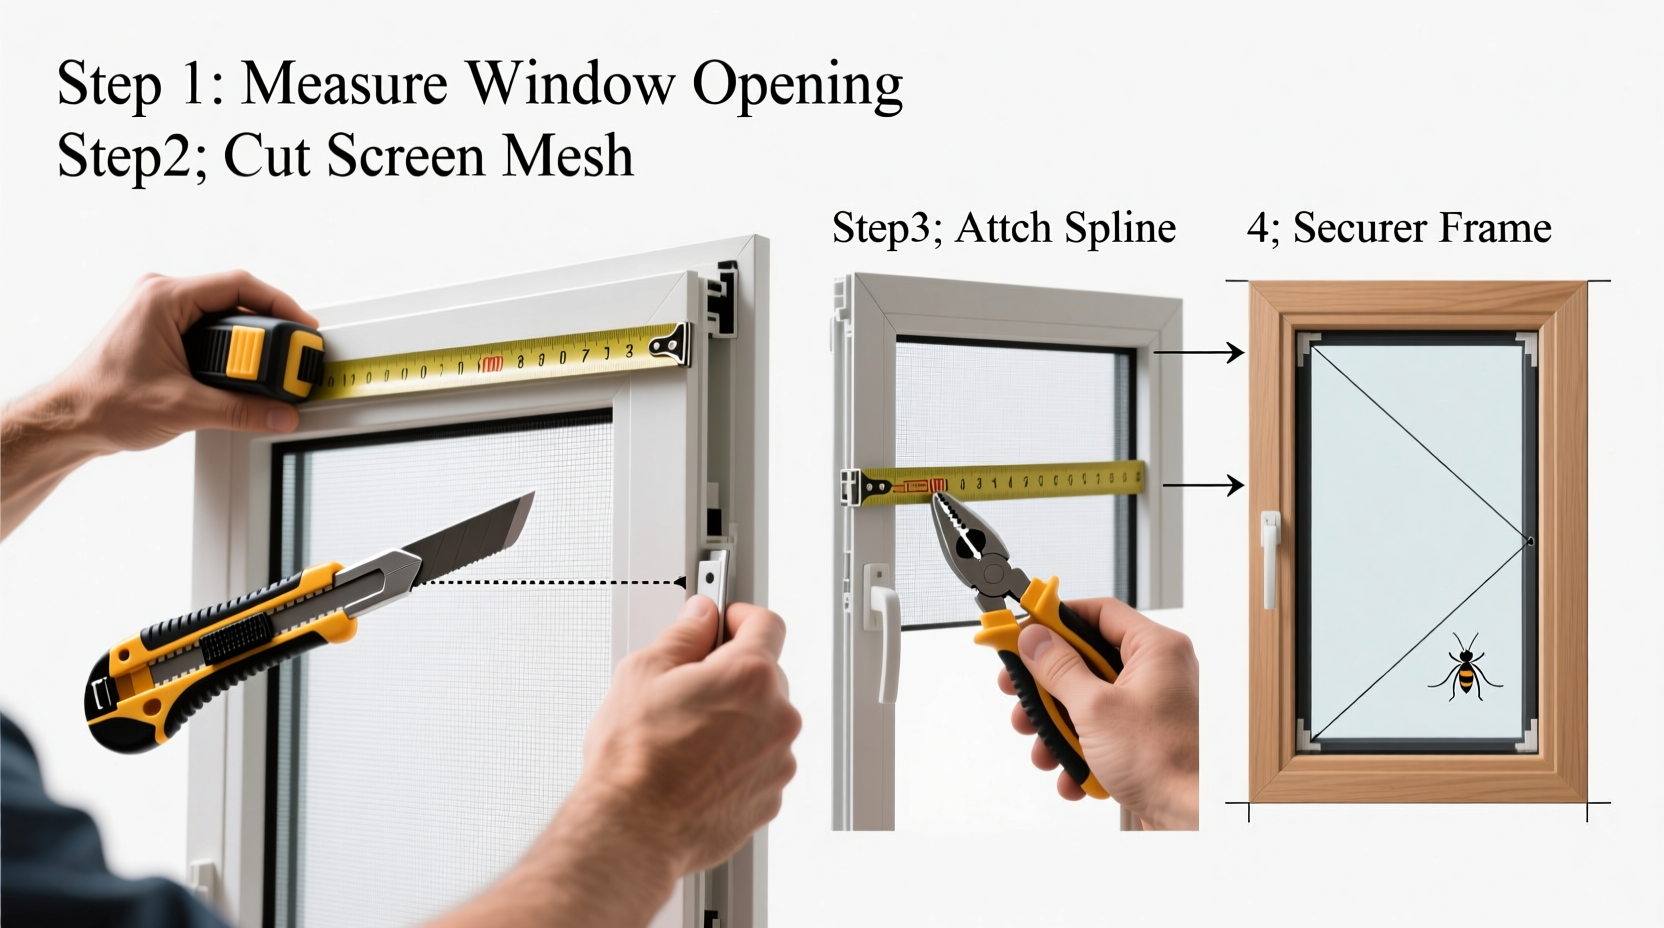
Step-by-Step Installation Process
Whether replacing an old screen or installing a new one, follow this sequence for reliable results:
- Remove the Old Screen: Tilt the existing screen outward from the bottom. Gently pull it free from the track. If secured with clips, unscrew or unclip them first.
- Clean the Track: Wipe the window track with a damp cloth to remove dust, dirt, and old spline fragments. Let dry completely.
- Assemble the Frame: Lay the frame pieces on a flat surface. Insert corner keys or press corners together depending on design. Ensure 90-degree angles using a carpenter’s square.
- Attach the Mesh: Place the screen face-down on a soft surface. Center the mesh over the frame. Starting at one midpoint, press the spline into the groove using a spline roller, stretching the mesh taut as you go.
- Trim Excess: Once the entire perimeter is secured, use a utility knife to cut away excess mesh, leaving a clean edge.
- Test Fit: Slide the screen into the track at a slight angle, then lower it into place. It should fit snugly without wobbling.
- Secure and Inspect: Check that the screen lies flat and doesn’t bulge. Open and close the window to confirm no interference.
Common Mistakes and How to Avoid Them
Even experienced DIYers make errors during screen installation. Recognizing these pitfalls improves success rates:
- Using inaccurate measurements: Always double-check dimensions before cutting frames or ordering replacements.
- Overstretching the mesh: Too much tension leads to premature sagging. Aim for drum-tight but not distorted.
- Skipping track cleaning: Debris prevents proper seating and can damage the spline over time.
- Ignoring seasonal wear: Inspect screens annually for tears, loose corners, or corrosion—especially after storms.
In humid climates, condensation can degrade aluminum frames over time. Opt for vinyl-coated or fiberglass alternatives in such environments.
Mini Case Study: Urban Apartment Retrofit
A Brooklyn-based homeowner upgraded six bedroom windows to improve airflow during summer. The original screens were torn and ill-fitting, allowing mosquitoes inside despite closed windows. After measuring each unit and selecting fiberglass mesh with fine weave (20x20), they replaced all screens over a weekend. Post-installation, indoor temperatures dropped by 3–5°F due to improved cross-ventilation, and pest complaints ceased. The total cost was under $120, including tools and materials.
Maintenance and Long-Term Care
A well-maintained screen lasts years. Clean every 3–6 months using mild soap and water. Rinse thoroughly and let air-dry before reinstalling. Avoid high-pressure hoses, which can warp frames or dislodge splines.
Store removed screens vertically in a dry garage or closet. Laying them flat invites warping, especially in vinyl or wood-composite frames.
“Annual inspection and light cleaning extend screen life significantly. Most failures occur from neglect, not material defects.” — Mark Tolbert, Building Maintenance Consultant
FAQ
Can I install window screens on sliding glass doors?
Yes. Sliding doors often use roll-up or side-mount retractable screens. Measure the track width and consult manufacturer specs before purchasing.
What if my window doesn’t have a screen track?
You can add external frames or magnetic mesh panels. These attach directly to the window frame using adhesive or clips and are ideal for historic homes where modifications aren’t allowed.
Are pet-resistant screens worth the extra cost?
If you have dogs or cats that lean on windows, yes. Pet screens use heavier-gauge mesh (typically 11×11 or 14×14) and reinforced frames to resist clawing and pressure.
Conclusion
Installing window screens is a simple yet impactful upgrade that enhances comfort, health, and energy efficiency in any home. With accurate measurements, the right materials, and careful installation, you can enjoy fresh breezes without sacrificing cleanliness or peace of mind. Regular upkeep ensures long-term performance and avoids costly replacements down the line.


 浙公网安备
33010002000092号
浙公网安备
33010002000092号 浙B2-20120091-4
Comments
No comments yet. Why don't you start the discussion?