
Puff pastry is one of the most elegant and technically satisfying elements in classic baking. When executed well, it puffs into light, airy layers with a crisp, golden finish—ideal for tarts, turnovers, or savory appetizers. The \"square\" style refers to the traditional method of maintaining a consistent rectangular shape throughout lamination, allowing for even layering and professional-looking results. While store-bought options exist, nothing compares to homemade puff pastry made with patience and precision. This guide walks you through each stage with actionable techniques used by seasoned bakers.
The Science Behind the Layers
Puff pastry relies on a simple but delicate balance: alternating layers of dough and butter that expand dramatically when heated. As the water in the butter turns to steam during baking, it lifts the dough layers apart, creating that signature rise. For this to work, the butter must remain cold and intact until it hits the oven. If it melts prematurely, the layers will fuse and the pastry won’t puff.
The \"square\" method ensures symmetry and control. Instead of rolling randomly, each turn maintains a 90-degree rotation and uniform thickness, making it easier to predict expansion and bake evenly. This structure also minimizes handling errors and reduces the risk of butter leakage.
“Puff pastry isn’t about speed—it’s about rhythm, temperature, and respect for the dough.” — Jacques Pépin, Chef & Culinary Educator
Essential Ingredients and Equipment
High-quality ingredients are non-negotiable. Since puff pastry contains only a few components, each one plays a critical role.
Ingredients
- All-purpose flour (or T45/T55 if available): Provides gluten structure without being too tough.
- Cold unsalted butter: Preferably European-style with 82% fat content for better pliability and flavor.
- Ice-cold water: Helps keep the dough cool and prevents early gluten development.
- Salt: Enhances flavor and regulates yeast activity, even in non-yeasted versions.
Equipment Checklist
- Rolling pin (preferably French-style tapered)
- Bench scraper
- Parchment paper
- Plastic wrap
- Digital scale (for precise measurements)
- Ruler and pastry brush
- Pastry blender or bowl scraper (optional)
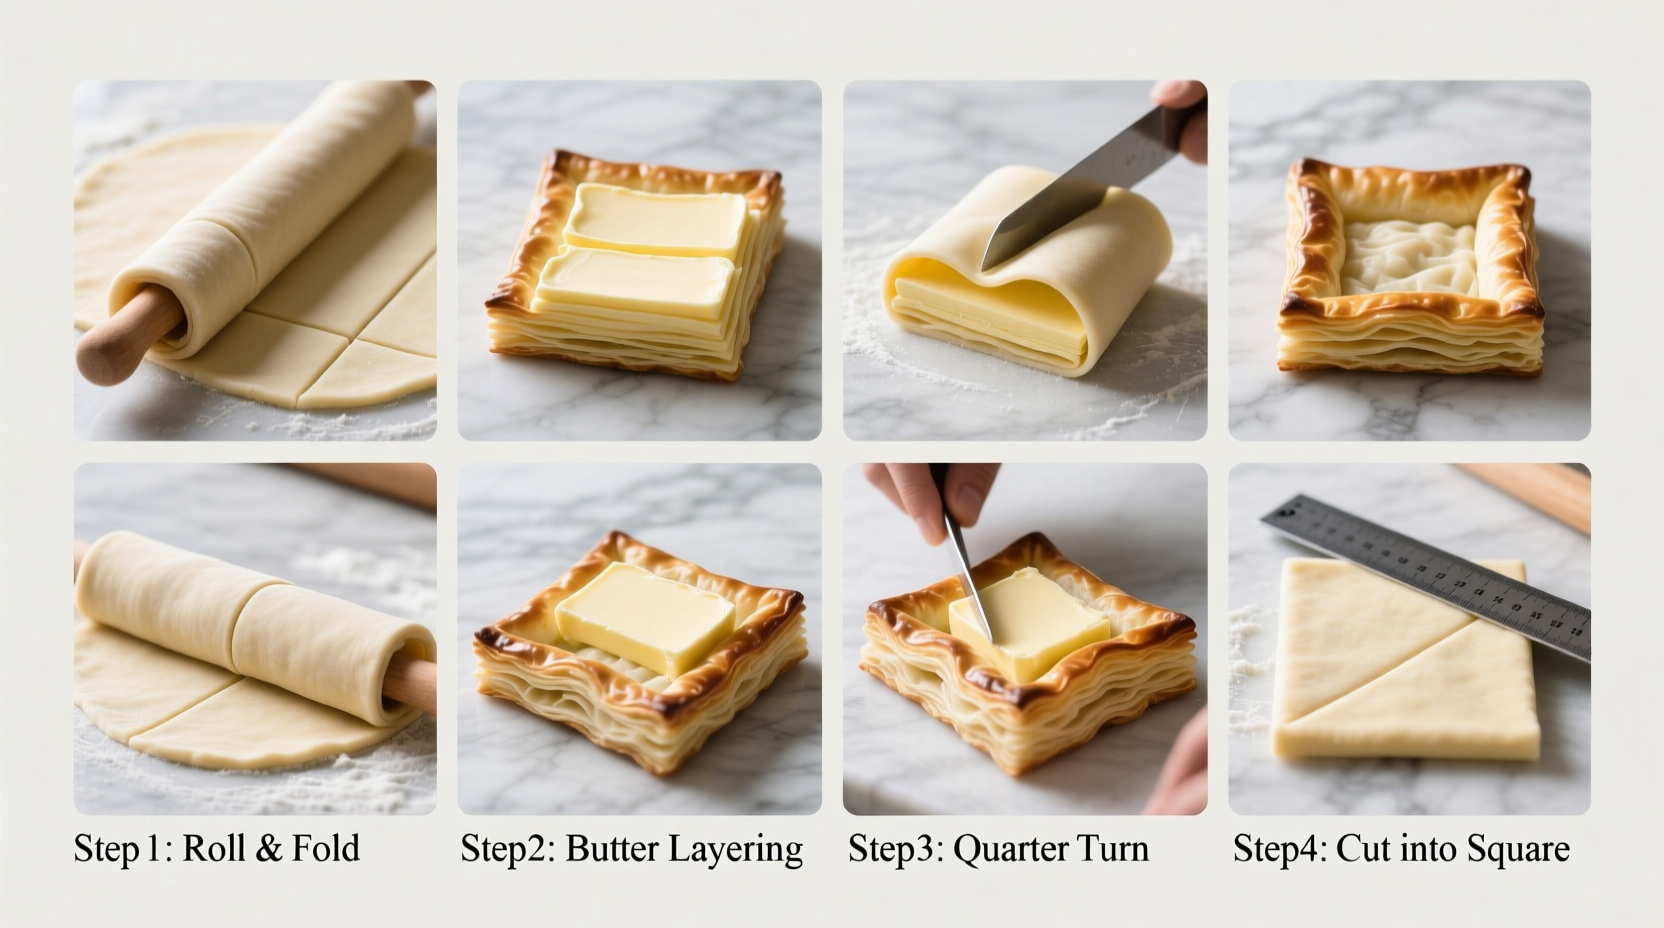
Step-by-Step Lamination Process
Making puff pastry is a multi-stage process spanning two to three days. Rushing leads to disaster. Follow this timeline for optimal results.
- Day 1 – Make the détrempe (dough base): Mix 250g flour, 1/2 tsp salt, and 180g ice water. Knead briefly into a smooth ball. Wrap and chill for 1 hour.
- Prepare the beurrage (butter block): Take 200g cold butter and form it into a 6x6 inch square between parchment sheets. Chill until firm but pliable.
- Enclose the butter: Roll the dough into a 10x10 inch square. Place the butter block in the center and fold the corners over to seal completely. Pinch edges lightly.
- First turn (single fold): Roll the package into a rectangle 4 times longer than its width (approx. 8x20 inches). Fold one-third toward center, then the other third over it—like a letter. Rotate 90 degrees. This is a single book fold.
- Chill 30 minutes.
- Repeat for four more turns, chilling between each. After Turn 3, consider switching to double folds (folding both ends to meet in the middle, then closing like a book) for tighter layer control.
- Final rest: After the sixth turn, wrap and refrigerate overnight before use.
Common Pitfalls and How to Avoid Them
Even experienced bakers encounter setbacks. Here’s a breakdown of frequent issues and their solutions.
| Problem | Likely Cause | Solution |
|---|---|---|
| Butter leaks out during rolling | Dough too warm or uneven pressure | Work faster; chill immediately if butter softens |
| Pastry doesn’t rise | Over-handling, under-chilling, or oven too cool | Ensure oven preheats to at least 400°F (200°C) |
| Uneven layers or dense texture | Inconsistent rolling thickness | Use guides or rolling pin rings to maintain evenness |
| Dough cracks at edges | Too cold or rolled too thin too soon | Let sit at fridge temp for 5–10 mins before continuing |
Real Example: From Failure to Flawless
A home baker in Lyon attempted puff pastry for a holiday tart. Her first batch collapsed in the oven, oily and flat. She reviewed her process: she’d skipped chilling between turns and used American butter with lower fat content. On her second try, she switched to imported butter, measured every roll with a ruler, and strictly followed the 30-minute chill rule. The result? A towering, golden square tart shell with audible crunch upon slicing. “It wasn’t magic,” she said. “It was just consistency.”
Shaping and Baking Your Square Puff Pastry
Once laminated and rested, your pastry is ready for shaping. Keep everything cold until the moment of baking.
Preparation Tips Before Baking
- Roll out to no thinner than 1/8 inch unless specified otherwise.
- Use a sharp knife or pizza cutter to trim edges cleanly—avoid dragging.
- For best rise, dock (prick) only areas meant to stay flat; leave borders undocked.
- Egg wash generously with yolk + cream mixture for deep color and shine.
- Chill shaped pastries for 15–20 minutes before baking.
Bake in a fully preheated oven at 400°F (200°C). Steam is crucial in the first 10 minutes—place a pan of boiling water on the bottom rack or use a steam injector if available. Avoid opening the oven door until at least 20 minutes in; premature heat loss causes collapse.
“The difference between good and great puff pastry? Discipline in temperature and geometry.” — Claire Ptak, Baker & Author of *The Violet Bakery Cookbook*
Frequently Asked Questions
Can I freeze homemade puff pastry?
Yes. You can freeze it after lamination (before final proofing) or baked. Wrap tightly in plastic and place in a freezer bag. Thaw overnight in the refrigerator before using. Freshly baked shells can be frozen and re-crisped at 350°F (175°C) for 5–8 minutes.
How many layers does proper puff pastry have?
After six book folds, you’ll have up to 729 layers (3^6). Not all remain distinct due to merging, but this illustrates why precision matters—each fold multiplies exponentially.
Why is my pastry shrinking during baking?
Gluten relaxation. Always let the shaped pastry rest in the fridge for 15+ minutes before baking. Also, avoid stretching the dough when placing it in pans.
Conclusion: Mastery Through Practice
Creating perfect square puff pastry isn’t reserved for professionals. With attention to temperature, geometry, and timing, any dedicated baker can achieve restaurant-quality results. The process teaches patience, observation, and an intimate understanding of dough behavior. Each failed attempt reveals new insight—why the butter broke through, why the rise faltered, why the color didn’t deepen.
Start small. Make half-batches. Track your turns and chilling times. Note what works. Refine. Repeat. Soon, you’ll produce not just puff pastry, but confidence—one golden, flaky layer at a time.


 浙公网安备
33010002000092号
浙公网安备
33010002000092号 浙B2-20120091-4
Comments
No comments yet. Why don't you start the discussion?