
Adding a logo to a photo is more than just slapping a brand mark onto an image. Done poorly, it can look amateurish and distract from the visual message. But when executed with precision, a well-placed logo enhances credibility, strengthens brand identity, and maintains professionalism across marketing materials, social media, and portfolios. Whether you're a photographer, marketer, or small business owner, mastering this skill ensures your visuals represent your brand at its best.
The key lies in balance—positioning, sizing, transparency, and context all play critical roles. This guide walks through the entire process using both professional software and accessible online tools, so you can apply these techniques regardless of your technical background.
Choose the Right Tools for the Job
Not all image editing platforms are created equal. The tool you use impacts the level of control and polish you can achieve. Below is a comparison of the most effective options:
| Tool | Best For | Pros | Cons |
|---|---|---|---|
| Adobe Photoshop | Professional-grade edits, batch processing | Precise layer control, advanced blending, non-destructive editing | Subscription cost, steep learning curve |
| Canva | Beginners, quick social media graphics | Free version available, drag-and-drop interface, templates | Limited fine-tuning, watermark on free tier |
| GIMP | Budget-conscious users needing advanced features | Free, open-source, supports layers and masks | Interface feels outdated, less intuitive |
| Pixlr X / E | Web-based alternative to Photoshop | No download needed, real-time adjustments | Slower with large files, fewer automation tools |
Prepare Your Logo and Photo
Before merging assets, ensure both your logo and photo are optimized. A blurry logo undermines even the most polished layout. Follow this checklist before proceeding:
- Use a transparent PNG logo: Avoid white backgrounds that create harsh edges.
- Scale appropriately: Your logo should be legible but not dominate the frame.
- Match color tones: Adjust your logo’s hue slightly to harmonize with the photo’s palette.
- Keep file paths organized: Store both logo and photo in the same folder for faster access.
“Your logo isn’t just an identifier—it’s a silent ambassador. Its placement tells viewers whether you respect their attention.” — Lena Torres, Brand Strategist
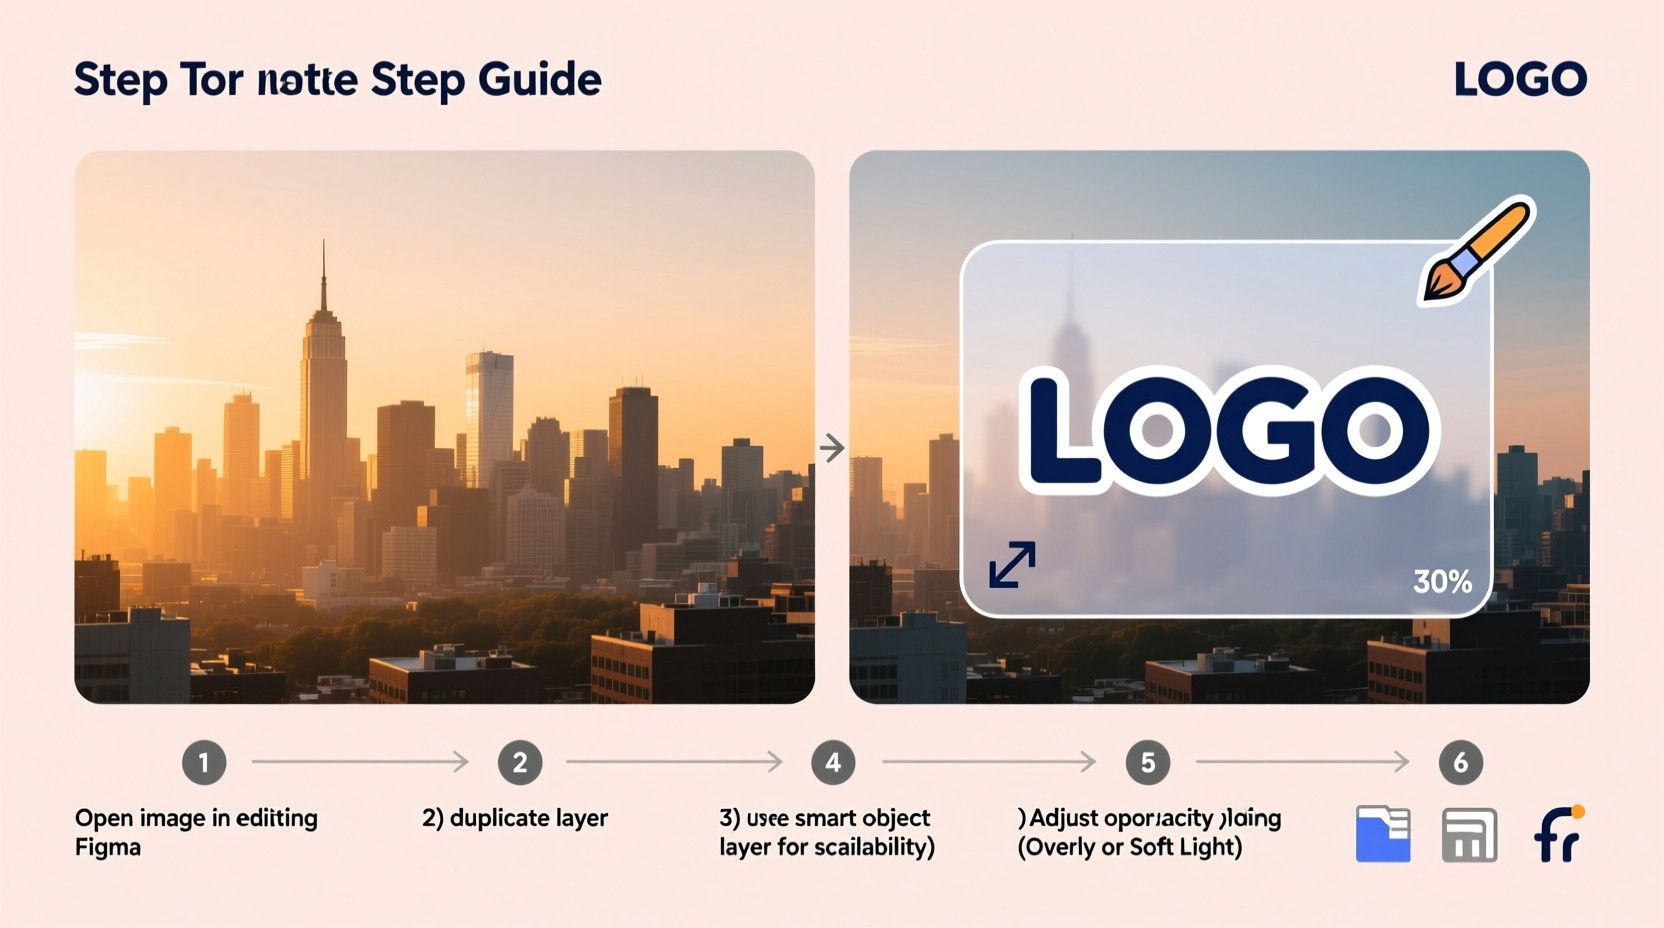
Step-by-Step Guide: Adding a Logo Using Photoshop
For those seeking pixel-perfect results, Adobe Photoshop offers unmatched control. Follow these steps to embed your logo professionally:
- Open your base photo in Photoshop via File > Open.
- Import your logo by going to File > Place Embedded, then select your PNG file.
- Resize and position the logo using the transform handles (Ctrl+T or Cmd+T). Hold Shift to maintain proportions.
- Adjust opacity in the Layers panel—typically between 70–90% works best for subtlety.
- Add a drop shadow (optional): Right-click the logo layer > Blending Options > Drop Shadow. Use low distance (1–2 px) and spread (0–5%) for realism.
- Apply a slight fade if needed: Use a layer mask with a soft black brush to gently erase parts of the logo near busy areas.
- Merge only after review: Once satisfied, flatten layers and save as PSD for future edits, then export as JPEG or PNG.
Alternative Method: Using Canva for Quick Results
If you're on a deadline or lack design experience, Canva delivers reliable results with minimal effort. Here's how:
- Log in to Canva and create a custom design matching your photo dimensions (e.g., 1080x1080 px).
- Upload your background photo and drag it onto the canvas.
- Click “Uploads” and add your transparent PNG logo.
- Drag the logo into place—ideal spots include bottom-right or top-left corners.
- Click the logo, then adjust transparency using the slider under “Effects” > “Transparency.”
- Enhance visibility by adding a subtle outline: Use a duplicate logo behind the original, slightly larger and filled with white or dark gray, then lower its opacity.
- Download as PNG (transparent background) or JPG (solid background), ensuring “High Quality” is selected.
This method is ideal for social media posts, blog headers, or promotional banners where speed matters.
Real Example: Photographer Branding Workflow
Sarah Kim, a freelance portrait photographer, needed a consistent way to brand her Instagram gallery without distracting clients from the subjects. She used the following approach:
She shot all images in RAW format, edited them in Lightroom, then exported high-res JPEGs. Using Photoshop, she placed her minimalist monogram logo in the bottom right corner at 85% opacity. To avoid interference with skin tones, she applied a soft mask along the edges where faces appeared near the corner. Finally, she saved the action script to automate the process for future uploads.
The result? A cohesive, elegant feed that subtly reinforced her brand while keeping focus on her artistry. Engagement increased by 22% within two months, with several clients commenting on the “professional presentation.”
Common Mistakes to Avoid
Even experienced creators fall into traps that diminish impact. Watch out for these pitfalls:
- Over-sizing the logo: It competes with the subject instead of complementing it.
- Placing it over key elements: Avoid covering faces, product details, or focal points.
- Ignoring contrast: A white logo on a light sky background disappears. Add a subtle stroke or shadow.
- Using inconsistent positioning: Move the logo around too much and your branding loses recognition.
- Skipping proofing: Always view the final image on mobile and desktop screens before publishing.
“Consistency builds trust. If your logo appears differently on every post, people won’t remember it.” — Marcus Reed, Digital Marketing Director
FAQ
Where should I place my logo on a photo?
The safest spots are the bottom-right or top-left corners. These positions align with natural eye movement patterns and minimize interference with central content. Avoid center placement unless part of a deliberate design strategy.
How transparent should my logo be?
Aim for 70–90% opacity. Lower values make the logo hard to see; higher values make it intrusive. Test on multiple devices and backgrounds to confirm visibility.
Can I add a logo to hundreds of photos at once?
Yes. In Photoshop, record an Action to automate logo placement, then use File > Automate > Batch to apply it across folders. Lightroom and third-party tools like ImageMagick also support bulk watermarking.
Final Checklist Before Publishing
- ✅ Logo is in transparent PNG format
- ✅ Positioned in a non-distracting area
- ✅ Sized appropriately (no larger than 1/6 of image width)
- ✅ Opacity adjusted for balance
- ✅ Tested on mobile and desktop views
- ✅ Final export matches intended use (web vs. print resolution)
Master the Details, Elevate Your Brand
Adding a logo may seem simple, but the difference between amateur and professional output lies in attention to detail. From choosing the right file formats to refining placement and transparency, each decision shapes how your audience perceives your brand. With the right tools and disciplined workflow, you can consistently produce polished, branded visuals that speak volumes—without saying a word.


 浙公网安备
33010002000092号
浙公网安备
33010002000092号 浙B2-20120091-4
Comments
No comments yet. Why don't you start the discussion?