
Replacing the battery in your Ice Watch doesn’t require a trip to the jeweler or an expensive service fee. With the right tools and a steady hand, you can do it yourself—safely and effectively. Ice Watches are known for their vibrant designs and quartz movements, making battery replacement a routine maintenance task. However, improper handling can damage the case, gaskets, or internal components. This guide walks you through each stage of the process with precision, safety precautions, and practical advice so you maintain both function and style.
Gather Your Tools and Prepare Your Workspace
Before touching your watch, ensure you have a clean, well-lit workspace free from dust and static. Lay down a soft microfiber cloth to protect the watch face and prevent small parts from rolling away. The following tools are essential:
- Case back opener (a high-quality watch case knife or specialized wrench)
- Plastic or non-metallic tweezers
- Small Phillips screwdriver (if applicable for screw-back models)
- Latex or nitrile gloves (to avoid fingerprints and oils on internal parts)
- Battery removal tool or plastic pick
- New CR2032 battery (confirm compatibility with your model)
- Magnifying glass or illuminated loupe
- Soft brush or blower for cleaning dust
Identify Your Watch Case Type
Ice Watches typically come in two case back styles: snap-on and screw-down. Knowing which type you have is crucial for safe opening.
| Case Type | How to Identify | Opening Method |
|---|---|---|
| Snap-On | Smooth or notched edge; no visible screws | Use a case knife to gently pry open |
| Screw-Down | Visible grooves or notches around the edge; may have tiny screws | Turn counterclockwise using a proper wrench or tool |
If your model has a screw-down back, never force it. Applying excessive pressure can strip the threads, compromising water resistance. If resistance is felt, double-check the direction—some watches use reverse threading.
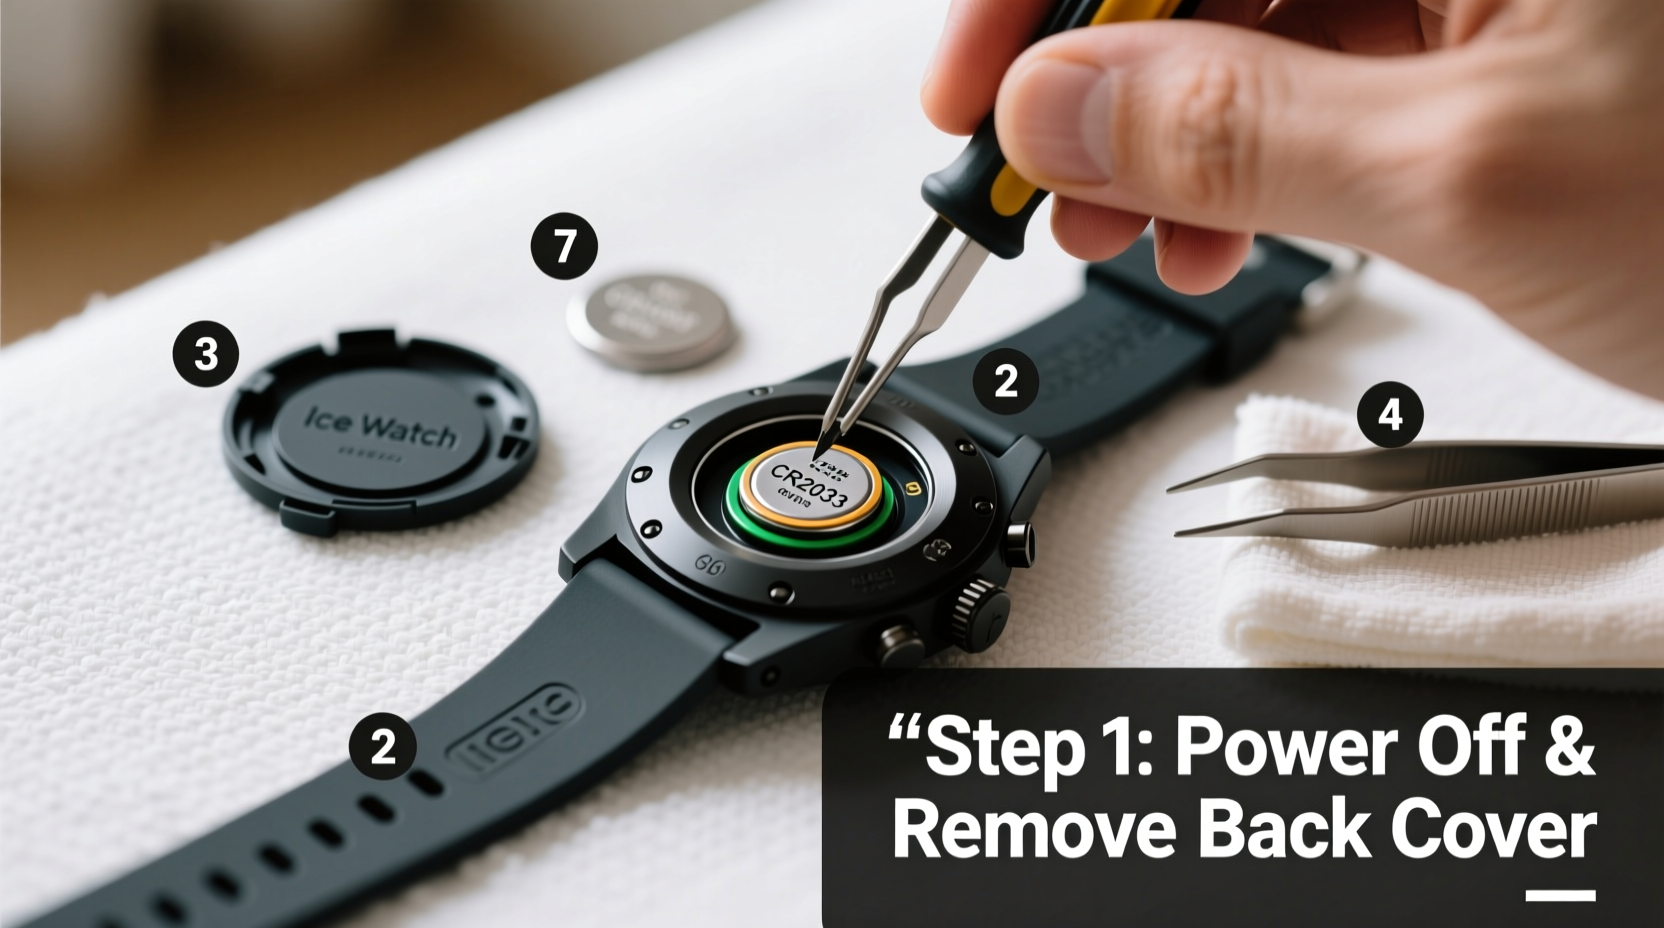
Step-by-Step Battery Replacement Process
- Wash and dry your hands thoroughly, then put on gloves. Skin oils can transfer to the movement and attract dust.
- Place the watch face-down on the microfiber cloth. Ensure stability before proceeding.
- Open the case back carefully. For snap-on backs, insert the case knife into the notch and apply gentle, even pressure. Rotate around the edge until the back releases. For screw-down types, align the wrench and turn slowly counterclockwise.
- Inspect the interior. Look for signs of moisture, corrosion, or debris. If you see condensation or rust, stop immediately—the watch likely needs professional servicing.
- Locate the battery. In most Ice Watch models, it’s held under a small metal cover secured by a clip or screw. Remove the fastener using the appropriate tool.
- Remove the old battery. Use plastic tweezers or a plastic pick to lift it out. Never use metal tools directly on the battery to avoid shorting the circuit.
- Clean the battery compartment lightly with a dry brush. Do not use liquids or solvents.
- Insert the new CR2032 battery, ensuring the positive side (+) faces up unless specified otherwise by the movement markings.
- Reattach the battery cover and securing clip or screw. Make sure it’s snug but not overtightened.
- Check that the watch starts. Most quartz watches begin ticking within seconds. If not, recheck battery orientation and contact points.
- Re-seal the case back. For snap-on cases, align the back and press evenly around the edges until it clicks. For screw-down backs, turn clockwise until tight but not forced.
Real Example: Sarah’s DIY Success Story
Sarah, a graphic designer from Portland, noticed her Ice Watch stopped after 18 months. Instead of paying $30 for a battery swap at a kiosk, she decided to try it herself. She purchased a $15 tool kit online and followed a methodical approach. “I was nervous about cracking the case,” she said, “but taking my time and watching one tutorial helped me feel confident.” Her watch restarted immediately, and she saved money while gaining a new skill. A year later, she’s replaced batteries on three other fashion watches with no issues.
Expert Insight on DIY Watch Maintenance
“With the right technique, changing a watch battery at home is perfectly safe—even for beginners. The key is patience and using proper tools. Rushing or using makeshift tools like knives or pliers often leads to costly damage.” — Daniel Ruiz, Certified Watch Technician & Horology Instructor
Do’s and Don’ts When Changing Your Ice Watch Battery
| Do’s | Don’ts |
|---|---|
| Use gloves and a lint-free cloth | Touch the movement with bare fingers |
| Double-check battery polarity | Force the case back open or closed |
| Work in a dust-free environment | Use metal tweezers near the battery |
| Test the watch before final sealing | Expose the watch to water immediately after |
| Label and organize small parts | Work on carpeted floors (static risk) |
Frequently Asked Questions
Can I damage my Ice Watch by changing the battery myself?
Yes, if done incorrectly. Using metal tools, applying too much force, or contaminating the movement with oils can cause permanent damage. However, with proper tools and care, the risk is minimal. Most Ice Watch owners successfully replace batteries at home without issues.
How often should I replace the battery in my Ice Watch?
Typically every 18 to 24 months, depending on usage and battery quality. Signs include the second hand jumping in two-second intervals (end-of-life indicator), slow timekeeping, or complete stoppage. Replace promptly to avoid potential leakage from a dead battery.
Is my Ice Watch still water-resistant after I open the case?
Possibly not. Opening the case can displace or damage the rubber gasket responsible for water resistance. Unless you replace or lubricate the gasket and test the seal professionally, assume your watch is no longer waterproof. Avoid swimming or showering with it post-replacement.
Final Checklist Before You Begin
- ✅ Confirm your Ice Watch model and battery type (usually CR2032)
- ✅ Purchase the correct replacement battery (lithium, 3V)
- ✅ Acquire a proper case back tool—not a flathead screwdriver
- ✅ Work in a clean, dry, well-lit area
- ✅ Wear gloves and keep tweezers and tools ready
- ✅ Take photos during disassembly for reference
- ✅ Test the watch after battery insertion but before sealing
Conclusion: Confidence Through Care
Changing your Ice Watch battery at home is a simple, cost-effective task when approached with care and the right tools. By understanding your watch’s design, respecting its delicate internals, and following a clear procedure, you preserve both functionality and aesthetics. Many people avoid DIY repairs out of fear—but with practice, this skill becomes second nature. Not only do you save time and money, but you also deepen your appreciation for the craftsmanship behind even the most affordable timepieces.


 浙公网安备
33010002000092号
浙公网安备
33010002000092号 浙B2-20120091-4
Comments
No comments yet. Why don't you start the discussion?