
Opening an iPhone 7 may seem intimidating, but with the right tools, preparation, and methodical approach, it’s a manageable task even for intermediate DIYers. Whether you're replacing a cracked screen, swapping out a worn battery, or cleaning internal components, doing it correctly ensures your device remains functional and safe. This comprehensive guide walks you through every stage of opening the iPhone 7—safely, efficiently, and without causing unnecessary damage.
Essential Tools and Preparation
Before touching any screw or connector, ensure you have the correct tools. Using improper equipment can strip screws, crack glass, or damage delicate ribbon cables. The iPhone 7 uses proprietary hardware, so standard household tools won’t suffice.
- Pentalobe P2 screwdriver – For removing the two bottom screws on the exterior.
- Phillips #000 screwdriver – Used internally for various small screws.
- Plastic pry tools or spudgers – To separate adhesive-sealed components without scratching.
- Suction cup – Helps lift the display from the frame after loosening adhesive.
- iOpener or heat gun – Softens the strong adhesive around the display.
- Tweezers (anti-static) – For handling small connectors and screws.
- Case opener (optional) – A plastic card designed specifically for prying open iPhones.
Power off your iPhone completely before beginning. This prevents accidental short circuits and protects sensitive circuitry during disassembly.
Step-by-Step Disassembly Process
Follow this sequence carefully. Rushing or skipping steps increases the risk of irreversible damage.
- Apply heat to the lower edge – Use an iOpener heated in the microwave for 30–60 seconds, or a low-heat setting on a hairdryer. Warm the area around the home button for 60–90 seconds to soften the adhesive.
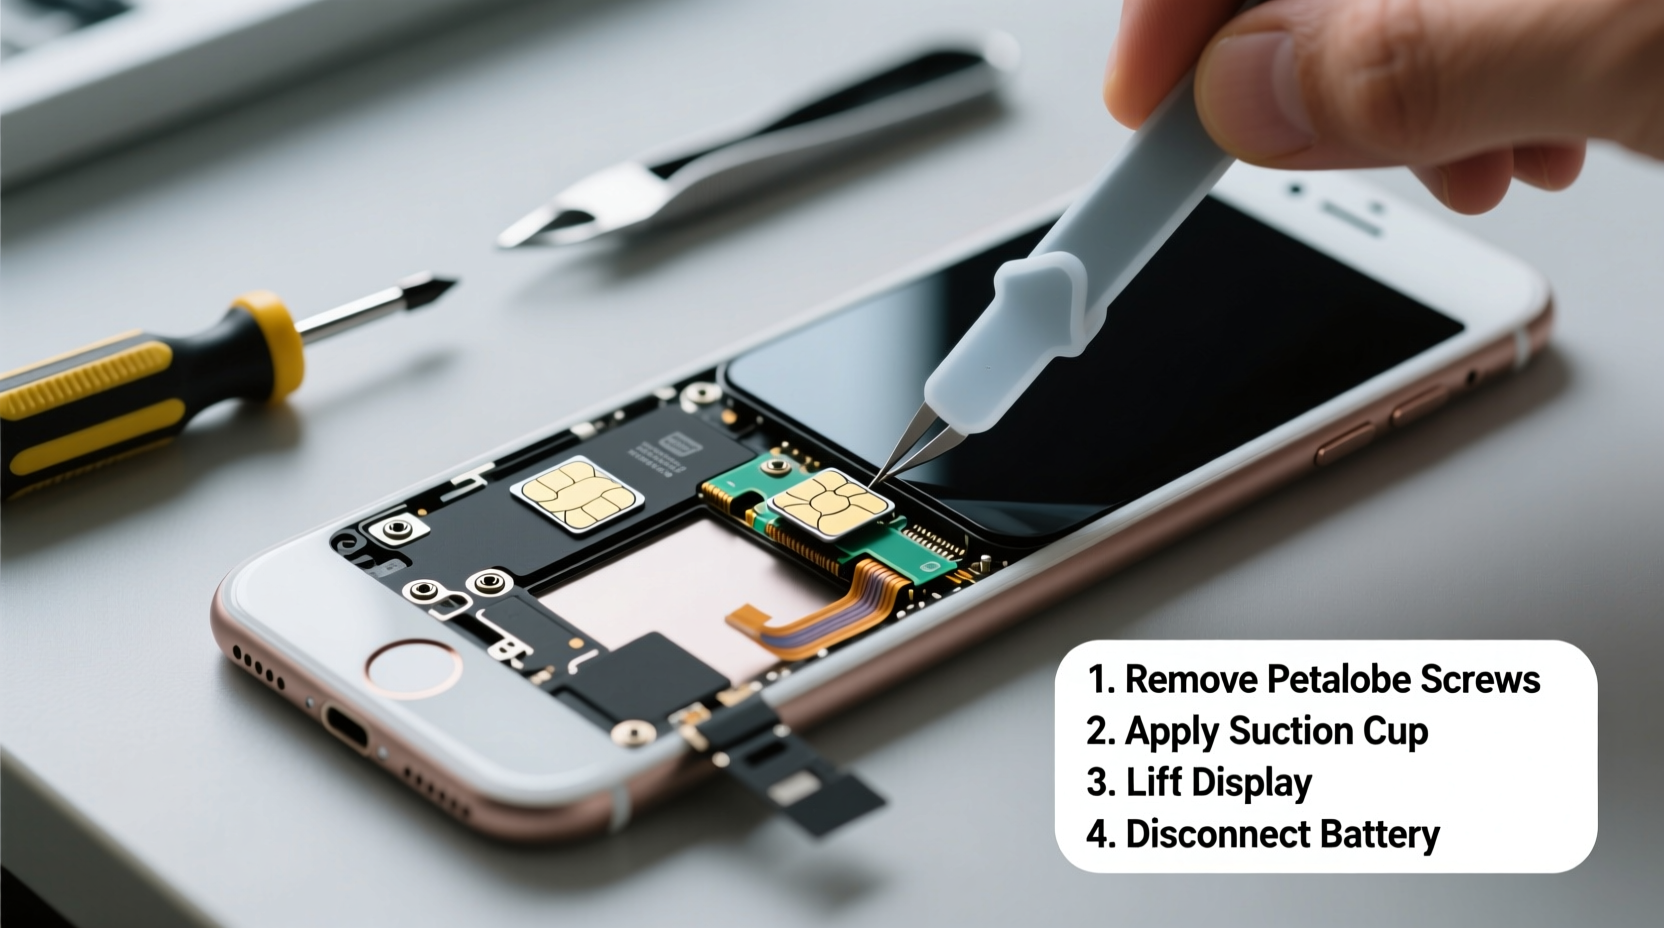
- Remove the pentalobe screws – Use the P2 pentalobe screwdriver to remove the two screws located on either side of the Lightning port.
- Attach the suction cup – Place it just above the home button. Gently pull upward while inserting a plastic pry tool into the gap between the front panel and rear case.
- Separate the display – Slide the tool along the left or right edge to break the adhesive seal. Avoid going too deep near the top edges to prevent damaging the front-facing camera or sensor array.
- Prop open the display – Once loose, prop the screen at about a 90-degree angle using a rubber band or stand to relieve tension on internal cables.
- Disconnect the battery – Before disconnecting anything else, locate the battery connector on the logic board and use a spudger to gently lift it. This eliminates electrical risk.
- Remove display connectors – Three connectors link the display to the logic board. Use the spudger to disconnect each one: digitizer, display data, and front camera/sensor cable.
- Lift the display assembly – With all connectors detached, carefully set the screen aside on a soft cloth, hinge-side down.
Internal Access and Component Handling
With the display removed, you now have access to the core components: logic board, battery, cameras, speakers, and more. Exercise caution—many parts are secured with tiny screws and connected via fragile ribbons.
To reach deeper components like the battery or rear camera:
- Remove the metal shield covering the battery connector using a Phillips #000 screwdriver.
- Carefully disconnect additional cables such as the rear camera, speaker, and wireless charging coil (if applicable).
- Use isopropyl alcohol (90%+) and a lint-free swab to clean corrosion or grime from contact points.
If replacing the battery, apply gentle, steady force to peel it from the adhesive lining. Never puncture or bend the battery—this could lead to fire or chemical leakage.
“Even experienced technicians recommend disconnecting the battery first. It’s the single most effective way to prevent costly shorts.” — David Lin, Mobile Repair Technician with 12 years of field experience
Do’s and Don’ts During iPhone 7 Disassembly
| Do’s | Don’ts |
|---|---|
| Work slowly and deliberately | Rush the process or force components |
| Label and organize screws | Mix screws from different areas |
| Use proper ESD-safe tools | Use metal tools near exposed circuitry |
| Reconnect battery only at final reassembly | Test functionality with battery connected prematurely |
| Take photos before disconnecting cables | Assume all connectors are identical |
Real-World Example: Battery Replacement Gone Right
Mark, a freelance photographer from Portland, noticed his iPhone 7 was shutting down unexpectedly at 30% charge. Instead of paying $79 at a service center, he decided to replace the battery himself. He followed a structured disassembly process, documented each step with photos, and used a high-quality third-party battery kit with adhesive strips. After two hours of careful work, his phone regained full capacity and lasted through long shooting days again. More importantly, because he disconnected the battery early and avoided excessive heat, no components were damaged. His total cost? Under $20.
This example shows that with patience and precision, users can extend their device's lifespan significantly—without relying on expensive official services.
Frequently Asked Questions
Can I reuse the display adhesive after opening the iPhone 7?
It’s not recommended. The original adhesive loses its effectiveness once peeled. Always replace it with new adhesive strips or apply a quality double-sided tape designed for smartphones.
Will opening my iPhone 7 void the warranty?
If your device is still under Apple’s warranty (typically one year), yes—any unauthorized disassembly voids coverage. However, if your iPhone is older than three years, warranty is likely expired, making DIY repair a cost-effective option.
What should I do if the screen cracks during removal?
If cracking occurs, stop applying pressure immediately. Continuing could damage underlying sensors or LCD. Consider pausing the repair and sourcing a replacement display. In some cases, minor edge cracks don’t affect function, but structural integrity is compromised.
Final Checklist Before Closing Up
After completing your repair or maintenance, verify the following before reassembling:
- Battery is securely seated and adhered.
- All connectors are properly reattached and latched.
- Shielding screws are returned to correct positions.
- No dust or debris remains inside the chassis.
- Display alignment is flush with the frame.
- Home button and touchscreen respond accurately.
Once everything checks out, gently press the display back into place, ensuring the perimeter adhesive bonds well. Allow 2–4 hours for full adhesion before exposing the phone to moisture or drops.
Conclusion
Opening an iPhone 7 safely is within reach for anyone willing to invest time and attention to detail. By using the correct tools, respecting the internal layout, and following a logical sequence, you gain control over your device’s longevity and performance. From saving money on repairs to reducing electronic waste, the benefits of responsible DIY maintenance are clear. Take pride in knowing exactly what goes into your phone—and how to care for it properly.


 浙公网安备
33010002000092号
浙公网安备
33010002000092号 浙B2-20120091-4
Comments
No comments yet. Why don't you start the discussion?