
Working with your home’s electrical system requires precision, respect for safety protocols, and a clear understanding of the components involved. One of the most common tasks homeowners or DIYers may consider is removing or replacing a circuit breaker. Whether you're upgrading an outdated unit, troubleshooting a faulty circuit, or installing a new appliance that demands a dedicated line, knowing how to safely pull a breaker from your electrical panel is crucial. Done incorrectly, this task can lead to electric shock, fire hazards, or permanent damage to your electrical system.
This comprehensive guide walks through each phase of safely removing a circuit breaker—emphasizing preparation, correct technique, and post-removal checks. While the process may seem straightforward, even experienced individuals must follow strict safety measures to prevent injury or equipment failure.
Understanding Your Electrical Panel and Breaker Types
Before attempting to remove any breaker, it's essential to understand what you're working with. Most residential panels use either plug-in type breakers (common in brands like Square D, Siemens, or GE) or bolt-on models (often found in larger service panels). The method for removal varies slightly depending on the brand and model, but all require disengaging the breaker from both the bus bar (the live power source) and the neutral/ground rail.
Single-pole breakers typically handle 120-volt circuits and occupy one slot, while double-pole breakers manage 240-volt appliances (like dryers or HVAC systems) and span two adjacent slots. Identifying the correct breaker type ensures compatibility during reinstallation or replacement.
“Never assume all breakers are interchangeable. Using the wrong model can cause arcing, overheating, or failure to trip under fault conditions.” — James Langston, Master Electrician & NEC Consultant
Essential Safety Precautions Before Starting
Safety is non-negotiable when dealing with live electrical components. Even if you plan to shut off the main power, residual current and incorrect assumptions can be deadly. Follow these critical precautions:
- Turn off the main breaker – This cuts power to the entire panel, eliminating the risk of contact with live bus bars.
- Verify power is off using a non-contact voltage tester – Test both the main lugs and individual breakers to confirm no voltage is present.
- Wear insulated gloves and safety glasses – Protect yourself from accidental arcs or debris.
- Use only insulated tools – Screwdrivers and pliers should have rubber-coated handles rated for electrical work.
- Work with a partner nearby – In case of emergency, having someone close who can cut power or call for help is vital.
Remember: The outer cover of the panel protects against accidental contact, but once removed, internal components—even downstream of the main breaker—can still carry dangerous voltages if utility power remains connected. Always treat every wire as potentially live until proven otherwise.
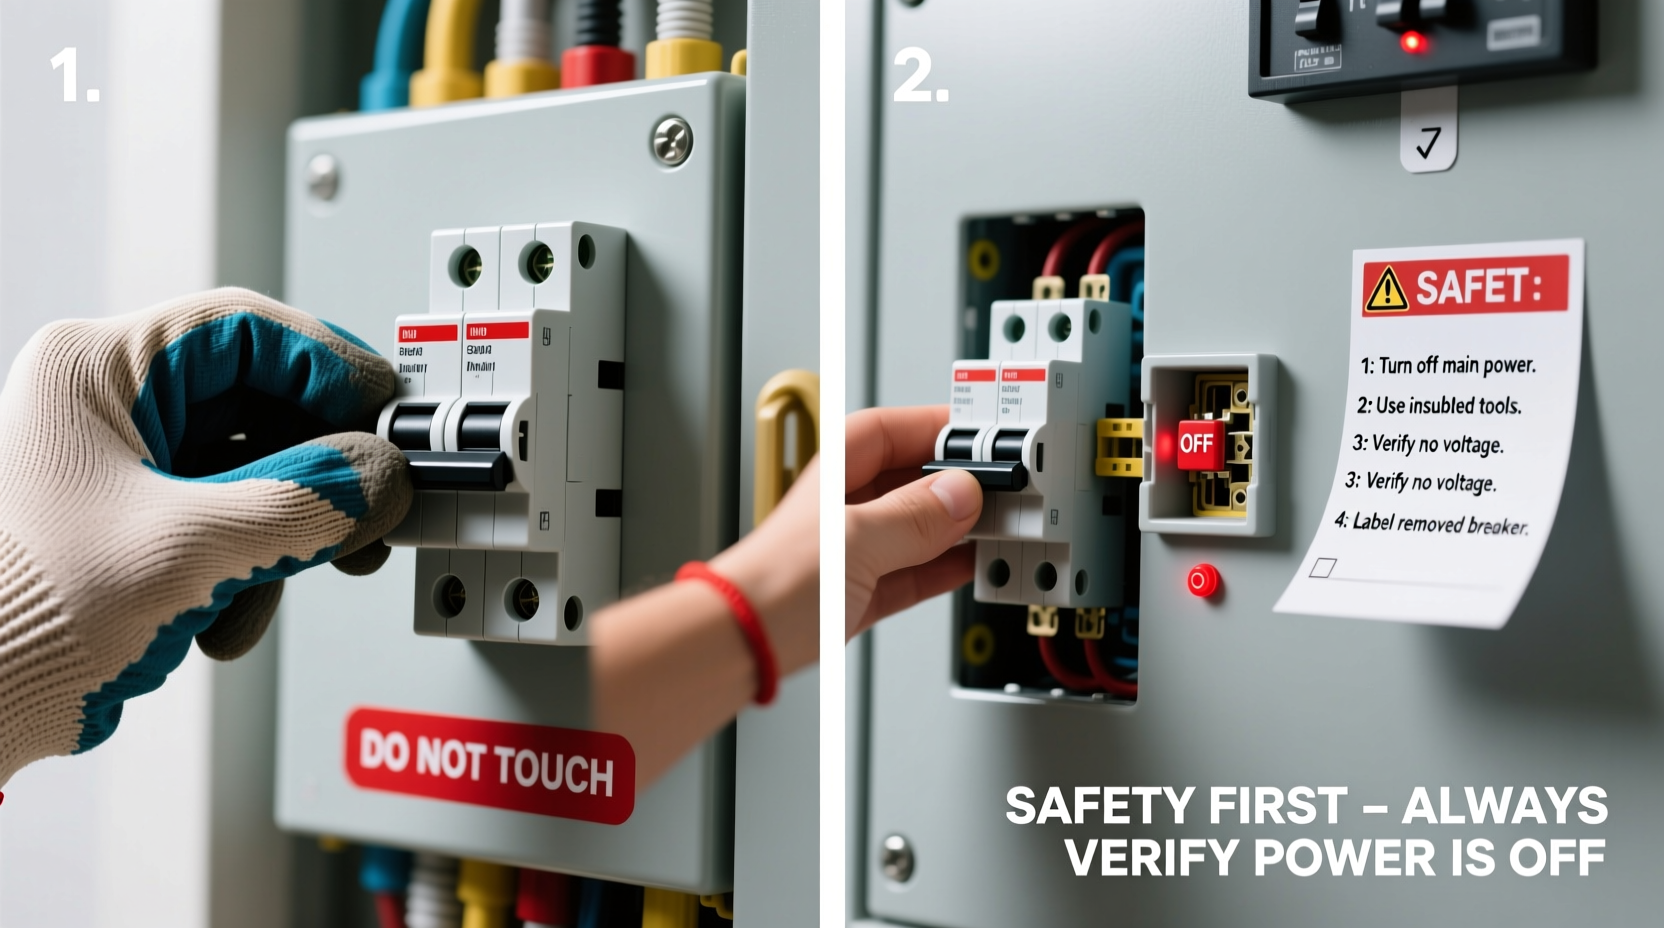
Step-by-Step Guide to Safely Remove a Circuit Breaker
Follow this sequence carefully to ensure safe and effective removal of a breaker without damaging the panel or risking personal injury.
- Shut off the main circuit breaker. Locate the large double-pole switch at the top or bottom of the panel and flip it to the OFF position.
- Remove the panel cover. Unscrew the metal cover plate securing the interior components. Set screws aside safely.
- Test for voltage. Use a non-contact voltage detector along the bus bar and each wire terminal. No lights or sounds should indicate presence of voltage.
- Disconnect the circuit wire. Loosen the screw terminal on the breaker where the hot wire (usually black or red) is attached. Gently pull the wire free and insulate it with a wire nut or tape.
- Release the breaker from the bus bar. For most plug-in breakers, grasp the body firmly and tilt the front end away from the bus bar. Then, lift the clip at the rear to disengage it from the mounting rail.
- Inspect the bus bar for damage. Look for signs of arcing, pitting, or discoloration. If present, consult a licensed electrician before proceeding.
- Label and store the removed breaker. Note its amperage, brand, and position for reference during replacement.
Reinstalling a breaker follows the reverse process: align the back tab, snap into place, reconnect the wire, and restore power after verifying all connections are secure.
Common Mistakes and What to Avoid
Even minor errors can compromise safety or functionality. Below is a comparison of recommended practices versus common pitfalls.
| Do’s | Don’ts |
|---|---|
| Always de-energize the main supply before opening the panel | Never work on a live panel—even if you’re “just pulling one out” |
| Use breakers approved for your panel brand (e.g., Square D QO breakers only in QO panels) | Don’t force incompatible breakers into slots (“slam switches”) |
| Torque terminal screws to manufacturer specifications | Avoid over-tightening, which can crack breaker housing |
| Double-check wire gauge matches breaker rating (e.g., 14-gauge for 15A) | Don’t reuse damaged or frayed wires |
Real-World Scenario: A Homeowner’s Close Call
Mark, a homeowner in Portland, attempted to replace a tripping 20-amp breaker without turning off the main power. Believing that switching off the individual breaker was sufficient, he began loosening the wire. As his screwdriver slipped, it bridged the gap between the hot terminal and the grounded panel box, causing a violent arc flash. The blast melted part of the tool and tripped the utility transformer, leaving his neighborhood without power for 20 minutes.
Thankfully, Mark was wearing safety glasses and suffered only minor burns. Afterward, an electrician explained that the bus bar remained energized despite the individual breaker being off. This real incident underscores why full panel de-energization is mandatory—not optional.
Frequently Asked Questions
Can I remove a breaker without turning off the main power?
No. The bus bar inside the panel remains live even when individual breakers are switched off. Removing a breaker without shutting down the main supply risks severe electric shock or arc flash. Always turn off the main breaker first.
How do I know which breaker I need to replace?
Check the amperage rating (e.g., 15A, 20A), pole count (single or double), and manufacturer label. Match these exactly when purchasing a replacement. Never substitute a different brand unless listed as compatible by the panel maker.
Is it legal for homeowners to replace their own breakers?
In many jurisdictions, yes—provided the work complies with the National Electrical Code (NEC) and local regulations. However, modifications to the panel often require permits and inspections. When in doubt, hire a licensed electrician.
Final Checklist Before You Begin
- ✅ Main breaker is turned OFF
- ✅ Voltage tested and confirmed dead
- ✅ Insulated gloves and safety glasses worn
- ✅ Correct replacement breaker on hand (if applicable)
- ✅ Panel diagram or labels available
- ✅ Fire extinguisher (Class C) nearby
- ✅ Someone else aware you’re working on the panel
Conclusion
Removing a circuit breaker is a manageable task when approached with caution, proper tools, and adherence to electrical safety standards. Every step—from cutting power to inspecting the bus bar—plays a role in preventing accidents and ensuring long-term reliability of your home’s electrical system. While DIY repairs can save time and money, they also carry responsibility. If at any point you feel uncertain, pause and consult a certified electrician.


 浙公网安备
33010002000092号
浙公网安备
33010002000092号 浙B2-20120091-4
Comments
No comments yet. Why don't you start the discussion?