
Replacing a cracked or malfunctioning screen on your ASUS smartphone doesn’t always require a trip to the repair shop. With the right tools, patience, and attention to detail, you can perform this repair at home and save both time and money. While the process may seem intimidating, especially if it’s your first time, following a structured approach minimizes risks and increases the chances of success. This comprehensive guide walks you through every phase—from preparation to final reassembly—ensuring your device is restored safely and efficiently.
Gather the Right Tools and Replacement Parts
The foundation of any successful screen replacement lies in proper preparation. Using incorrect or low-quality tools can lead to further damage, such as broken connectors, scratched frames, or misaligned components. Before starting, ensure you have all necessary items on hand.
- Precision screwdriver set (including Phillips #000 and P2)
- Plastic pry tools or guitar picks
- Suction cup (small, for lifting the screen)
- Tweezers (fine-tipped, anti-static preferred)
- Heat gun or hairdryer (for softening adhesive)
- Replacement screen (OEM or high-quality aftermarket)
- Cleaning wipes and microfiber cloth
- Double-sided adhesive tape or glue strips (if not pre-applied)
- Spudger or plastic opening tool
Order your replacement screen from a reputable supplier that lists compatibility with your exact ASUS model (e.g., ZenFone 8, ROG Phone 5, etc.). Confirm whether the part includes the front glass, digitizer, and LCD as a complete module. Integrated assemblies simplify installation and reduce alignment errors.
Prepare Your Workspace and Device
A clean, organized environment is essential. Static electricity, dust, and clutter can compromise sensitive internal components. Choose a well-lit, non-carpeted area with a large, flat surface.
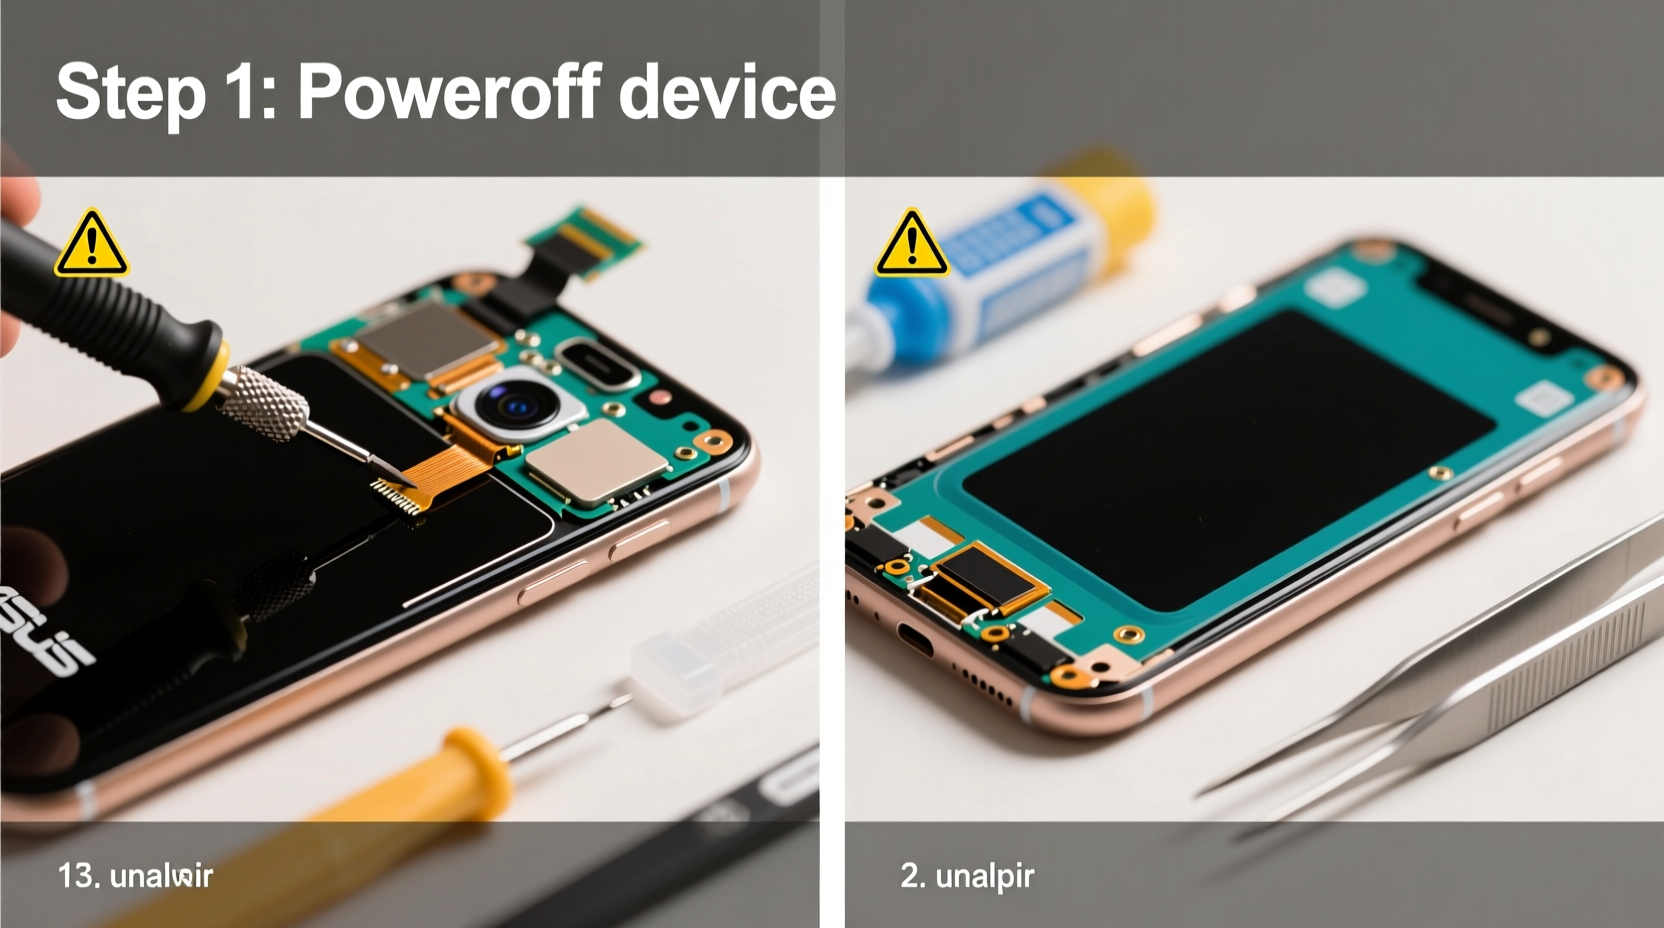
- Power off the phone completely. Hold the power button and select “Power off.” Wait 30 seconds after shutdown.
- Remove the SIM tray and any external case. Use the eject tool to gently release the tray.
- Ground yourself. Touch a metal object like a faucet to discharge static, or wear an anti-static wrist strap if available.
- Organize screws. Use a magnetic mat or labeled container to keep track of tiny screws by location.
Step-by-Step Screen Replacement Process
This sequence applies to most modern ASUS smartphones with glued-on displays. Proceed slowly—rushing increases the risk of cracking the chassis or damaging ribbon cables.
1. Apply Heat to Loosen Adhesive
Use a heat gun or hairdryer on low setting to warm the edges of the screen for 60–90 seconds. Move in circular motions to distribute heat evenly. The goal is to soften the adhesive without overheating the battery or frame.
2. Attach the Suction Cup and Create a Gap
Place the suction cup near the bottom edge of the screen. Gently pull upward while inserting a plastic pry tool into the seam. Work around the perimeter, separating the display from the frame. Avoid prying near the charging port or camera module.
3. Remove the Old Screen
Once the front panel is loose, carefully lift it at a 45-degree angle. Do not detach it fully yet—several ribbon cables connect the display to the motherboard. Use tweezers or a spudger to disconnect the digitizer, display, and possibly front camera cables from their sockets. Lift straight up using even pressure; do not twist.
4. Transfer Components (If Necessary)
Some models require moving components like the earpiece speaker, ambient light sensor, or front-facing camera from the old screen to the new one. If your replacement is a full assembly, this step may be unnecessary. When transferring, use tweezers and avoid touching sensors directly.
5. Install the New Screen
Align the new screen and gently press it into place. Reconnect each cable securely, ensuring they click into their respective connectors. Close the retaining flaps over the connectors to lock them in place.
6. Test Before Final Assembly
Power on the phone before reapplying adhesive or screws. Check for:
- Display backlight and color accuracy
- Touch responsiveness across the entire surface
- Proximity sensor function during calls
- Front camera operation
7. Secure the Display
Apply new adhesive strips around the bezel or use double-sided tape. Press the screen firmly into place, holding it for 30 seconds to ensure bonding. Wipe excess residue with isopropyl alcohol on a cotton swab.
8. Reassemble and Final Check
Replace all screws in their original positions. Reinsert the SIM tray and power on the device one last time. Perform a full touchscreen calibration test using a drawing app or grid-based diagnostic tool.
| Do’s | Don’ts |
|---|---|
| Work slowly and methodically | Rush the heating or prying process |
| Label screws by location | Mix screws from different areas |
| Test functionality before sealing | Close the device with unverified connections |
| Use OEM-compatible parts | Force connectors that don’t align |
Expert Insight and Real-World Example
“DIY screen repairs are more viable than ever, but precision matters. One misaligned connector can disable touch input permanently.” — Carlos Mendez, Mobile Repair Technician with 12 years of experience
Mini Case Study: Sarah, a college student in Portland, dropped her ASUS ZenFone 9 on tile flooring, shattering the screen. Rather than pay $180 at a local shop, she ordered a $65 OEM-grade replacement online. After watching two tutorial videos and preparing her toolkit, she completed the repair in under two hours. By testing connectivity before reassembly, she caught a loose digitizer cable early. Her total cost: $72. Device lifespan extended by over a year.
Frequently Asked Questions
Can I damage my phone beyond repair while replacing the screen?
Yes, though rare with careful handling. Risks include breaking the battery tab, tearing flex cables, or introducing dust under the display. Following each step deliberately reduces these dangers significantly.
Will water resistance be preserved after a DIY screen replacement?
Most ASUS phones have limited water resistance to begin with, and removing the screen typically breaks the original seal. Even with new adhesive, IP ratings cannot be guaranteed post-repair. Avoid submerging the device after replacement.
How long should a screen replacement take for a beginner?
Allow 2–3 hours for your first attempt. Familiarity with small electronics helps, but patience is more important than speed. Rushing increases error rates.
Final Checklist Before You Begin
- ✅ Phone model confirmed and compatible screen purchased
- ✅ All tools gathered and workspace prepared
- ✅ Battery charged to 30–50% (reduces fire risk if punctured)
- ✅ Backup made of important data (in case of unexpected failure)
- ✅ Time scheduled with no interruptions
Conclusion
Replacing an ASUS phone screen at home is a practical skill that empowers users to maintain their devices independently. With clear instructions, quality parts, and a steady hand, what once seemed complex becomes manageable. Not only does this repair extend your phone’s usability, but it also fosters a deeper understanding of its inner workings. Millions of people successfully perform similar fixes every year—there’s no reason you can’t join them.


 浙公网安备
33010002000092号
浙公网安备
33010002000092号 浙B2-20120091-4
Comments
No comments yet. Why don't you start the discussion?