
Integrating still images into video content is a powerful way to enhance storytelling, emphasize key points, or break up visual monotony. Whether you're creating a documentary, social media reel, tutorial, or corporate presentation, the seamless inclusion of photos can elevate your production value. However, poorly integrated images disrupt flow and appear amateurish. The difference between a polished final product and an unprofessional edit often lies in attention to detail—timing, transitions, scaling, and audio synchronization. This guide walks through the essential steps and techniques to embed pictures smoothly into your videos with consistently professional outcomes.
Choose the Right Editing Software
The foundation of any high-quality video project begins with selecting capable editing software. While basic tools may allow image insertion, advanced features like keyframing, motion effects, and color correction are crucial for seamless integration. Consider your experience level and output needs when choosing a platform.
| Software | Skill Level | Key Features for Image Integration |
|---|---|---|
| Adobe Premiere Pro | Intermediate to Advanced | Advanced keyframing, Lumetri Color, Motion presets |
| Final Cut Pro | Intermediate to Advanced | Smooth Ken Burns effect, magnetic timeline, color grading |
| DaVinci Resolve | Advanced | Fusion compositing, node-based effects, free version available |
| iMovie / CapCut | Beginner | Drag-and-drop, auto-transitions, simple animations |
Prepare Your Images Before Importing
Raw image files straight from cameras or smartphones often require optimization before they fit naturally into a video sequence. Skipping this step leads to mismatched colors, pixelation, or awkward framing.
- Resize and crop images to match your video’s aspect ratio (e.g., 16:9 for YouTube, 9:16 for Instagram Reels).
- Adjust brightness and contrast to align with the overall tone of your footage.
- Remove backgrounds if necessary using tools like Photoshop or remove.bg for cleaner overlays.
- Name files clearly (e.g., “interview_photo_03.jpg”) to streamline organization within the editing timeline.
“Professionalism starts before the first cut. A well-prepared image saves hours of troubleshooting during editing.” — Jordan Lee, Video Post-Production Supervisor
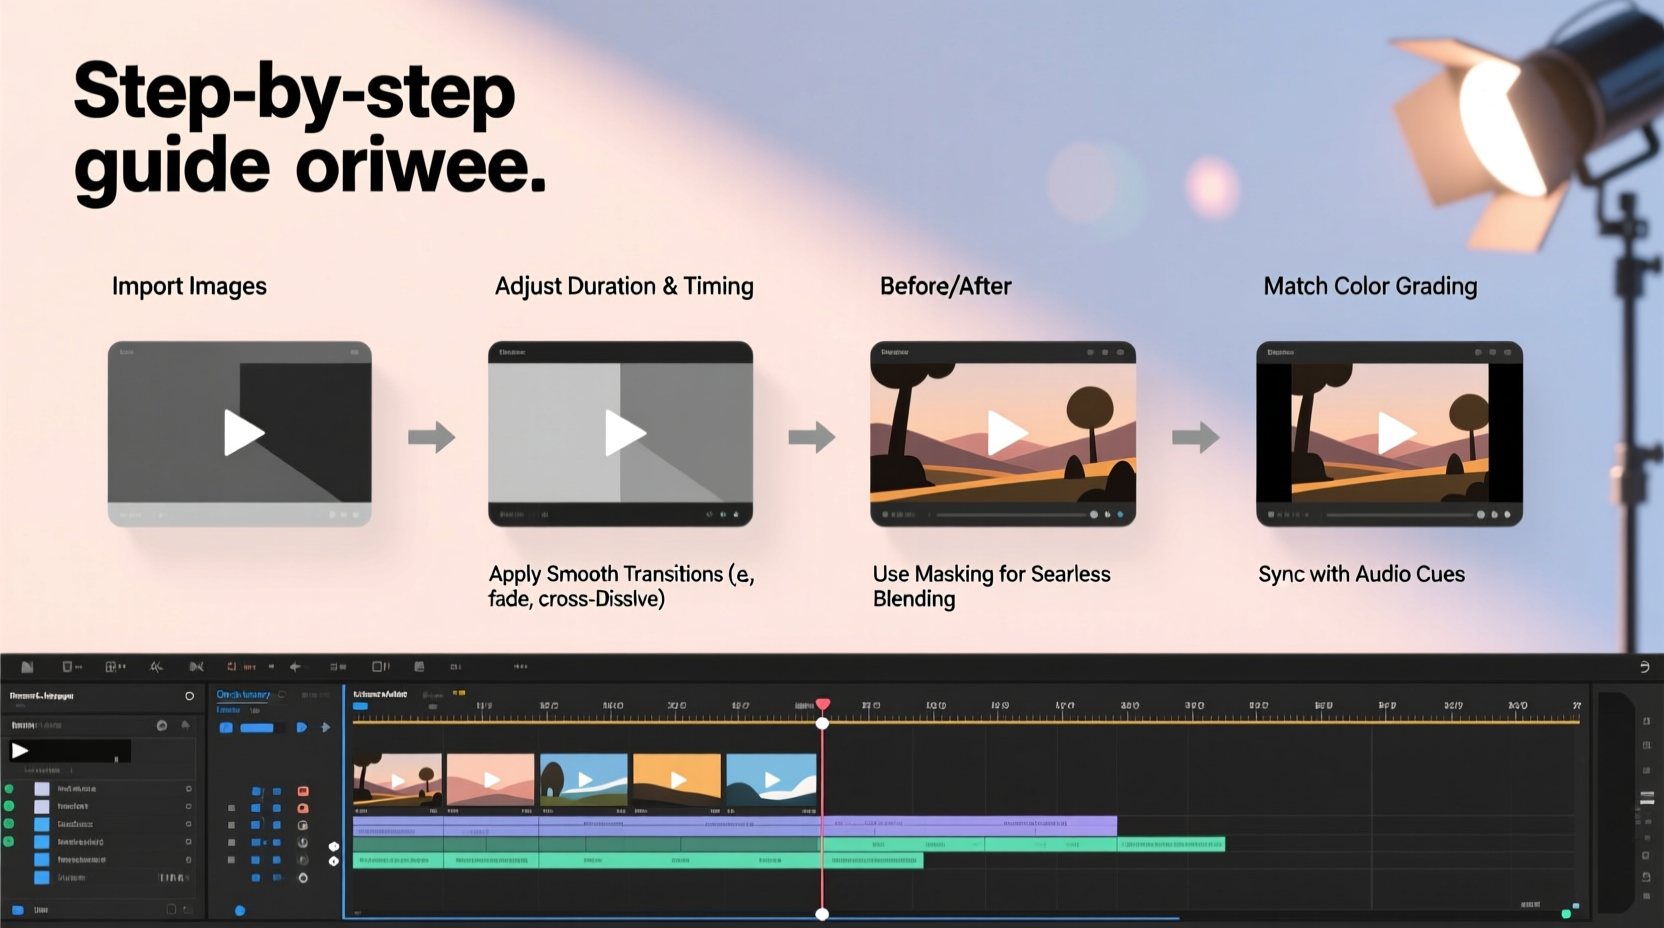
Apply the Ken Burns Effect for Dynamic Movement
Static images on screen can feel lifeless. The Ken Burns effect—a slow zoom and pan across a still photo—creates cinematic movement that mimics camera motion, making stills feel more engaging.
To apply it effectively:
- Import the image into your timeline.
- Select the clip and open the “Motion” or “Transform” settings.
- Set a starting position (e.g., focus on the subject’s face).
- Move forward in the timeline 3–5 seconds, then adjust scale and position to reveal another part of the image.
- Let the software interpolate the movement automatically.
Timing and Duration Guidelines
The length an image stays on screen impacts comprehension and pacing. Too short, and viewers miss details; too long, and engagement drops.
- Simple graphics or text overlays: 3–5 seconds
- Detailed photos (e.g., historical images): 6–8 seconds
- Photos with voiceover narration: Match duration to audio segment
- Fast montages: 1–2 seconds per image with smooth transitions
Create Smooth Transitions Between Clips and Images
A jarring jump from video to photo breaks immersion. Use transitions strategically to maintain continuity.
Effective transition methods include:
- Cross-dissolve: Ideal for emotional sequences or time progression.
- Push or wipe: Works well in educational or technical videos.
- Fade through black/white: Useful for scene changes or dramatic pauses.
- No transition: Acceptable only if lighting and composition are perfectly matched.
Avoid overusing flashy transitions like spin or cube effects—they draw attention to the edit rather than the content.
Overlay Images Without Disrupting Primary Footage
Sometimes, you need to show a photo while maintaining visibility of the main video—such as displaying a document during an interview. Use picture-in-picture (PiP) techniques:
- Place your main video on Video Track 1.
- Add the image to Video Track 2 above it.
- Resize and reposition the image (typically top-right or bottom-left corner).
- Apply a slight drop shadow or border to improve readability.
- Lower opacity slightly (around 90%) if the image competes visually.
Sync Visuals with Audio for Maximum Impact
Pictures gain meaning when timed precisely with narration, music, or sound effects. A photo appearing exactly as a speaker mentions a person or event strengthens retention.
For example, in a travel vlog describing a hike, show the summit photo the moment the narrator says, “And then we reached the peak.” This alignment creates a cohesive sensory experience.
- Use waveform displays to pinpoint exact moments in voiceover.
- Match image entrances with musical beats in montage sequences.
- Add subtle sound effects (e.g., paper shuffle, camera click) to signal photo appearance—sparingly.
“When visuals and sound move in sync, the audience doesn’t notice the technique—they feel the story.” — Lila Chen, Documentary Filmmaker
Checklist: Final Review Before Export
Before rendering your final video, run through this checklist to ensure flawless image integration:
- ✅ All images are high-resolution (minimum 1920x1080 for HD projects)
- ✅ Aspect ratios match the video sequence
- ✅ Ken Burns or motion effects are applied where needed
- ✅ Transitions are consistent and purposeful
- ✅ Image durations allow comfortable viewing
- ✅ Colors are balanced across all clips and stills
- ✅ Picture-in-picture elements don’t obstruct critical content
- ✅ Sync between visuals and audio is precise
Mini Case Study: Historical Documentary Enhancement
A freelance filmmaker was producing a short documentary about 1950s jazz culture. Early cuts relied heavily on archival footage, but gaps existed where no video was available. By integrating high-resolution photographs of musicians, clubs, and album covers using the Ken Burns effect and cross-dissolves, the editor maintained narrative momentum. Each image appeared in sync with voiceover descriptions, and soft piano music played beneath the montages. Test audiences reported feeling “immersed in the era,” crediting the thoughtful use of stills. The final piece was accepted into a regional film festival—proof that well-integrated images can carry significant emotional weight.
FAQ
Can I use low-resolution images if that’s all I have?
You can, but results will suffer. Upscaling tools like Topaz Gigapixel AI may help, but prevention is better. Always source the highest resolution available. If using small images, limit screen time and avoid zooming.
How do I make images look like they belong in the same scene as my video?
Color grade your images to match the video’s temperature, contrast, and saturation. Add subtle grain or vignette if the footage has those characteristics. Matching lighting direction (e.g., shadows from the left) also improves believability.
Is it okay to use copyrighted images?
No, unless you have explicit permission or a license. Use royalty-free platforms like Unsplash, Pexels, or Adobe Stock. For historical or editorial content, verify fair use guidelines in your country.
Mastery Through Precision
Seamlessly adding pictures to videos isn’t about complexity—it’s about intentionality. Every decision, from file preparation to exit timing, contributes to the viewer’s perception of quality. When done right, the audience never notices the edits; they only feel the impact of the story. Modern editing tools make these techniques accessible to everyone, but discipline and attention to detail separate good videos from exceptional ones.


 浙公网安备
33010002000092号
浙公网安备
33010002000092号 浙B2-20120091-4
Comments
No comments yet. Why don't you start the discussion?