
Tassels have become more than just decorative accents—they're personal statements. When attached to a car hanging, such as an air freshener, lucky charm, or spiritual emblem, a tassel adds elegance and flair. However, if not properly secured, a loose tassel can become a distraction, pose a safety risk during sudden stops, or even damage interior surfaces. This guide walks through the practical, safe, and stylish way to attach a tassel to any car hanging, ensuring it enhances your vehicle’s ambiance without compromising safety.
Why Secure Attachment Matters
A dangling tassel might seem harmless, but in a moving vehicle, even small objects can shift unpredictably. During rapid deceleration or sharp turns, loosely fastened accessories can swing into the driver’s line of sight or interfere with controls. Additionally, constant movement may cause wear on attachment points, eventually leading to breakage or detachment.
Beyond safety, a well-secured tassel maintains its aesthetic appeal. A neatly fixed tassel flows gracefully rather than flailing chaotically. The goal is to balance visual charm with structural reliability.
Materials You’ll Need
The right tools make all the difference. Below is a checklist of recommended materials based on durability and ease of use.
- Car hanging (e.g., rearview mirror charm, air freshener, religious symbol)
- Tassel (fabric, silk, or synthetic fiber)
- Mini key ring or split ring (5–8mm diameter)
- Jump ring pliers (optional but helpful)
- Strong thread or thin nylon cord (if reattaching)
- Lighter or fray check solution (for synthetic fibers)
- Clear nail polish or fabric glue (for sealing ends)
- Scissors
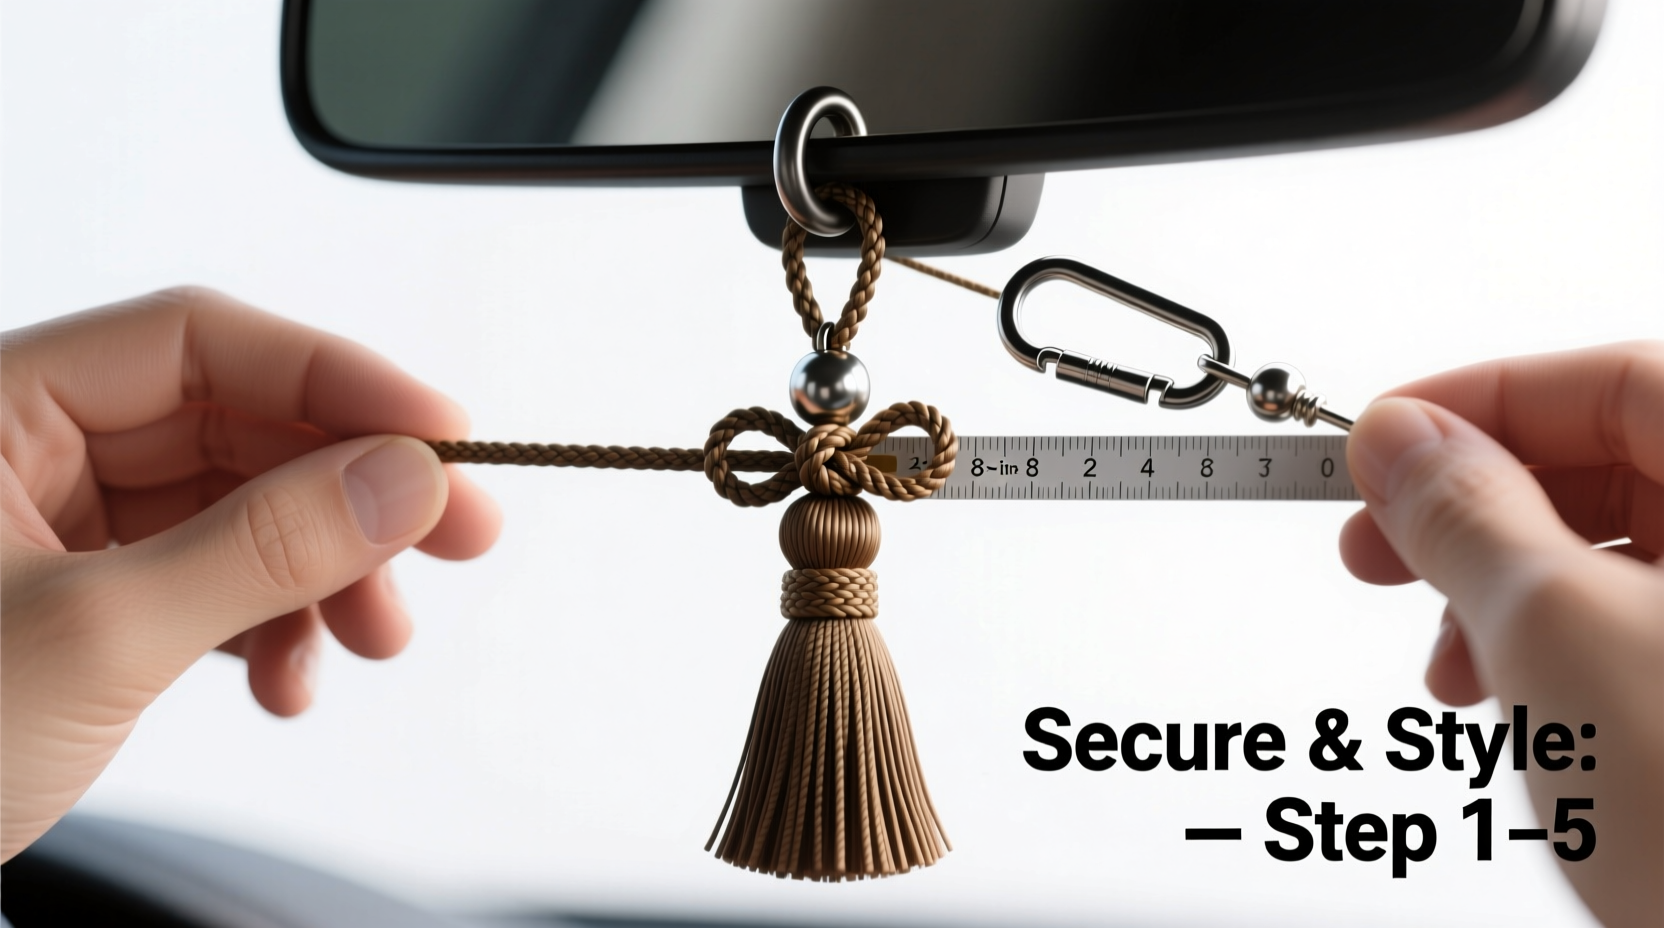
Step-by-Step Guide to Attaching the Tassel
- Evaluate the Hanging Mechanism
Inspect how your current car hanging is attached. Most use a loop, clasp, or key ring. Determine whether you can integrate the tassel directly or need an intermediary connector like a jump ring. - Prepare the Tassel
If the tassel lacks a built-in loop or metal ring, create one. Thread a strong nylon filament through the top cap of the tassel and tie a secure double knot. Seal the knot with a drop of fabric glue or clear nail polish to prevent unraveling. - Trim and Seal Loose Ends
Use scissors to neaten any uneven strands. For synthetic tassels, lightly pass the cut end over a flame (briefly) to prevent fraying—do this in a ventilated area and away from flammable materials. - Select the Attachment Point
Decide where the tassel will hang relative to the main charm. Common positions include:- Below the primary pendant (most balanced)
- Alongside, using a secondary ring (for symmetry)
- Integrated into the top loop (minimalist look)
- Connect Using a Jump Ring or Key Ring
Open the jump ring with pliers by twisting sideways (not pulling apart). Slide both the tassel’s loop and the hanging’s attachment point onto the ring. Close securely by reversing the twist motion. If using a key ring, simply snap it closed after threading. - Test for Stability
Gently tug on the tassel and shake the entire assembly. There should be no slippage or wobbling. Ensure the added weight doesn’t tilt the main charm forward into the driver’s view. - Final Placement Check
Hang the item on your rearview mirror. Sit in the driver’s seat and verify that nothing obstructs vision, especially when looking up at traffic lights or checking mirrors.
Do’s and Don’ts: Tassel Attachment Safety Table
| Do’s | Don’ts |
|---|---|
| Use lightweight tassels made of silk or rayon | Attach heavy wooden or metallic tassels |
| Secure knots with fabric glue | Leave raw, frayed ends exposed |
| Position tassel below eye level when seated | Allow tassel to sway into windshield view |
| Check monthly for wear or loosening | Forget to inspect after long drives or rough roads |
| Choose colors that complement your interior | Use excessively bright or reflective tassels at night |
Real Example: Maria’s Commute Upgrade
Maria, a graphic designer in Austin, wanted to add a bohemian touch to her daily commute. She purchased a handmade dreamcatcher-style air freshener with a delicate cream tassel. After attaching it directly with thread, she noticed it began unraveling within days. Worse, during a sudden stop, the tassel swung upward and momentarily blocked her view.
She revisited the setup using a 6mm silver jump ring and sealed nylon thread. She shortened the tassel slightly and glued each knot. The new version stayed secure through months of city driving, including bumpy backroads and high-speed highways. “It looks better and feels safer,” she said. “Now I don’t cringe every time I brake.”
“Vehicle decor should never compromise visibility or control access. A tassel can enhance ambiance only if it’s engineered for motion.” — David Lin, Automotive Interior Safety Consultant
Frequently Asked Questions
Can I attach a tassel to any type of car hanging?
Most car hangings can accommodate a tassel, provided the attachment point is sturdy. Avoid items with weak plastic loops or adhesive mounts. If necessary, reinforce the connection with a metal ring or replace the original hanger with a stronger alternative.
Is it legal to hang items from the rearview mirror?
Laws vary by jurisdiction. In many U.S. states, such as California and New York, objects that obstruct the driver’s view through the windshield are prohibited. A small, low-hanging tassel that doesn’t enter the primary field of vision is typically acceptable. When in doubt, consult local DMV regulations.
How do I clean a tassel without damaging it?
Dust regularly with a soft brush or compressed air. For deeper cleaning, spot-treat with a mild detergent on a cloth. Never submerge a fabric tassel in water unless specified by the manufacturer. Allow it to air-dry flat, away from direct sunlight to prevent fading.
Long-Term Maintenance Tips
Even a perfectly installed tassel requires periodic care. Sunlight can fade colors, friction can weaken threads, and vibrations can loosen connections. Set a reminder every three months to perform a quick inspection:
- Check for loose stitching or slipping knots
- Ensure the jump ring remains closed and intact
- Look for signs of UV damage or brittleness in fibers
- Reapply sealant to thread ends if needed
Consider seasonal swaps—lighter pastel tassels in spring, deeper tones in winter—to keep your interior feeling fresh while giving older pieces a rest.
Conclusion: Style Meets Responsibility
Attaching a tassel to your car hanging isn’t just about decoration—it’s an act of intentional design. With the right materials, technique, and attention to safety, you can elevate your vehicle’s atmosphere without introducing risk. Whether it’s a symbol of culture, faith, or personal taste, a well-secured tassel reflects thoughtfulness and care.


 浙公网安备
33010002000092号
浙公网安备
33010002000092号 浙B2-20120091-4
Comments
No comments yet. Why don't you start the discussion?