
Microsoft Word is more than just a tool for typing text—it’s a powerful platform for creating visually engaging documents. Whether you're designing a brochure, crafting a resume, or preparing a presentation handout, adding a background image can elevate the look and feel of your work. However, many users struggle with how to properly insert and customize these visuals without compromising readability or print quality. This comprehensive guide walks through every stage of the process, from choosing the right image to fine-tuning transparency and layout settings.
Why Use Background Images in Word?
Background images add depth and context to your documents. A subtle watermark can reinforce branding, while a thematic backdrop can enhance storytelling in reports or invitations. When used thoughtfully, they transform plain pages into polished, professional outputs.
But there's a caveat: poor execution can make text hard to read or cause printing issues. The key lies in balance—using visuals that support rather than overwhelm the content.
“Design isn’t about making things flashy; it’s about enhancing communication. A well-placed background image should serve the message, not distract from it.” — Daniel Kim, Document Design Consultant
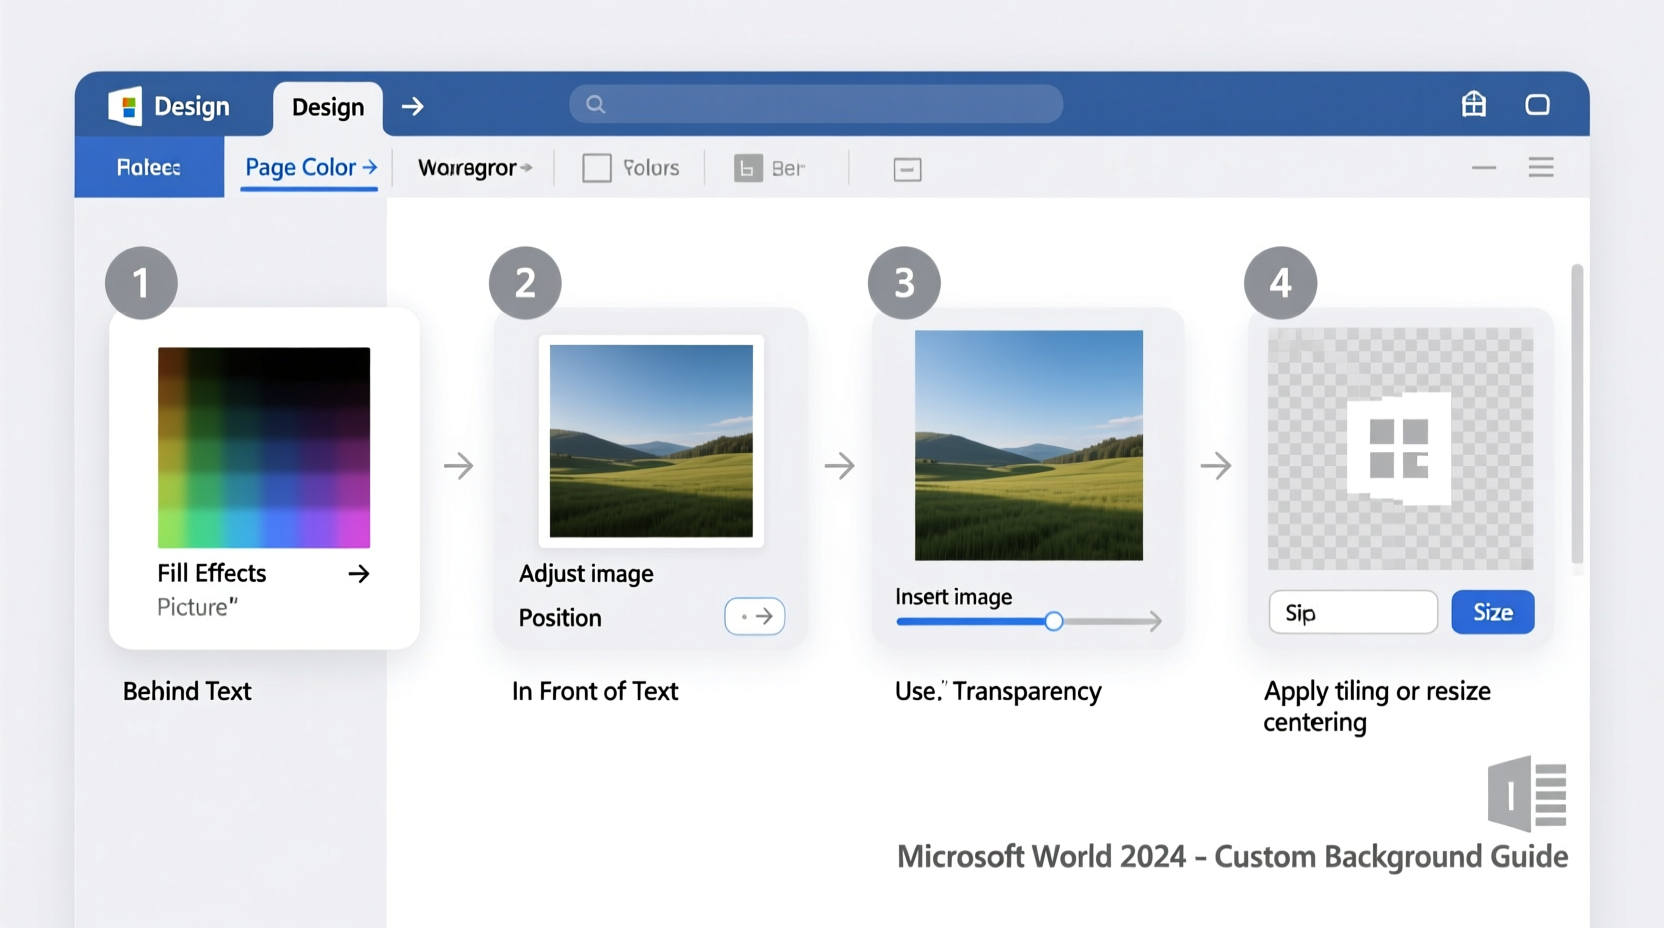
Step-by-Step Guide to Adding a Background Image
Follow this structured approach to successfully insert a background image into any Word document.
- Open your document in Microsoft Word (2016, 2019, 365, or later versions).
- Navigate to the Design tab on the ribbon menu at the top.
- Click on Watermark in the Page Background group.
- Select Custom Watermark… at the bottom of the dropdown menu.
- In the dialog box that appears, choose Picture Watermark.
- Click Select Picture and browse your files for the desired image.
- Once selected, ensure Washout is checked to lighten the image and improve text visibility.
- Adjust the scale if needed—Word often auto-scales, but you can set a custom percentage.
- Click Apply, then OK.
The image will now appear behind your text across all pages. If you only want the background on specific pages, consider using section breaks and different headers/footers—a technique covered later in this guide.
Customizing the Appearance and Layout
After inserting the image, further customization ensures it aligns with your design goals.
Adjusting Transparency and Washout
The default \"washout\" effect reduces opacity so text remains legible. To modify this:
- Double-click the Design tab > Watermark > Custom Watermark…
- In the Picture section, uncheck or adjust the washout strength indirectly via scaling and image choice.
- Note: Direct opacity control isn’t available here, so pre-editing the image externally (e.g., reducing opacity in an image editor) gives more precision.
Scaling and Positioning Options
Word offers limited positioning control when using the watermark method. For greater flexibility:
- Use Insert > Pictures instead of watermark.
- Select the image, go to Picture Format, and choose Wrap Text > Behind Text.
- Drag the image to position it precisely.
- Resize using corner handles while holding Shift to maintain proportions.
This method allows per-page adjustments and avoids repeating the image across every page unless manually duplicated.
Using Section Breaks for Selective Backgrounds
If you need a background image only on the first page (like a title page), follow these steps:
- Place your cursor at the end of the first page.
- Go to Layout > Breaks > Next Page (under Section Breaks).
- Double-click the header area on the second page to open Header & Footer tools.
- Unlink the header from the previous section by clicking Link to Previous to deactivate it.
- Delete the background image or watermark from the new section’s header/footer.
- Exit the header/footer mode.
Now the background appears only where intended.
Best Practices and Common Pitfalls
Avoid these frequent mistakes when working with background images:
| Do’s | Don’ts |
|---|---|
| Use simple, low-contrast images that don’t compete with text | Overload the page with busy patterns or bright colors |
| Compress large images to reduce file size | Insert high-resolution photos without optimization |
| Test print a sample page to check readability | Assume what looks good on screen will print well |
| Save a version without background for accessibility and email sharing | Send image-heavy files to recipients with slow connections |
Real-World Example: Creating a Branded Report Cover
Sarah, a marketing manager, needed to produce a quarterly report with company branding visible but unobtrusive. She used a simplified version of her firm’s logo as a background.
She followed these steps:
- Exported a grayscale PNG of the logo with transparent background.
- Inserted it via the watermark method, enabled washout, and scaled to 100%.
- Applied a section break after the cover page to prevent repetition.
- Used bold headings and ample white space to keep content readable.
The result was a sleek, professional cover that communicated brand identity without sacrificing clarity.
Checklist: Preparing Your Background Image
Before inserting any image, verify the following:
- ✅ Image is in a supported format (JPG, PNG, BMP, GIF)
- ✅ File size is under 1–2 MB to avoid lagging
- ✅ Colors are muted or desaturated to avoid contrast clashes
- ✅ Dimensions match page aspect ratio (8.5 x 11 in or A4)
- ✅ No sensitive or copyrighted material unless licensed
- ✅ You have saved a clean copy of the document without the background
Frequently Asked Questions
Can I use different background images on different pages?
Yes, but not through the standard watermark feature. Use section breaks and insert images manually via Insert > Pictures, setting each to “Behind Text” wrapping. Then unlink headers/footers between sections to control placement.
Why does my background disappear when I print?
This happens if Word’s print settings are configured to omit backgrounds. Go to File > Options > Display and ensure “Print background colors and images” is checked. Also confirm your printer driver supports image printing.
Is it possible to animate a background in Word?
No. Microsoft Word does not support animated backgrounds (such as GIFs). Animated elements will appear as static frames. For dynamic content, consider PowerPoint or digital publishing platforms instead.
Final Thoughts and Next Steps
Adding and customizing background images in Microsoft Word opens up creative possibilities for personal and professional documents. With careful selection, proper formatting, and attention to usability, you can create visually compelling outputs that stand out.
Start small—try adding a faint logo to your next memo or resume. Experiment with alignment, scaling, and section controls. As you gain confidence, incorporate these techniques into larger projects like proposals, newsletters, or certificates.


 浙公网安备
33010002000092号
浙公网安备
33010002000092号 浙B2-20120091-4
Comments
No comments yet. Why don't you start the discussion?