
Printing on non-standard paper sizes like 8.5 x 13 inches can be essential for specialized documents such as legal forms, architectural sketches, or custom reports. While many Epson printers support a range of standard sizes, the 8.5 x 13 inch dimension—slightly longer than letter size—is not always preconfigured. This guide walks through the exact process to create and use a custom 8.5 x 13 paper size setting across different operating systems, ensuring accurate output without trimming or scaling issues.
Understanding 8.5 x 13 Paper Size and Its Uses
The 8.5 x 13 inch paper format is occasionally used in business, engineering, and administrative environments where slightly extended content is needed beyond the standard 8.5 x 11 letter size. It's not an ISO or ANSI standard but is supported by many modern inkjet and laser printers—including various Epson models—when properly configured via custom paper settings.
Common applications include:
- Extended financial statements
- Engineering drafts with additional annotations
- Legal documents requiring extra space
- Custom marketing materials
To print successfully at this size, you must first define it within your printer driver settings. Once added, it becomes available across all applications that support system-level printing options.
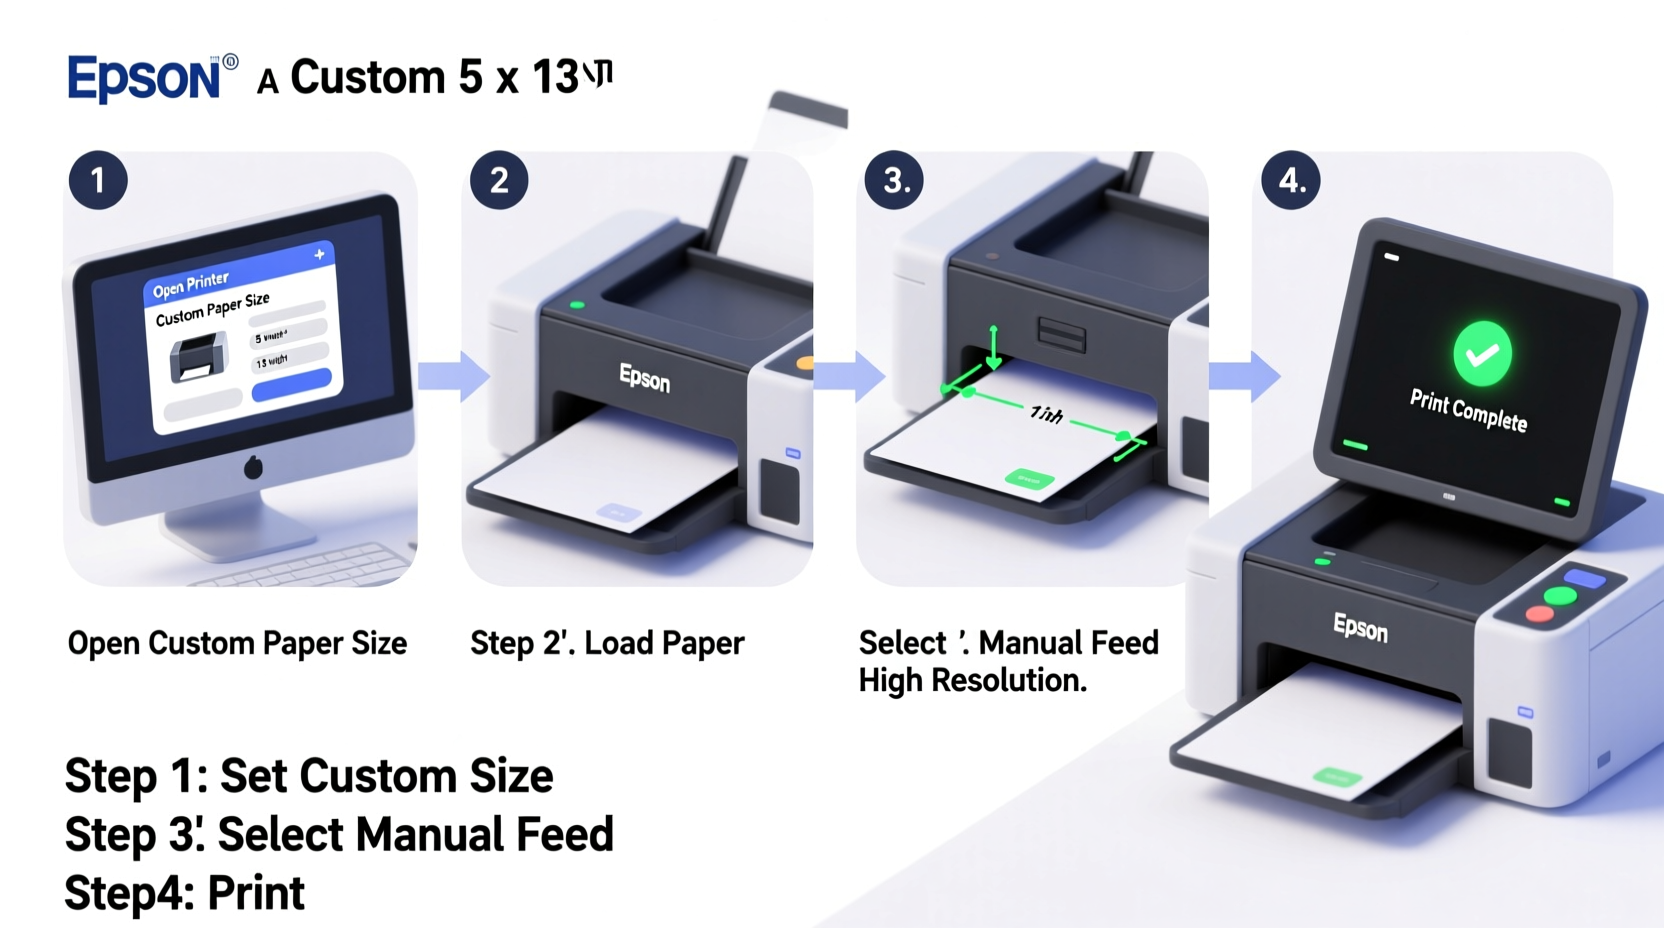
Step-by-Step: Adding 8.5 x 13 Custom Paper Size in Windows
Windows allows users to define custom paper sizes through the Printer Properties interface. Follow these steps carefully to ensure accuracy:
- Open the Control Panel and navigate to Devices and Printers.
- Locate your connected Epson printer, right-click it, and select Printer properties.
- Switch to the Advanced tab.
- Click the Printing Preferences button near the bottom.
- In the new window, go to the Page Setup or Paper tab (varies by model).
- Select Custom from the Paper Size dropdown, then click Custom Settings or Edit.
- Name the new size (e.g., “8.5 x 13 Custom”) and enter the dimensions:
- Width: 8.5 inches
- Height: 13 inches
- Confirm units are set to inches, then click Add or Save.
- Apply changes and close all windows.
After completing these steps, open any document (e.g., Word, PDF), go to Print, and verify that “8.5 x 13 Custom” appears in the paper size list. Select it before printing.
“Custom paper sizes must match both software settings and physical paper loading. Even a 0.1-inch misalignment can cause jams or cutoff text.” — James Liao, Senior Technical Support Engineer, Epson America
Configuring 8.5 x 13 Paper on macOS
macOS handles custom paper sizes through the CUPS (Common Unix Printing System) interface, which offers precise control over printer definitions.
Steps to Add Custom Size on Mac:
- Go to System Settings > Printers & Scanners.
- Select your Epson printer and click Options & Supplies.
- Choose the Driver tab, then click Open Print Queue.
- In the print dialog of any app, click PDF (bottom-left corner) > Open Print Dialog.
- Click Properties or Printer Features.
- Navigate to Paper Size, then select Manage Custom Sizes…
- Click the + button to add a new size.
- Enter the following:
- Name: 8.5 x 13 Custom
- Width: 8.5 in
- Height: 13.0 in
- Top/Bottom/Left/Right Margins: Adjust based on printer minimums (usually 0.12–0.25 in)
- Click OK, then test with a sample page.
Once saved, this size will appear in the paper size menu across all macOS applications, including Preview, Word, and Adobe Acrobat.
sudo cupsctl followed by restarting the printer service.
Printing Best Practices for 8.5 x 13 Output
Even with correct setup, improper handling can lead to skewed prints or paper jams. Use the following checklist to ensure reliable performance:
✅ Printing Checklist
- Confirm paper tray supports 13-inch length (manual feed trays often do, even if main tray doesn't)
- Load paper smoothly, aligning edges with guides—no over-tightening
- Select “Borderless” only if explicitly supported; otherwise, keep borders enabled
- Use the “Print Preview” function to confirm layout fits the custom size
- Run a test print on plain paper before using premium stock
- Ensure document page size matches the selected printer paper size exactly
| Action | Do | Avoid |
|---|---|---|
| Paper Loading | Align paper straight in the tray or manual feeder | Bending or forcing wrinkled sheets |
| Software Settings | Set document size to 8.5 x 13 in Word, InDesign, etc. | Assuming default letter size will stretch correctly |
| Driver Selection | Use latest Epson driver from official site | Generic drivers or outdated versions |
Real-World Example: Legal Firm Adopts Custom Forms
A mid-sized law firm in Portland needed to digitize internal case summaries that previously ran onto two pages due to space constraints. By switching to 8.5 x 13 custom paper, they consolidated each summary onto a single sheet, improving readability and reducing filing clutter.
The IT manager followed this guide to configure all office Epson WorkForce printers. After defining the custom size, they updated their Word templates to default to 8.5 x 13. The transition took under two hours and eliminated double-page printing for over 200 documents per week.
“We didn’t realize how much time we were wasting flipping pages until we streamlined our format,” said Sarah Nguyen, Office Administrator. “The custom size paid for itself in efficiency within a month.”
Frequently Asked Questions
Can I use 8.5 x 13 paper in any Epson printer?
No. Only certain Epson models support paper longer than 12 inches. Check your printer’s specifications under “Maximum Paper Length” or consult the user manual. Models like the Epson WorkForce Pro WF-7840 or EcoTank ET-5850 support extended sizes via the rear manual feed slot.
Why does my printed content get cut off?
This usually occurs when margins are too narrow for the printer’s hardware limits, or the document size doesn’t match the selected paper size. Verify both the application page setup and printer driver settings use 8.5 x 13 inches with appropriate margins (typically no less than 0.25 inches on all sides).
How do I delete a custom paper size if I no longer need it?
In Windows, return to Printer Properties > Advanced > Printing Preferences > Page Setup, edit custom sizes, and remove the entry. On macOS, go to Printers & Scanners > [Your Printer] > Options & Supplies > Driver > Manage Custom Sizes, then select and delete the unwanted size.
Final Steps and Recommendations
Successfully printing on 8.5 x 13 inch paper requires coordination between hardware capabilities, driver configuration, and software settings. Take time to validate each component: ensure your Epson model supports the size, configure the custom dimensions accurately, and test thoroughly before committing to final prints.
Keep your printer drivers updated through Epson’s official website to maintain compatibility and access the latest features. Additionally, label custom paper sizes clearly to avoid confusion among multiple users in shared environments.


 浙公网安备
33010002000092号
浙公网安备
33010002000092号 浙B2-20120091-4
Comments
No comments yet. Why don't you start the discussion?