
Silicone watch bands have become a staple in modern timepieces due to their durability, flexibility, and resistance to sweat and moisture. Whether you're using a fitness tracker, smartwatch, or analog timepiece, a properly fitted silicone band ensures comfort during daily wear and physical activity. However, off-the-shelf bands often come with extra links or length that don’t suit every wrist. An ill-fitting band can slip, cause chafing, or reduce the accuracy of health tracking features. This comprehensive guide walks you through the process of adjusting your silicone watch band for a secure, personalized fit—without damaging the material or compromising longevity.
Why Proper Fit Matters
A well-fitted silicone band does more than look good—it enhances functionality. A loose band shifts during movement, potentially interfering with heart rate sensors or GPS tracking on smart devices. Conversely, a band that’s too tight can restrict circulation and lead to skin irritation, especially during prolonged wear or exercise. Achieving a snug yet breathable fit ensures consistent performance and all-day comfort.
Unlike metal bracelets, silicone bands typically don’t use removable links. Instead, they rely on pre-punched holes or adjustable folding clasps. Understanding your band’s design is essential before making any modifications.
Tools You’ll Need
Adjusting a silicone band requires minimal tools, most of which are commonly found at home. Gather these items before beginning:
- Small ruler or measuring tape
- Ballpoint pen or punch tool
- Scissors (sharp, precision-blade)
- Lighter or match (for sealing edges)
- Masking tape (optional, for marking cuts)
- Isopropyl alcohol and cotton swab (for cleaning post-adjustment)
Having the right tools prevents jagged cuts or accidental over-trimming. Precision is key when working with flexible materials like silicone, which cannot be reattached once removed.
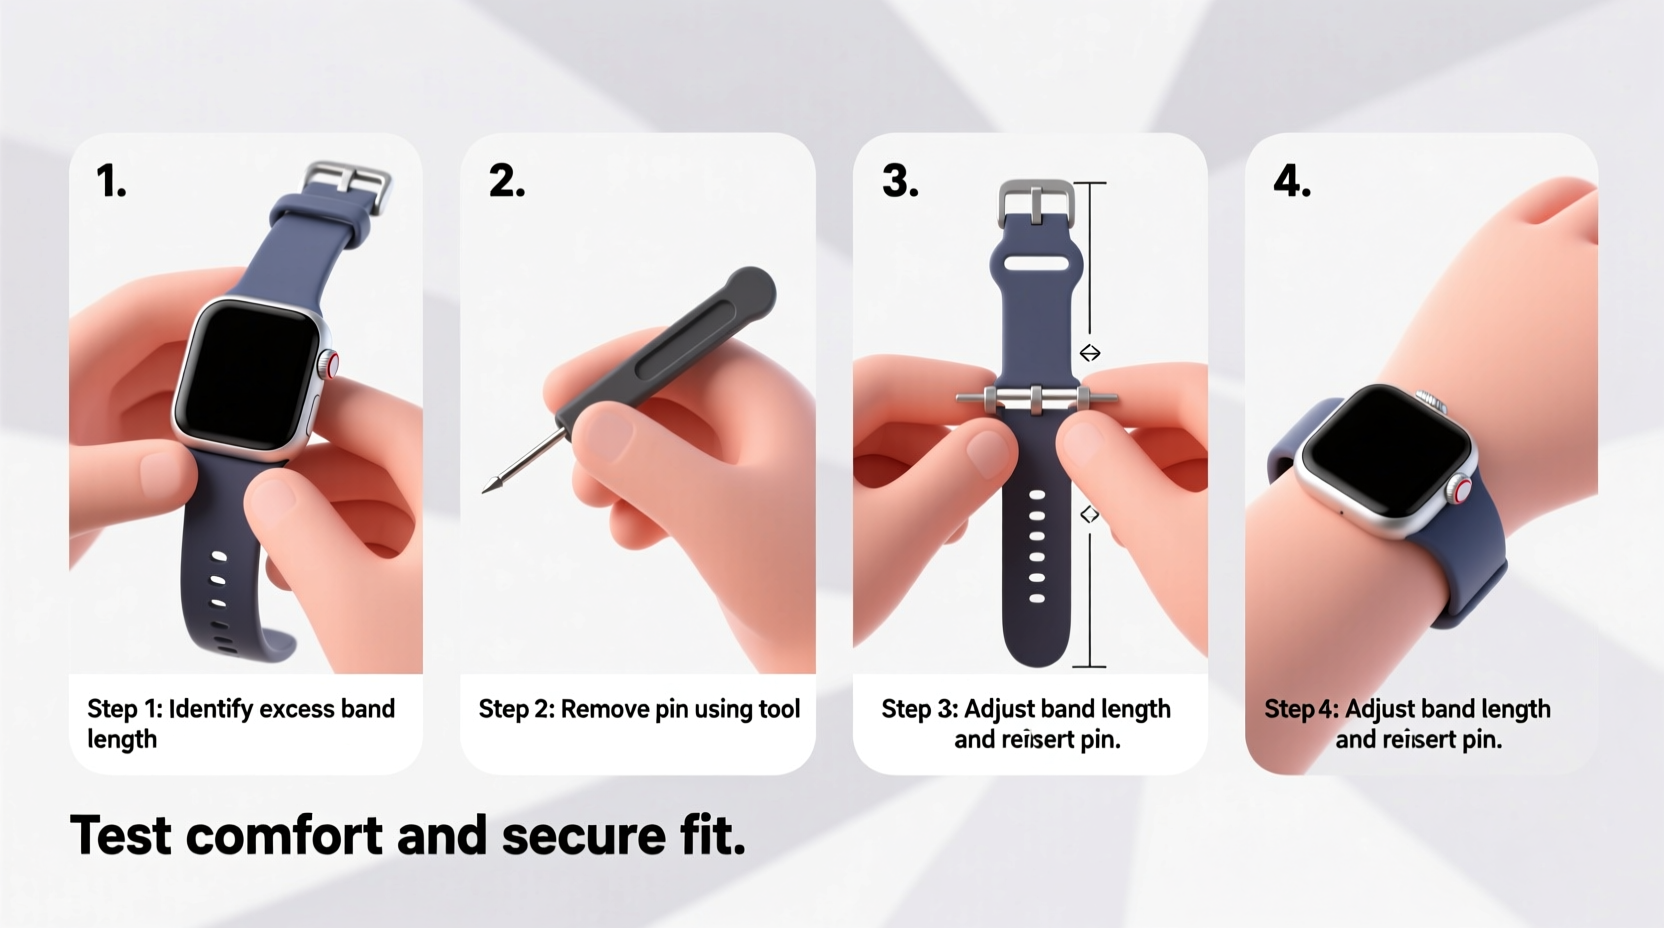
Step-by-Step Guide to Resizing Your Silicone Band
- Remove the Watch Head: Detach the watch from the band using a spring bar removal tool or a small pin. This gives you better access and prevents scratches on the device.
- Lay the Band Flat: Position the band on a clean, hard surface. Align both sides so the current holes are even.
- Determine Desired Length: Wrap the band around your wrist to identify where the new hole should go. Mark this spot with a fine-tip marker or masking tape.
- Create a New Hole: Use a ballpoint pen pressed firmly into the marked area to create a starter dimple. Rotate the pen in a circular motion to gradually widen the hole to match existing ones. Avoid using knives—they can tear the silicone.
- Trim Excess Length (if needed): If the tail end is excessively long, measure 1–1.5 cm beyond the last hole and mark the cut line. Use sharp scissors to make a straight, clean cut.
- Seal the Edge: Lightly pass the cut edge over a flame for 1–2 seconds to melt and smooth the silicone. Wipe with an alcohol-soaked swab to remove residue.
- Reattach the Watch: Slide the watch head back onto the band and ensure the spring bars click securely into place.
This method preserves the integrity of the band while delivering a tailored fit. For two-piece bands (common on Apple Watch-style models), repeat the process on both upper and lower segments.
Do’s and Don’ts When Adjusting Silicone Bands
| Do’s | Don’ts |
|---|---|
| Use a heated tool to seal cut edges and prevent fraying | Use dull scissors that may crush or tear the silicone |
| Mark measurements with low-residue tape | Cut more than 1 cm beyond the last functional hole initially |
| Check fit throughout the day as swelling can occur | Make holes too large—start small and expand gradually |
| Clean the band before and after adjustment | Expose silicone to prolonged UV light during drying stages |
Real-World Example: Custom Fit for Active Lifestyles
Jamie, a triathlete from Portland, struggled with her fitness tracker slipping during long runs. The default medium-sized silicone band was too loose, causing data inaccuracies in her heart rate readings. After measuring her wrist at 16.3 cm, she followed the hole-punching method outlined above. She added a new hole 1 cm closer to the watch head and trimmed the excess tail by 2 cm. Post-adjustment, the band stayed securely in place without pressure points. Her sensor data improved noticeably within days, confirming that proper fit directly impacts wearable performance.
“Even minor slippage can disrupt optical sensors. A customized strap isn’t just about comfort—it’s critical for accurate biometrics.” — Dr. Lena Torres, Wearable Technology Researcher, Stanford Biodesign Lab
Maintenance Tips for Longevity
Once adjusted, maintaining your silicone band extends its usability. Sweat, lotions, and dirt accumulate in crevices and degrade the material over time. Rinse the band weekly with lukewarm water and mild soap. For deeper cleaning, soak it in a solution of water and isopropyl alcohol (70%) for 5–10 minutes, then air dry completely before reuse.
Store the watch flat or coiled loosely when not in use. Avoid leaving it in hot environments like car dashboards—silicone can warp under extreme heat. Inspect the band monthly for cracks or deformation near stress points like holes and clasps.
Frequently Asked Questions
Can I enlarge an existing hole if it feels too tight?
Yes, but do so incrementally. Use a fine-tipped heated tool or rotating pen motion to gently expand the hole. Test the clasp frequently to avoid oversizing.
What if my band stretches over time?
Slight stretching is normal with extended use. If the fit becomes too loose, adding a new hole closer to the watch head restores tension. Avoid tightening the clasp excessively, as this accelerates material fatigue.
Is it safe to use super glue if a clasp breaks?
No. Most adhesives don’t bond well with silicone and may release harmful fumes when heated by body contact. Replace damaged components instead of attempting repairs.
Final Checklist Before Wearing
- ✅ Band lies flat against the wrist without twisting
- ✅ Clasp secures firmly without excessive force
- ✅ No sharp edges or rough spots after cutting
- ✅ Watch sits centered on the top of the wrist
- ✅ Sensor side maintains full skin contact
Conclusion
Adjusting a silicone watch band for a custom fit is a simple yet impactful way to enhance both comfort and functionality. With careful measurement, the right tools, and attention to detail, you can transform an average-fit accessory into a seamless extension of your daily routine. Whether you're training for a marathon or navigating a busy workweek, a well-fitted band supports your goals without distraction. Take the time today to tailor your wearable—not just for how it looks, but for how it performs.


 浙公网安备
33010002000092号
浙公网安备
33010002000092号 浙B2-20120091-4
Comments
No comments yet. Why don't you start the discussion?