
The Apple Watch Link Bracelet, often referred to as the \"lia chain,\" combines elegance with functionality, offering a refined look that transitions seamlessly from boardroom to evening wear. Unlike traditional bands with buckles or clasps, the Link Bracelet uses an innovative hidden deployment clasp and interlocking metal links that allow for precise adjustments. However, achieving that ideal fit—snug enough to stay secure but loose enough for comfort—requires careful sizing. Many users either struggle with excess links or find the band too tight after initial use. This guide walks you through the entire process of adjusting your Link Bracelet at home, ensuring both comfort and style.
Understanding the Link Bracelet Design
The Link Bracelet is engineered for precision. Each link connects magnetically and mechanically, forming a seamless band around the wrist. The clasp mechanism tucks into the last link, creating a flush finish. Because it lacks a traditional strap-and-hole system, resizing isn’t about trimming length—it’s about removing or adding individual links. Apple designed this system so that only authorized service providers adjust the band, but with care and patience, it’s possible to do it yourself safely.
Each full-size Apple Watch (40mm, 41mm, 42mm, 44mm, 45mm, 49mm) comes with extra links in the box. For smaller models (38mm, 40mm), fewer links are included. If you’ve lost them or bought the band separately, replacements can be ordered directly from Apple or purchased from certified resellers.
Tools You’ll Need
While Apple recommends visiting a store, experienced users have successfully resized the Link Bracelet using basic household tools. Here’s what you’ll need:
- A clean, flat workspace with good lighting
- A small push pin or narrow paperclip (0.8–1.0mm diameter)
- A soft cloth or mat to protect the watch and band
- A pair of fine-tipped tweezers (optional, for handling pins)
- A magnifying glass (optional, for better visibility)
Do not use pliers, screwdrivers, or excessive force. The pins are delicate and can break or become misaligned, which may compromise the integrity of the band.
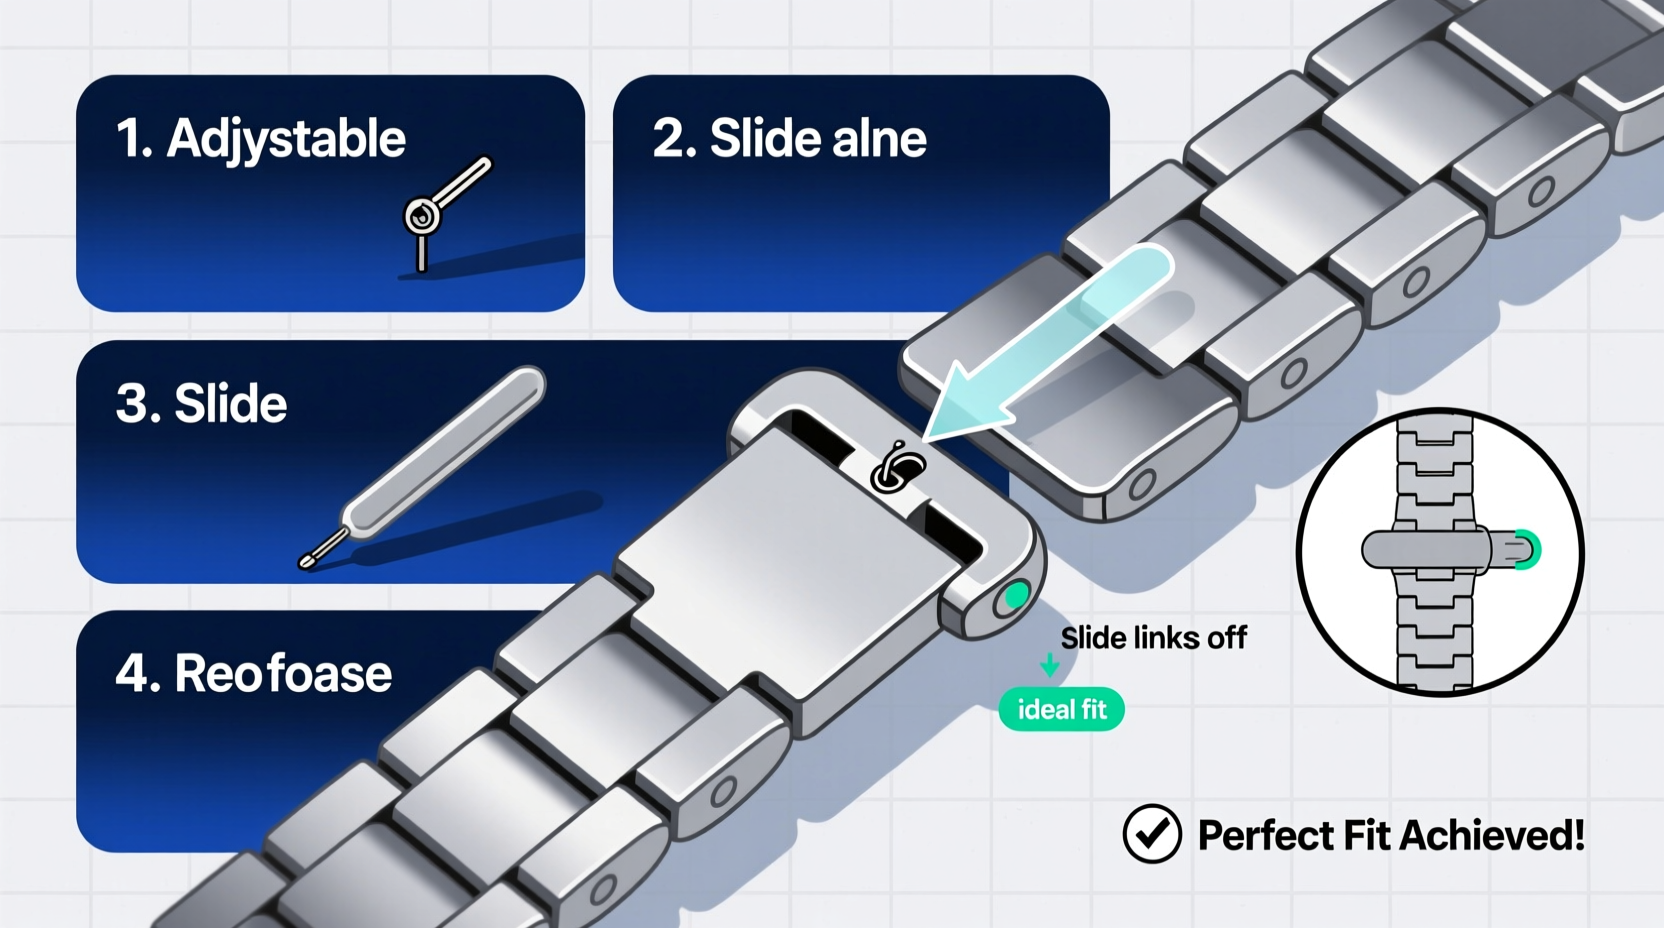
Step-by-Step Guide to Resizing Your Link Bracelet
- Determine how many links to remove: Put on the watch and fasten the clasp. Identify where the excess length occurs. Typically, one or two links per side are sufficient for most users. Mark the target links lightly with a pencil if needed.
- Lay the watch face-down on a soft surface: This protects the display and gives you access to the underside of the band where the pins are located.
- Locate the release pin on the outermost link: On each link, there’s a tiny circular opening near the joint. Inside is a spring-loaded pin with a small notch facing outward. Align your push pin with this notch.
- Gently press the pin inward: Apply steady pressure until the pin retracts slightly and the link disengages. You should feel a soft click. Do not force it—if resistance is high, double-check alignment.
- Remove the selected link(s): Once the pin is depressed, slide the link out horizontally. Repeat on the other side of the bracelet for symmetry.
- Reconnect the remaining links: Align the open ends and gently push them together. The internal magnets will help guide the connection. Ensure the pin clicks back into place securely.
- Test the fit: Fasten the clasp and wear the watch for several minutes. Move your wrist, check for pinching or slipping, and ensure the clasp lies flat against your skin.
If the band still feels too loose or too tight, repeat the process, adjusting by one link at a time. It’s easier to remove more than to add links later unless you kept the originals.
| Action | Do | Don't |
|---|---|---|
| Pin Removal | Use a straight, thin tool; apply even pressure | Wiggle or twist the tool—this can bend the pin |
| Link Handling | Work over a tray to avoid losing parts | Hold the band over open space |
| Reassembly | Let magnets align the links before pressing | Force misaligned links together |
| Testing Fit | Wear for 10+ minutes during normal movement | Assume fit is correct after a quick try-on |
Expert Insight: Why Precision Matters
“The Link Bracelet is one of the most sophisticated wearable designs on the market. A millimeter too tight can cause discomfort during daily swelling; a millimeter too loose risks snagging or slippage. Getting the fit right enhances both usability and longevity.” — Daniel Reyes, Wearable Technology Specialist, GadgetFit Labs
According to Reyes, wrist size fluctuates throughout the day due to temperature, hydration, and activity. He recommends adjusting the band to fit snugly when the wrist is warm—such as after a workout or shower—as this mimics peak expansion. “That way, the band won’t feel restrictive later,” he adds.
Real-Life Example: Sarah’s Adjustment Journey
Sarah, a graphic designer from Portland, bought her Apple Watch Ultra with a Link Bracelet for its premium look. Initially, she visited an Apple Store to have it sized. After two weeks, she noticed red marks on her wrist after long work sessions. She realized the band was too tight, especially when her arms were raised at her desk.
Determined to fix it herself, she followed online guides and removed one additional link from each side. The difference was immediate: no more irritation, and the watch stayed securely in place. “I wish I’d known how simple it was,” she said. “Now I can tweak it seasonally—tighter in winter, looser in summer.”
Frequently Asked Questions
Can I resize the Link Bracelet without tools?
No. Unlike some bands that use sliding mechanisms, the Link Bracelet requires precise pin manipulation. Attempting to force links apart without proper tools can damage the mechanism or injure your fingers.
How many times can I adjust the Link Bracelet?
There’s no strict limit, but each adjustment stresses the pins slightly. With careful handling, the band can be resized 5–7 times over its lifespan. Avoid constant changes to preserve durability.
What if I remove too many links?
If the band becomes too short, you’ll need replacement links. Apple sells individual links for $19 each (as of 2024). Order the correct finish (silver, space black, etc.) and size (large or medium) to match your model.
Final Checklist Before Wearing
- All links are securely connected and aligned
- Pins are fully engaged and don’t protrude
- Clasp closes smoothly and lies flat against the wrist
- No sharp edges or gaps between links
- Band allows slight movement without sliding
Conclusion: Achieve Comfort Without Compromising Style
The Apple Watch Link Bracelet stands out for its craftsmanship and refinement. With thoughtful adjustment, it can deliver all-day comfort without sacrificing its sleek aesthetic. Whether you’re resizing it for the first time or fine-tuning after months of wear, the process empowers you to take control of your wearable experience. Now that you know how to adjust it properly, take a few minutes to ensure your band fits like it was made just for you—because, with the right tweaks, it practically is.


 浙公网安备
33010002000092号
浙公网安备
33010002000092号 浙B2-20120091-4
Comments
No comments yet. Why don't you start the discussion?