
A sports watch is only as effective as its fit. No matter how advanced the features—heart rate monitoring, GPS tracking, or sleep analysis—if the watch slides around your wrist or pinches during movement, accuracy and comfort suffer. An improperly fitted band can cause chafing, inaccurate sensor readings, and even lead to discomfort during long workouts or overnight wear. Achieving the ideal fit isn’t about guesswork; it’s about understanding your band type, wrist anatomy, and making precise adjustments. This guide walks you through every stage of optimizing your sports watch band for all-day comfort and reliable performance.
Why Proper Fit Matters
The importance of a well-fitted sports watch extends beyond physical comfort. A loose band allows the device to shift, which interferes with optical heart rate sensors that rely on consistent skin contact. According to Dr. Lena Patel, a biomechanics researcher at the Sports Technology Institute, “Even a 2mm gap between the sensor and skin can reduce heart rate accuracy by up to 15% during high-intensity intervals.”
Conversely, a band that’s too tight restricts blood flow and may cause nerve irritation, especially during prolonged wear. The ideal fit balances snugness with flexibility—secure enough to stay in place during sprints or weightlifting, yet loose enough to allow circulation and natural wrist movement.
“Think of your watch like a running shoe: if it doesn’t fit right, everything else suffers.” — Marcus Tran, Wearable Device Specialist
Identify Your Band Type
Sports watches come with various band styles, each requiring a different adjustment method. Knowing your band type is the first step toward proper fitting.
| Band Type | Common Brands | Adjustment Method |
|---|---|---|
| Silicone Strap with Pin Buckle | Garmin, Fitbit, Samsung Galaxy Watch | Punch holes or trim excess length |
| NATO/Free-Spring Strap | Fitness models with military-style bands | Slide through keepers; no tools needed |
| Metal Mesh with Micro-Adjust Clasp | Apple Watch (Milanese Loop), some Suunto models | Use clasp sliders for fine-tuning |
| Quick-Release Silicone with Butterfly Clasp | Polar, newer Garmin Fenix models | Adjust via sliding mechanism or removable links |
Before making any changes, inspect your band closely. Look for small notches, spring bars, or micro-adjustment levers. These design cues indicate how—and whether—you can modify the fit yourself.
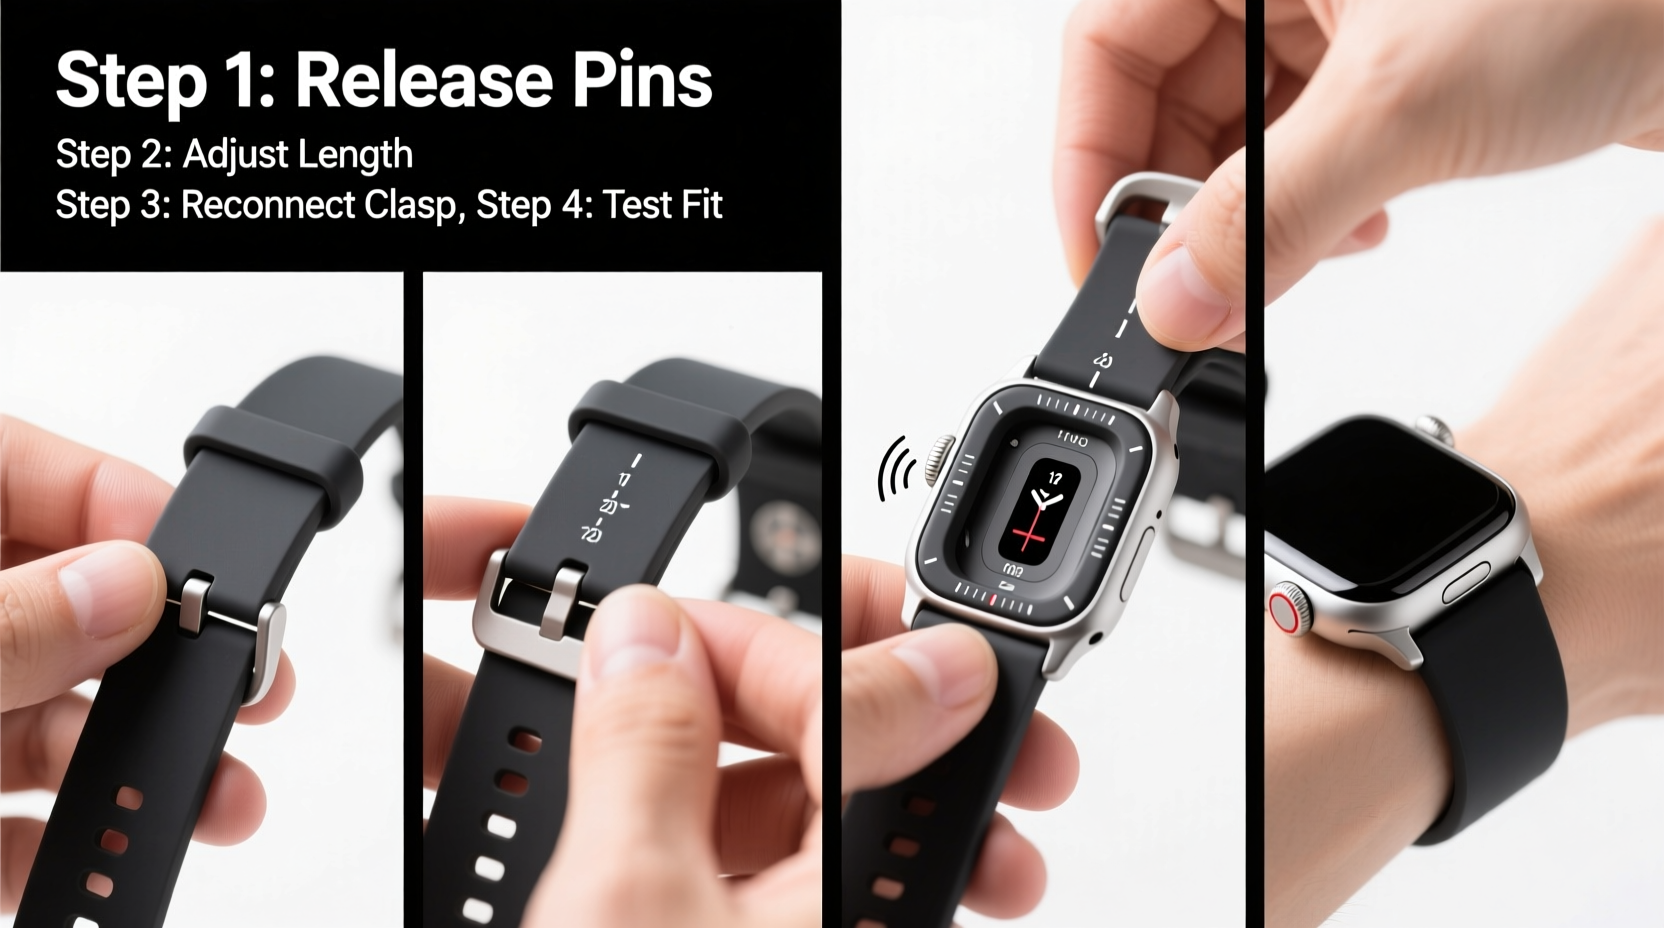
Step-by-Step Adjustment Process
Follow this universal five-step sequence regardless of band type. Precision and patience prevent damage and ensure lasting comfort.
- Measure Your Wrist
Use a soft measuring tape to determine your wrist circumference just below the wrist bone. Most sports watches perform best when worn slightly tighter than a fashion watch—about 1–2 finger widths of slack is ideal. - Position the Watch Correctly
Place the watch on the top of your wrist, aligning the display between the center of your forearm and the base of your thumb. For accurate heart rate tracking, the sensor should sit about 1–2 cm above the wrist crease. - Test Initial Fit
Secure the band and move your hand through common motions: make a fist, rotate your wrist, simulate a running arm swing. The watch should remain stable without pressing into your skin. - Make Physical Adjustments
Depending on your band:- Silicone straps: Use a hole-punch tool to add new perforations if the band is too long. Avoid trimming unless replacement is planned—cutting reduces future adjustability.
- Metal bands: Use a spring bar tool to remove excess links. Reattach the clasp only after verifying fit with all links removed.
- Micro-adjust bands: Slide the clasp mechanism incrementally until tension feels balanced.
- Final Validation
Wear the adjusted watch for at least 20 minutes while performing light activity. Check for red marks, pressure points, or slippage. Reassess if the screen tilts when you raise your hand.
Real-World Example: Marathon Training Adjustment
Jamal, an amateur runner training for his first marathon, experienced inconsistent heart rate data during long runs. His Garmin Forerunner 255 frequently registered spikes unrelated to effort. After consulting a coach, he realized the silicone band had stretched over six months of use and now slid freely during arm motion.
He followed the adjustment steps: measured his wrist (17.8 cm), repositioned the watch higher on his forearm, and used a leather punch to create a new hole one notch tighter. He also switched to a breathable mesh strap for summer runs. Within two days, his heart rate graphs stabilized, and he reported greater confidence in his training metrics.
Common Mistakes to Avoid
- Over-tightening for security: This compresses capillaries and distorts pulse readings. If the watch leaves a red ring or numbness occurs, it’s too tight.
- Ignoring sweat buildup: Moisture softens skin and loosens grip. Consider perforated bands or moisture-wicking sleeves in humid climates.
- Adjusting only for rest: A perfect fit at rest may fail during activity. Always test under simulated exercise conditions.
- Forgetting seasonal changes: Swollen wrists in heat or looser skin in cold weather require minor recalibration.
Checklist: Perfect Fit Verification
Use this checklist before every key workout or extended wear period:
- ✅ Watch sits flat against the skin with minimal wobble
- ✅ Optical sensor maintains constant contact
- ✅ One finger slides comfortably underneath the band
- ✅ No skin discoloration after 30 minutes of wear
- ✅ Display remains visible when wrist is raised
- ✅ Clasp or buckle secures without strain
- ✅ Band material shows no signs of fraying or deformation
Frequently Asked Questions
Can I wear my sports watch too tight?
Yes. Excessive tightness can lead to “watch neuropathy,” where pressure on the radial nerve causes tingling or weakness in the hand. If you experience numbness, loosen the band immediately and avoid wearing it tightly for several hours.
How often should I readjust my band?
Reassess fit every 6–8 weeks, especially if you're actively training. Sweat, UV exposure, and mechanical stress degrade elastic properties. Also, body composition changes can affect wrist size over time.
Are third-party bands safe to use?
Many are, but verify compatibility and material safety. Opt for hypoallergenic silicone or stainless steel from reputable vendors. Poorly made bands may lack proper ventilation or contain allergens like nickel.
Conclusion
A properly adjusted sports watch enhances both performance tracking and daily comfort. It’s not a one-time setup but an ongoing process of observation and refinement. Whether you're logging miles, lifting weights, or sleeping, your wearable should feel like a seamless extension of your body—not a distraction. Take a few minutes today to reassess your band fit using these guidelines. Small tweaks yield significant returns in accuracy, endurance, and long-term device reliability.


 浙公网安备
33010002000092号
浙公网安备
33010002000092号 浙B2-20120091-4
Comments
No comments yet. Why don't you start the discussion?