
Elegant bowknot nail art has become a signature detail in modern manicures—feminine, chic, and effortlessly stylish. Whether you're preparing for a special occasion or simply elevating your everyday look, press-on nails with bowknot accents offer a flawless finish without requiring professional tools or skills. With the right technique, you can achieve a durable, salon-worthy result from your bathroom counter in under 30 minutes.
The appeal of bowknot press-ons lies not only in their aesthetic but also in their convenience. Unlike gel or acrylics, they don’t damage natural nails, require no UV lamp, and can be removed painlessly. However, improper application often leads to premature lifting or uneven alignment. This guide walks you through each stage of the process to ensure longevity, precision, and elegance every time.
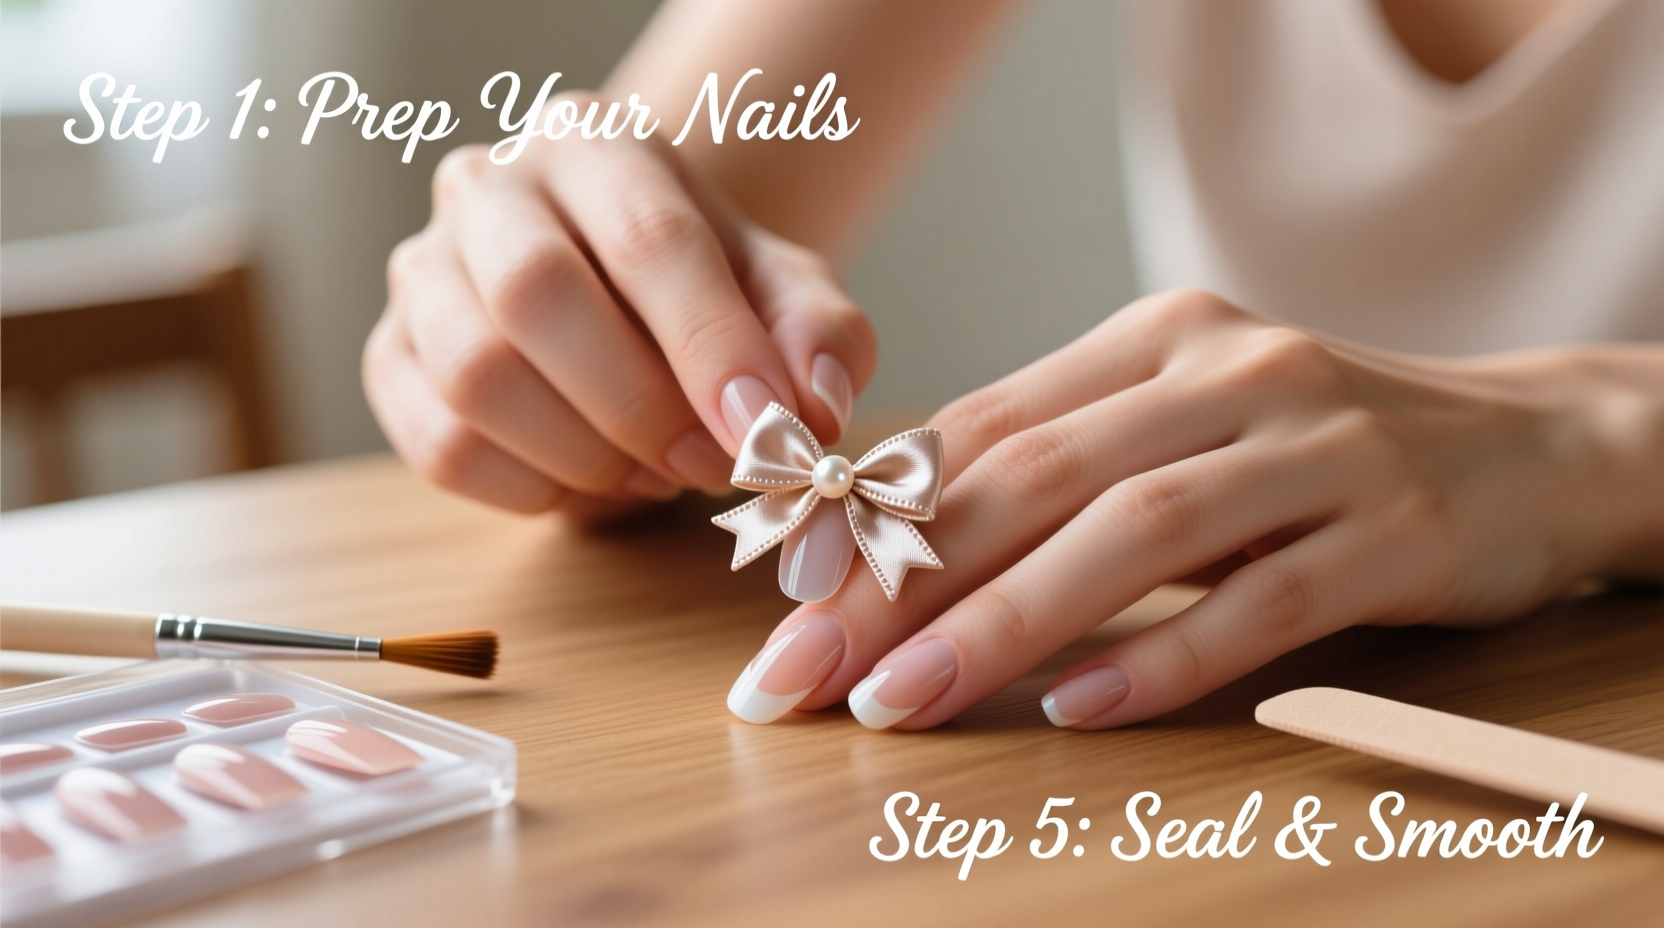
Why Bowknot Nail Designs Stand Out
Bowknots bring a touch of romantic sophistication to any manicure. Often rendered in delicate rhinestones, metallic threads, or sculpted gel patterns, these designs evoke vintage charm while remaining fashion-forward. Press-ons featuring pre-applied bowknots eliminate the need for intricate hand-painting, making them ideal for those who admire detailed nail art but lack the time or steady hand to create it.
Design variations include minimalist single-line bows, 3D embellished knots, and even asymmetrical placements across accent nails. Many kits now come with themed sets—pearl-adorned bows for weddings, pastel ribbons for spring, or bold black satin knots for evening wear.
Your Application Toolkit: What You’ll Need
Success starts with preparation. Before opening your press-on kit, gather these essentials:
- Press-on nails with bowknot design (ensure correct size)
- Nail file and buffer block (180/240 grit)
- Cuticle pusher or orangewood stick
- 70% isopropyl alcohol or nail dehydrator wipe
- Lint-free pad or cotton ball
- Nail glue or adhesive tabs (included in most kits)
- Tweezers or applicator stick (optional but helpful)
- Top coat (for sealing edges after application)
Using high-quality tools makes a noticeable difference. Cheap buffers may leave rough edges; low-concentration alcohol won’t remove oils effectively. Investing in a basic nail care set ensures consistent results across multiple applications.
Step-by-Step Application Process
- Prep your natural nails: Remove old polish with acetone-free remover to preserve moisture. Gently push back cuticles using an orangewood stick. Avoid cutting live tissue—it increases infection risk and weakens adhesion.
- Shape and smooth: File each nail into your preferred shape—oval, almond, or square—using even strokes in one direction. Over-filing thins the nail plate and causes peeling. Lightly buff the surface with a 240-grit block to create micro-texture for better bonding.
- Clean thoroughly: Wipe each nail with a lint-free pad dampened with 70% isopropyl alcohol. This removes skin oils, dust, and residue that could prevent strong adhesion. Let nails air-dry completely—no touching!
- Select correct sizes: Match each press-on to your natural nail by laying it flat on top. The ideal fit covers the nail fully without overlapping the cuticle or sides. Most kits include multiple sizes; use tweezers to organize them before gluing.
- Apply adhesive: If using liquid glue, apply a tiny drop to the center of your natural nail. Too much glue causes seepage and delays curing. For adhesive tabs, peel off the backing and place directly onto the nail.
- Attach the press-on: Align the base of the press-on with your cuticle line, then press down firmly for 15–20 seconds. Start from the middle and work outward to eliminate air pockets. Hold constant pressure—this activates the bond.
- Seal the free edge: Once all nails are applied, brush a thin layer of top coat along the tip and sides of each nail. This reinforces the seal between the artificial and natural nail, reducing water intrusion and extending wear time.
- Final check: Inspect for gaps or misalignment. If a nail feels loose, gently lift and reapply with fresh glue. Wait at least 30 minutes before heavy use.
| Step | Action | Pro Tip |
|---|---|---|
| 1 | Remove old polish & prep cuticles | Never skip cuticle care—dry, flaky skin undermines clean application |
| 2 | File and buff natural nails | Buff lightly—over-buffing weakens the nail structure |
| 3 | Clean with alcohol | Use fresh pads; reused ones spread oil instead of removing it |
| 4 | Size match press-ons | Label fingers if unsure—thumbs often need largest size |
| 5 | Glue or tab application | Liquid glue lasts longer; tabs are quicker and less messy |
| 6 | Press and hold | Set timer for 20 seconds per nail to ensure full contact |
| 7 | Seal with top coat | Reapply sealant every 2–3 days for maximum durability |
Avoid These Common Mistakes
Even experienced users make errors that compromise wearability. Recognizing these pitfalls helps prevent frustration later:
- Skipping dehydration: Oily nails repel adhesive. Always clean with alcohol post-buffing.
- Over-gluing: Excess glue spreads under the nail, softening the bond and inviting bacteria.
- Rushing the press: Inadequate pressure leads to bubbles and early lifting.
- Ignoring size mismatches: Slightly too-small press-ons crack under stress; oversized ones catch on fabric.
- Not sealing edges: Unsealed tips absorb moisture, causing separation within hours.
“Precision in prep equals longevity in wear. The first five minutes of application determine how long your press-ons last.” — Lena Torres, Professional Nail Technician & Educator
Real-Life Example: A Bridal Manicure Done Right
Sophia had her wedding in six days and wanted elegant bowknot nails but couldn’t visit a salon due to scheduling conflicts. She purchased a premium press-on set with pearl-accented bows on two accent nails. Following this guide, she prepped her nails the night before, cleaned meticulously, and used nail glue instead of tabs for stronger hold. She applied each nail slowly, holding for a full 20 seconds, then sealed every edge with a quick-dry top coat. Throughout the ceremony and reception—even during bouquet holding and handshaking—not a single nail lifted. She reapplied top coat daily and safely removed them after 10 days with zero damage to her natural nails.
How Long Should Bowknot Press-Ons Last?
With proper application, expect 7–14 days of wear. Factors influencing duration include:
- Nail oil production (higher oil = shorter wear)
- Daily activities (typing, dishwashing, gym)
- Type of adhesive used (glue outperforms tabs)
- Frequency of edge sealing (recoating every 2–3 days adds life)
To extend wear, wear gloves during wet chores and avoid using nails as tools. At night, consider applying a nourishing cuticle oil around—but not on—the nail surface to keep surrounding skin supple without weakening the bond.
Frequently Asked Questions
Can I reuse bowknot press-on nails?
Yes, if removed carefully. Soak fingertips in warm soapy water for 10–15 minutes until nails loosen. Gently slide them off—don’t pry. Clean residual glue with a cotton swab and store in the original case. Reapplication success depends on whether the adhesive bed remains intact.
Are bowknot designs safe for short nails?
Absolutely. Many manufacturers design scaled-down versions specifically for shorter beds. Opt for minimalist line-art bows or side-corner accents rather than large 3D elements that may overhang.
How do I fix a lifted press-on at home?
Don’t wait for full detachment. Use a bobby pin to apply a tiny amount of nail glue under the lifted edge, then press down for 30 seconds. Wipe away excess and seal with top coat once dry.
Final Tips for Flawless Results
Conclusion: Elevate Your Style with Confidence
Applying press-on nails with elegant bowknot designs at home isn’t just convenient—it’s empowering. With careful prep, precise placement, and smart maintenance, you can enjoy a luxurious manicure that rivals salon work. The key isn’t speed; it’s attention to detail. Each step, from cleaning to sealing, contributes to a seamless, lasting result.
Now that you have the complete method, choose your favorite bowknot set and transform your look in minutes. Share your styled nails online and inspire others to try the technique—because beautiful details shouldn’t require appointments or expense.


 浙公网安备
33010002000092号
浙公网安备
33010002000092号 浙B2-20120091-4
Comments
No comments yet. Why don't you start the discussion?