
A tiered cake stand with shelves is more than just a centerpiece—it's a functional work of art. Whether you're hosting a wedding, birthday party, or simply elevating your home dessert display, a well-assembled cake stand ensures stability, elegance, and practicality. Many commercially available models lack durability or customization options. Building your own allows control over height, material, and load capacity. This guide walks through the entire assembly process with precision, offering tested methods to create a structure that supports heavy tiers without wobbling.
Understanding the Components and Design
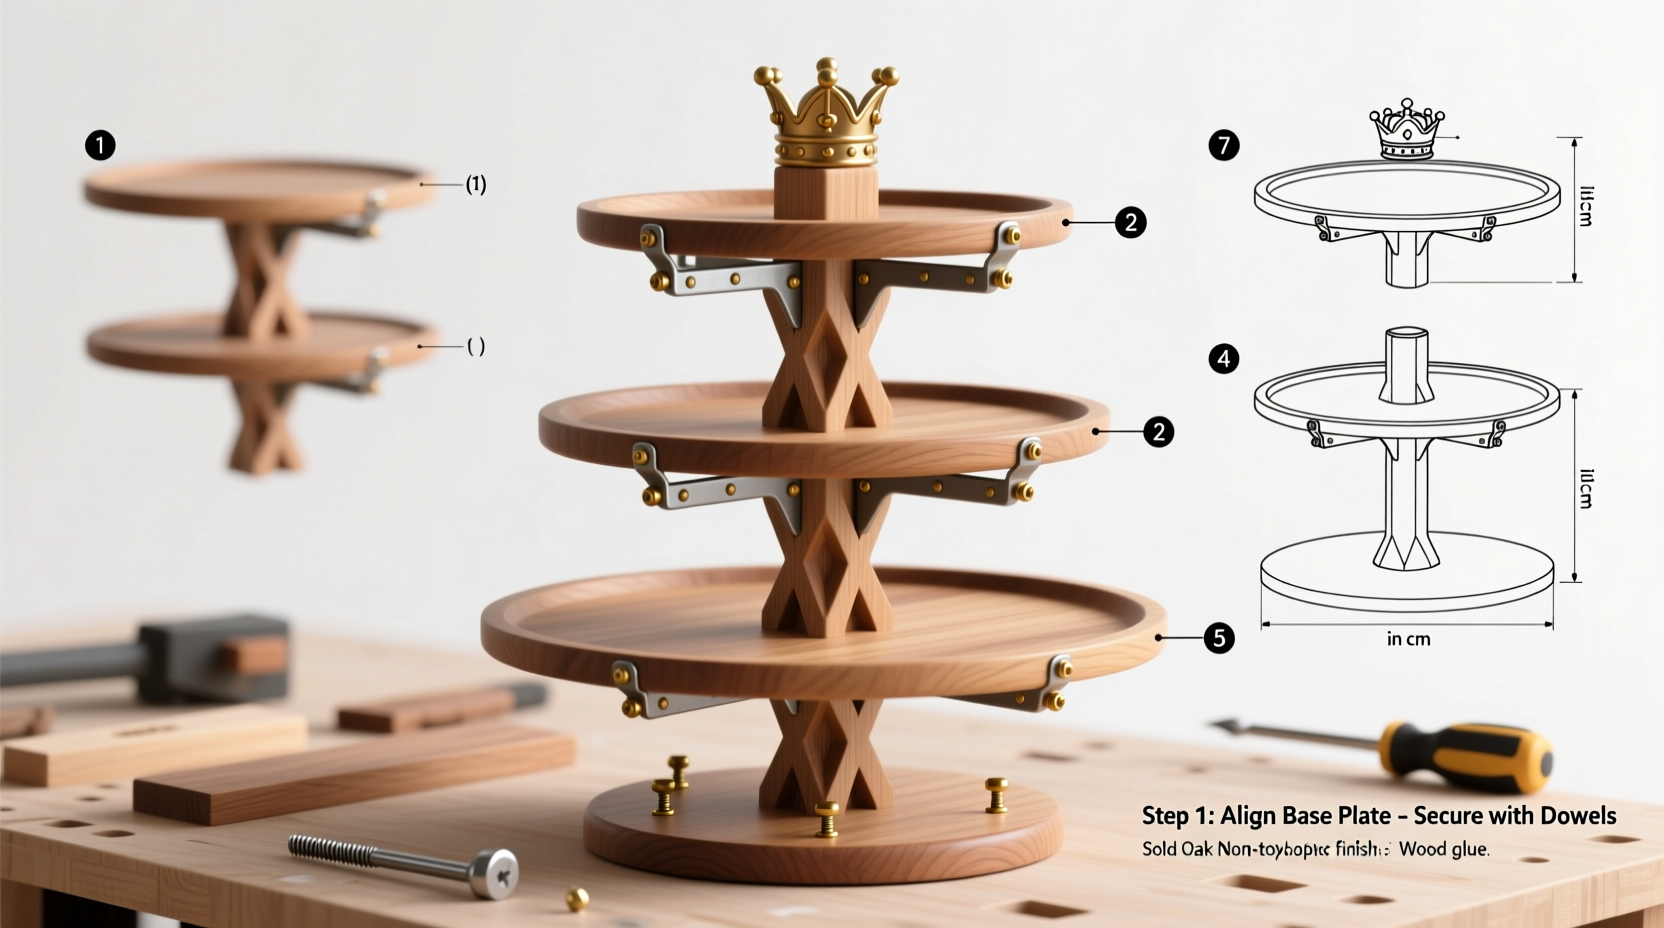
A tiered cake stand typically consists of multiple platforms (shelves) supported by vertical posts or central columns. The key to sturdiness lies in balanced weight distribution, secure fastening, and appropriate spacing between levels. Most DIY versions use wooden or acrylic shelves paired with metal rods, threaded bolts, or dowels as support pillars. The base must be wide enough to prevent tipping, especially when loaded unevenly.
Before beginning assembly, decide on the number of tiers—common configurations include three or four levels. Each shelf should decrease in diameter from bottom to top, creating a cascading effect. Standard sizes range from 12 inches at the base to 6 inches at the top. Materials matter: hardwood offers strength and longevity; food-safe acrylic provides a modern look but requires careful handling.
Materials and Tools Checklist
Gathering everything beforehand prevents interruptions during assembly. Use this checklist to prepare:
- 3–4 circular shelves (wood, acrylic, or tempered glass)
- 4 stainless steel support rods or threaded bolts (at least 1/4 inch thick)
- Matching nuts and washers (if using bolts)
- Drill with variable speed settings
- Wood drill bits (size matched to rod diameter)
- Measuring tape and carpenter’s square
- Pencil for marking
- Sandpaper (medium and fine grit)
- Level tool
- Clamps (optional but helpful)
“Precision in hole placement is non-negotiable. Even a 2mm misalignment can cause binding or instability.” — Marcus Tran, Furniture Designer & Event Stylist
Step-by-Step Assembly Process
Follow these steps carefully to assemble a structurally sound, visually balanced cake stand.
- Prepare the shelves: Lightly sand each shelf edge and surface. Wipe clean with a dry cloth to remove dust. Mark the center point on each shelf using a ruler and pencil.
- Mark support rod positions: On the bottom shelf, measure and mark four equidistant points around the center—these will be your rod locations. A common layout uses a 4-inch diameter circle centered on the shelf. Repeat this pattern on middle and top shelves, ensuring alignment.
- Drill pilot holes: Using a drill bit slightly smaller than your rods, carefully drill vertical holes at each marked point. Keep the drill perpendicular to the shelf surface. Drill through completely on all shelves except the top one—on the top shelf, drill only halfway to conceal rod ends if desired.
- Insert support rods: Begin with the bottom shelf. Insert rods into the holes, pushing them flush with the underside. If using threaded bolts, add a washer and nut underneath to lock them in place temporarily.
- Add middle shelves: Slide the next shelf down the rods, aligning holes precisely. Adjust until level. Secure position with washers and locking nuts if needed, or allow gravity to hold it in place on snug-fitting rods.
- Install top shelf: Place the final shelf, ensuring all rods fit smoothly. For aesthetic finish, cap exposed rod ends with decorative finials or file down protrusions.
- Test stability: Gently press down on each shelf and rock the stand side to side. No movement should occur. If wobbling happens, check hole alignment and tighten connections.
Stability Enhancements and Safety Tips
A beautiful cake stand is useless if it collapses under weight. Prevent disasters with these structural upgrades:
- Use thicker rods (≥1/4\") for heavier loads like fondant-covered cakes.
- Add rubber feet to the base shelf to increase grip on tabletops.
- Reinforce the bottom shelf with a hidden inner ring brace made from plywood.
- Limit maximum height-to-width ratio to 3:1 (e.g., no taller than 36 inches for a 12-inch base).
Do’s and Don’ts of Tiered Cake Stand Assembly
| Do’s | Don’ts |
|---|---|
| Use a level after placing each shelf | Force rods into misaligned holes |
| Pre-drill all holes slowly and steadily | Use plastic rods for large, heavy tiers |
| Wipe shelves with food-safe cleaner before use | Stack more than four tiers without central column reinforcement |
| Label shelf order during disassembly for reassembly ease | Leave sharp metal edges exposed near food |
Real-World Example: Wedding Dessert Display Build
Jessica, a freelance event planner in Portland, needed a custom cake stand for a rustic-chic wedding. The client wanted a three-tiered display holding cupcakes, macarons, and a small naked cake—total weight exceeding 15 pounds. Prefabricated stands she tested flexed dangerously.
She built her own using birch plywood shelves (12\", 9\", 6\") and 6-inch stainless steel threaded rods. After drilling aligned holes guided by a jig, she secured the rods with nylon-insert lock nuts to prevent loosening. She sanded and sealed the wood with food-grade mineral oil for a warm finish. During the event, the stand remained perfectly stable despite frequent guest interaction. “It held up better than the rental units we’ve used,” she reported. “And guests complimented its craftsmanship.”
Frequently Asked Questions
Can I use PVC pipes as support rods?
PVC is lightweight and easy to cut but lacks rigidity. Under load, it may bend or compress, especially in warm environments. It’s acceptable only for very light displays with paper-thin tiers. Metal rods are strongly recommended for any serious use.
How do I clean a wooden cake stand safely?
Never submerge wooden shelves in water. Damp-wipe with a cloth moistened with food-safe vinegar solution (1 part vinegar to 3 parts water), then immediately dry with a soft towel. Re-oil every few months with mineral oil to maintain integrity and prevent cracking.
What’s the safest way to stack desserts on the stand?
Place heaviest items on the bottom shelf. Avoid overloading any single tier. Distribute weight evenly and never hang items off the edge. For tall cakes, consider using internal dowels within the cake itself for added support before placing on the stand.
Final Thoughts and Call to Action
Building a sturdy tiered cake stand isn’t just about following instructions—it’s about understanding balance, material behavior, and user safety. When done right, your creation becomes a centerpiece that impresses both visually and functionally. You gain confidence knowing every bolt and shelf was placed with intention, capable of supporting not just desserts, but memories.
Now that you have the knowledge, gather your materials and start building. Measure twice, drill once, and take pride in crafting something both useful and beautiful. Share your finished project online—tag it with #DIYCakeStand so others can learn from your success.


 浙公网安备
33010002000092号
浙公网安备
33010002000092号 浙B2-20120091-4
Comments
No comments yet. Why don't you start the discussion?