
Building a LEGO minifigure head of Darth Vader may seem simple at first glance—after all, it’s just one small piece among many in larger sets. But for collectors, custom builders, and Star Wars enthusiasts, achieving a perfect, seamless assembly of the iconic helmet is more than a matter of snapping parts together. The angular design, precise alignment, and structural integrity required make this a deceptively intricate task. Whether you're restoring an old set, creating a display model, or troubleshooting a loose fit, attention to detail ensures your Darth Vader head looks as commanding as it should.
This guide walks through every phase of assembling the classic black helmet with clarity and precision. From identifying the correct components to final alignment checks, each step is designed to eliminate common pitfalls and deliver a professional-grade result.
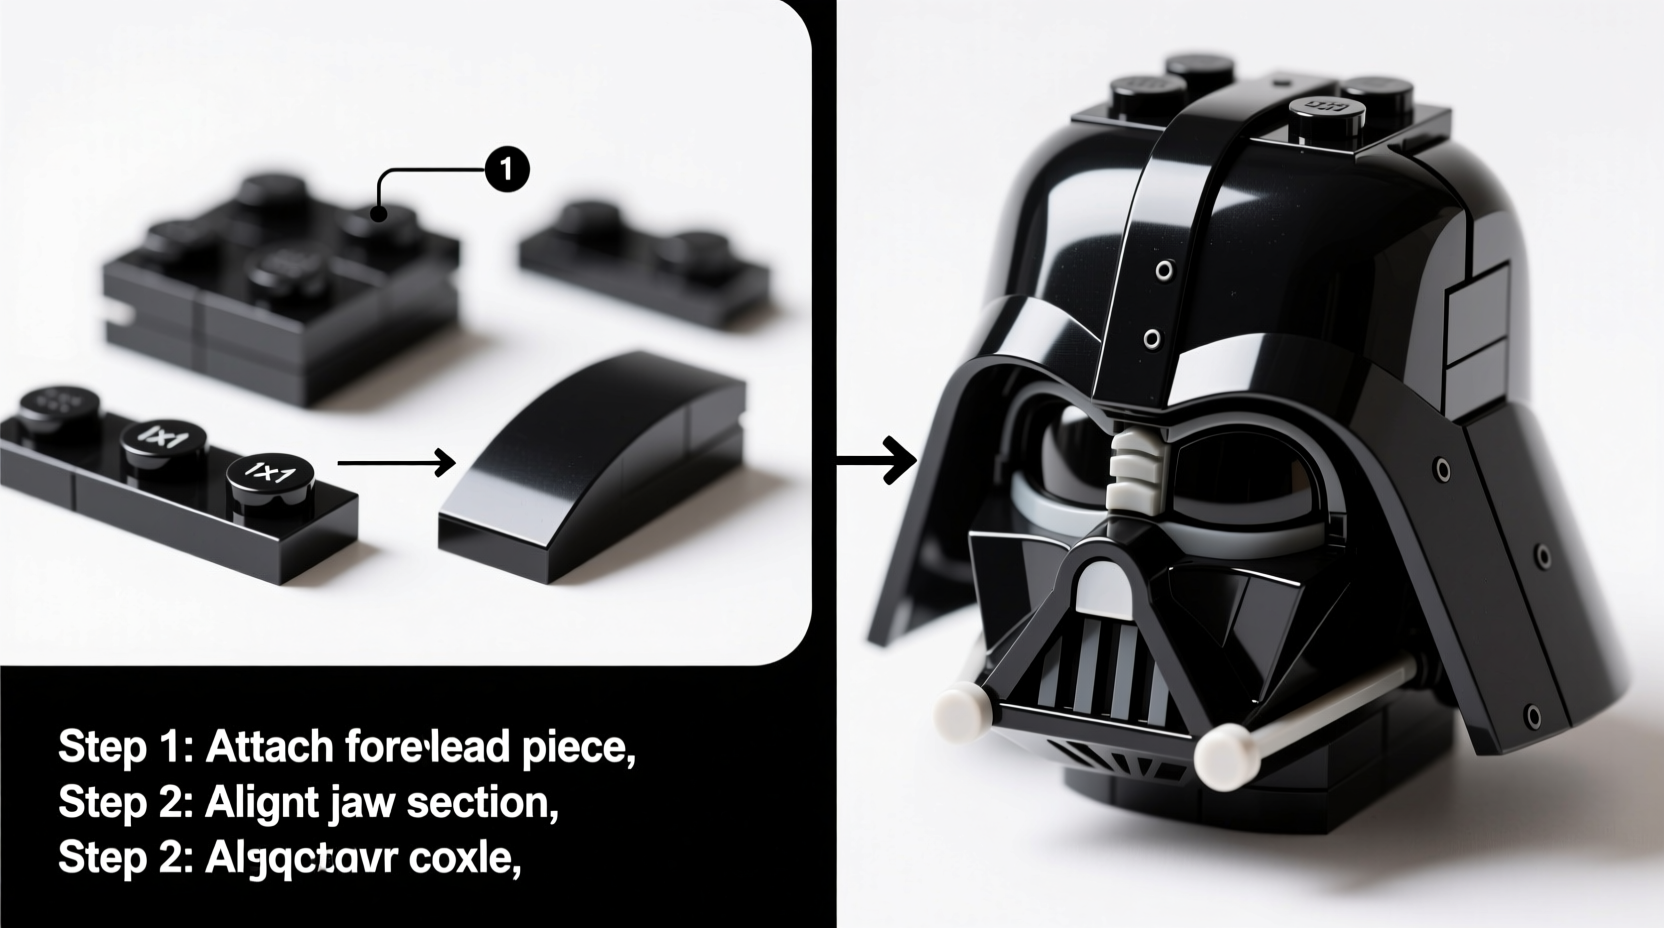
Understanding the Components
The standard Darth Vader minifigure head consists of two primary pieces: the head base (a flesh-toned or black molded face) and the helmet (a solid black, angular cowl that fits over it). Some variations include printed details on the face, while others rely entirely on the helmet's shape for recognition. Knowing which version you’re working with affects how tightly the pieces must be joined.
The helmet itself has internal ridges and a snug collar that locks around the neck stud of the torso when fully seated. However, improper alignment during attachment can cause stress fractures, misshaping, or an uneven silhouette—especially along the jawline and temple areas.
Step-by-Step Assembly Process
- Prepare Your Workspace
Choose a clean, flat surface with good lighting. Use a soft mat or cloth to prevent scratching delicate pieces. Keep hands dry and free of oils or lotions, which can degrade plastic over time. - Align the Helmet Correctly
Hold the helmet so the front (with the distinctive T-shaped visor groove) faces forward. Rotate it until the bottom edge is perfectly level. Misalignment at this stage leads to asymmetry once attached. - Position the Head Base
Place the head base upright on the table. Ensure no dust or debris is lodged in the top socket where the neck stud will eventually go. If using a printed face, confirm the eyes and mouth are centered. - Begin Insertion from the Back
Tilt the helmet slightly and start sliding it onto the rear of the head. This prevents pressure on the fragile front edges near the brow ridge. Gently guide the back tabs into place first. - Press Down Evenly Across the Top
Once the back is engaged, apply slow, even pressure across the crown. Do not use fingers inside the helmet opening—this risks cracking the inner walls. Instead, press with the pads of your fingertips on the upper sides. - Check Lateral Symmetry
After full seating, rotate the head and examine both temples. They should mirror each other exactly. Look down from above to verify the helmet sits level and doesn’t tilt toward one shoulder. - Test Stability on Torso
Attach the completed head to a compatible minifigure torso. It should click firmly into place without wobbling. If it feels loose, disassemble and recheck alignment before proceeding.
Common Pitfalls and How to Avoid Them
Rushing the process is the most frequent cause of damage. Enthusiasts often force the helmet down too quickly, especially if the head base feels tight. Over time, this weakens the connection points and creates microfractures invisible to the naked eye—but evident when the helmet begins to shift.
| Issue | Causes | Solution |
|---|---|---|
| Helmet tilts to one side | Asymmetric insertion or warped piece | Disassemble and realign; test fit without pressing fully |
| Creaking sound during attachment | Excessive friction or incompatible batch variation | Use minimal pressure; consider replacing either part |
| Helmet won't stay on torso | Worn stud or stretched helmet collar | Replace head or torso; avoid glue unless permanent display |
Expert Insight: Precision Over Force
“Many fans don’t realize that LEGO tolerances vary slightly between production runs. What fits perfectly today might feel tighter or looser five years later. The key is patience—align, then seat. Never force.” — Lars Mikkelsen, Certified LEGO Master Builder & Display Artist
This advice underscores a critical principle: consistency in technique matters more than speed. Seasoned builders develop a tactile sense for proper fit, recognizing the subtle 'click' that signals correct placement. Newcomers should practice on less valuable figures before handling rare or vintage Darth Vader variants.
Mini Case Study: Restoring a Vintage 1999 Vader Head
Mark, a collector from Copenhagen, acquired a used Episode I-era Darth Vader minifigure missing its original helmet. He purchased a replacement online but found the new helmet sat crookedly on the original head base. After checking for debris and confirming both pieces were authentic LEGO, he realized the issue was batch variance—the newer helmet had slightly thicker sidewalls.
He applied the step-by-step method outlined here, starting with rear-first insertion and incremental pressure. When full alignment still failed, he carefully tested the helmet on other heads and discovered it fit standard bases flawlessly—just not his aged one, which had contracted slightly over two decades.
Instead of forcing it, Mark opted to source a matching-era helmet from a reputable collector forum. The original aesthetic and structural harmony were restored, preserving both authenticity and durability.
Final Checklist for Flawless Assembly
- ✅ Clean all components with a dry microfiber cloth
- ✅ Verify orientation: front, back, and top alignment
- ✅ Begin attachment from the rear to avoid front-edge stress
- ✅ Apply even pressure across the upper sides, not the center
- ✅ Inspect symmetry from multiple angles
- ✅ Test fit on torso to ensure secure retention
- ✅ Store assembled heads upright or in protective cases
Frequently Asked Questions
Can I paint or modify the Darth Vader head?
Yes, but only if you're not preserving collectible value. Acrylic paints work best on primed LEGO surfaces. For displays, some builders add matte sealants to reduce shine. Always disassemble before painting to avoid coating connection points.
Why does my helmet keep falling off?
This usually indicates wear on either the neck stud or the helmet’s inner collar. Over repeated use, these parts lose elasticity. Replace the weaker component rather than attempting repairs. Avoid sanding or trimming, which compromise structural integrity.
Are there different versions of the Darth Vader LEGO head?
Yes. Early versions (pre-2010) often featured simpler printing and slightly rounder helmets. Modern iterations include enhanced detailing, improved visor depth, and better weight distribution. Some exclusive sets even feature alternate builds like transparent-back designs for display stands.
Mastery Through Attention
Building a flawless Darth Vader LEGO head isn’t about complexity—it’s about discipline. Each motion, from initial alignment to final inspection, contributes to the overall presence of the figure. In the world of LEGO collecting, where visual perfection defines display quality, getting the small things right elevates the entire build.


 浙公网安备
33010002000092号
浙公网安备
33010002000092号 浙B2-20120091-4
Comments
No comments yet. Why don't you start the discussion?