
The Fondjoy Iron Man MK2 action figure is a detailed, highly articulated collectible that brings the iconic early armor from the Marvel Cinematic Universe to life. While pre-assembled versions exist, many fans choose the DIY route—either because they purchased a kit or want full control over the final look. Assembling it correctly ensures durability, articulation, and display quality. This comprehensive guide walks you through each phase of assembly with precision-tested methods, expert insights, and real-world tips to help you avoid common pitfalls.
1. Pre-Assembly Preparation: Tools and Workspace Setup
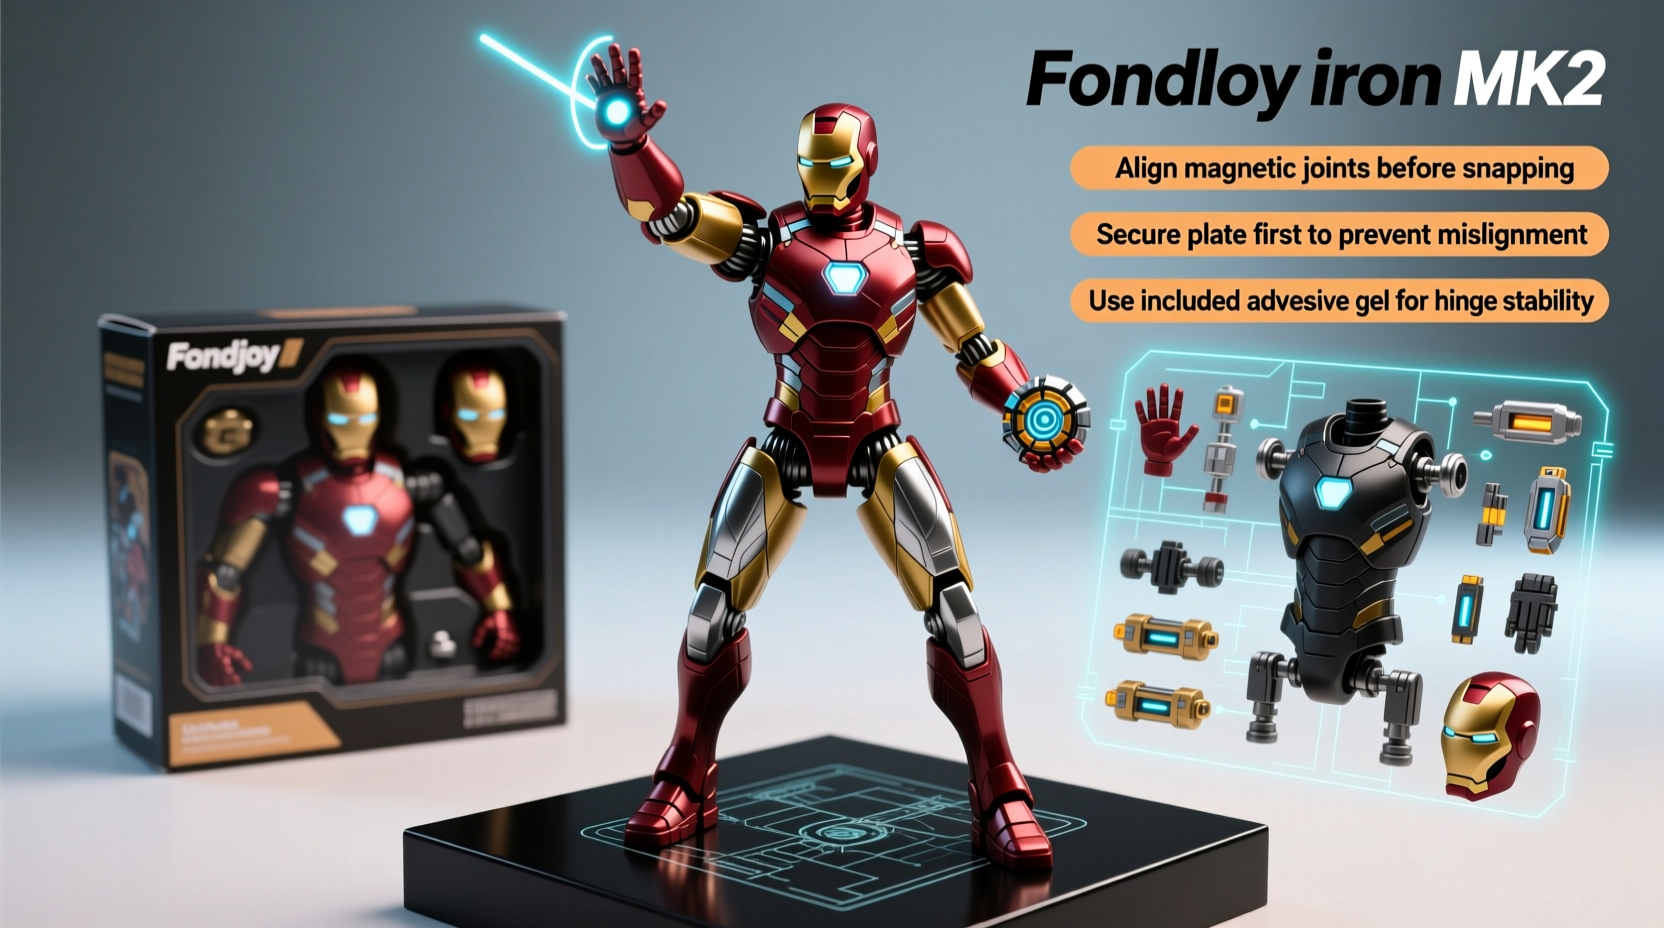
Before touching any parts, prepare your environment. A clean, well-lit workspace with organized tools prevents lost pieces and mistakes. The MK2 includes small joints, screws, and delicate armor panels that can be easily damaged if handled improperly.
You’ll need the following tools:
- Mini Phillips-head screwdriver (size #0 or #00)
- Tweezers (for handling small parts)
- Soft microfiber cloth
- Isopropyl alcohol (70%) for cleaning parting lines
- Small brush (like a toothbrush) for dust removal
- Magnifying glass (optional but helpful for inspecting joints)
Lay out all components from the box and cross-check them with the instruction manual. Missing parts are rare but possible. Contact the seller immediately if anything is absent.
2. Step-by-Step Assembly Process
Follow this logical sequence to assemble your MK2 figure efficiently. Skipping steps or forcing parts can lead to breakage, especially in the shoulder and hip joints.
- Inspect and Clean Parts: Remove any mold release residue or flash using isopropyl-soaked cotton swabs. Dry thoroughly before assembly.
- Assemble the Internal Frame (Skeleton): Begin with the torso core. Attach the spine connector and secure the chest plate housing. This forms the central support.
- Install Shoulder Joints: Slide the upper arms into the shoulder sockets. Tighten the joint screws just enough to allow smooth movement without wobbling. Over-tightening strips plastic threads.
- Attach Arms and Hands: Connect forearms, then wrists. Test articulation at each stage. The MK2’s repulsor palms should align naturally when fists are closed.
- Build the Lower Body: Secure the hip ball joints to the pelvis frame. Attach thighs, knees, and lower legs. Ensure ankle rotation is smooth before fixing feet.
- Mount Armor Panels: Start from the torso and work outward. Attach abdominal plating, then pectoral covers. Follow with upper and lower arm guards, leg segments, and finally the helmet.
- Final Check and Adjustments: Move each joint through its range. Tighten loose screws and reseat misaligned panels.
3. Common Mistakes and How to Avoid Them
Even experienced collectors make errors during assembly. These are the most frequent issues—and how to fix them.
| Mistake | Consequence | Solution |
|---|---|---|
| Over-tightening screws | Stripped threads, cracked joints | Use light pressure; stop when resistance increases |
| Forcing misaligned panels | Cracked armor, poor fit | Double-check orientation; disassemble and retry |
| Skipping internal frame check | Unstable posture, drooping limbs | Verify core integrity before adding armor |
| Ignoring parting lines | Rough texture, visible seams | Light sanding or alcohol wipe pre-assembly |
“Patience is the most important tool when building high-detail figures like the MK2. Rushing leads to irreversible damage.” — Daniel Reyes, Prop Master & Collectible Consultant
4. Expert Tips for Enhanced Durability and Display
Once assembled, your MK2 should not only look good but last. These professional techniques go beyond basic instructions.
- Use Threadlocker Sparingly: A tiny drop of low-strength threadlocker (e.g., Loctite 222) on joint screws prevents loosening without making disassembly impossible.
- Reinforce Weak Points: The elbow and knee joints are prone to slippage. Wrap a thin elastic band around the joint pin before insertion to increase friction.
- Customize Fit with Shims: If armor gaps appear, cut micro-shims from plastic card (like an old credit card) and insert behind panels for flush alignment.
- Test Poses Before Final Lockdown: Pose the figure in dynamic stances (flight, repulsor blast) to ensure stability. Adjust joint tension as needed.
5. Real Example: Fixing a Loose Shoulder Joint
Mark, a collector from Austin, assembled his MK2 only to find the right shoulder sagged after a few days. He had tightened the screw fully, but movement caused gradual loosening. Instead of applying glue—which would ruin future customization—he removed the arm, wrapped two turns of Teflon tape around the joint pin, and reassembled. The added thickness created a snug fit without restricting motion. The shoulder stayed firm for over six months.
This solution is reversible and maintains factory-like appearance—ideal for resale or trade scenarios.
Frequently Asked Questions
Can I paint my MK2 after assembly?
Yes, but disassembly is strongly recommended. Painting over sealed joints risks cracking and adhesion failure. Use acrylic-based model paints and prime first for best results.
What if a screw breaks inside the joint?
Stop immediately. Use a precision drill bit (1mm) to carefully bore into the broken screw, then extract with a reverse-thread extractor. Replace with a spare or order a replacement set online.
Is it safe to pose the MK2 for long periods in flight mode?
Yes, as long as joint tension is balanced. However, periodically return the figure to a neutral stance to relieve stress on connecting pins and prevent creep deformation.
Final Checklist Before Display
- All screws are securely fastened but not over-tightened
- Armor panels sit flush with no visible gaps
- Repulsor palms face forward when arms are extended
- Head rotates smoothly and holds position
- No debris or leftover packaging material inside joints
- Figure stands upright without tipping
Conclusion
Assembling the Fondjoy Iron Man MK2 is more than a mechanical task—it’s a ritual of craftsmanship and fandom. With the right approach, attention to detail, and respect for the materials, your figure will stand as a durable, dynamic centerpiece in your collection. Whether you're a first-time builder or refining your technique, every step you take improves both the process and the result.


 浙公网安备
33010002000092号
浙公网安备
33010002000092号 浙B2-20120091-4
Comments
No comments yet. Why don't you start the discussion?