
The resurgence of Y2K fashion has brought bold accessories back into the spotlight, and few elements capture the era’s essence like chunky chain straps. Whether you're revamping a vintage purse or modernizing a minimalist tote, adding a metallic chain strap instantly elevates your look with retro flair. But aesthetics mean little if the strap doesn’t stay put. A poorly attached chain can slip, snap, or damage your favorite bag. This guide walks through every stage of securely installing a Y2K-style chain strap on nearly any handbag—ensuring both durability and style.
Understanding Chain Strap Components and Compatibility
Before reaching for tools, assess your bag and chosen strap. Not all chains are created equal, nor are all bags designed to support added weight. Most Y2K-inspired straps consist of metal links (often stainless steel or alloy) connected to attachment hardware: lobster clasps, spring rings, or swivel hooks. These connect to either D-rings, O-rings, or built-in loops on the bag.
If your handbag lacks sturdy anchor points, reinforcement is essential. Lightweight fabric bags, clutches, or evening purses may require additional hardware installation such as riveted D-rings or reinforced stitching panels to handle stress from the chain’s weight.
Tools and Materials You’ll Need
Gathering the right supplies ensures a clean, professional result. Depending on your bag’s construction, you may need some or all of the following:
- Y2K-style chain strap with hardware
- Reinforced D-rings or O-rings (if not already present)
- Heavy-duty nylon thread or waxed polyester cord
- Needle (leather or upholstery grade, if applicable)
- Mini rivet setter and rivets (for non-stitched bags)
- Sewing machine (optional, but recommended for fabric bags)
- Pliers (to open and close jump rings)
- Measuring tape
- Scissors or thread clippers
- Chalk or fabric marker
“Many people underestimate how much lateral tension a swinging chain creates. The weakest point isn't usually the clasp—it's the attachment loop.” — Dana Reyes, Handbag Designer & Restoration Specialist
Step-by-Step Installation Process
Follow this detailed sequence to ensure your chain strap remains secure under daily use.
- Evaluate Attachment Points: Inspect where the original handles or straps connect. Look for signs of wear, weak stitching, or thin material. If existing loops feel flimsy, plan to reinforce them.
- Determine Desired Length: Hold the chain against your shoulder or crossbody position to decide ideal drop length. Mark adjustment points using chalk.
- Add Reinforcement Hardware (if needed): For bags without strong anchor points, install brass or nickel-plated D-rings. Position them symmetrically near top gussets. Secure with double-box stitching or rivets.
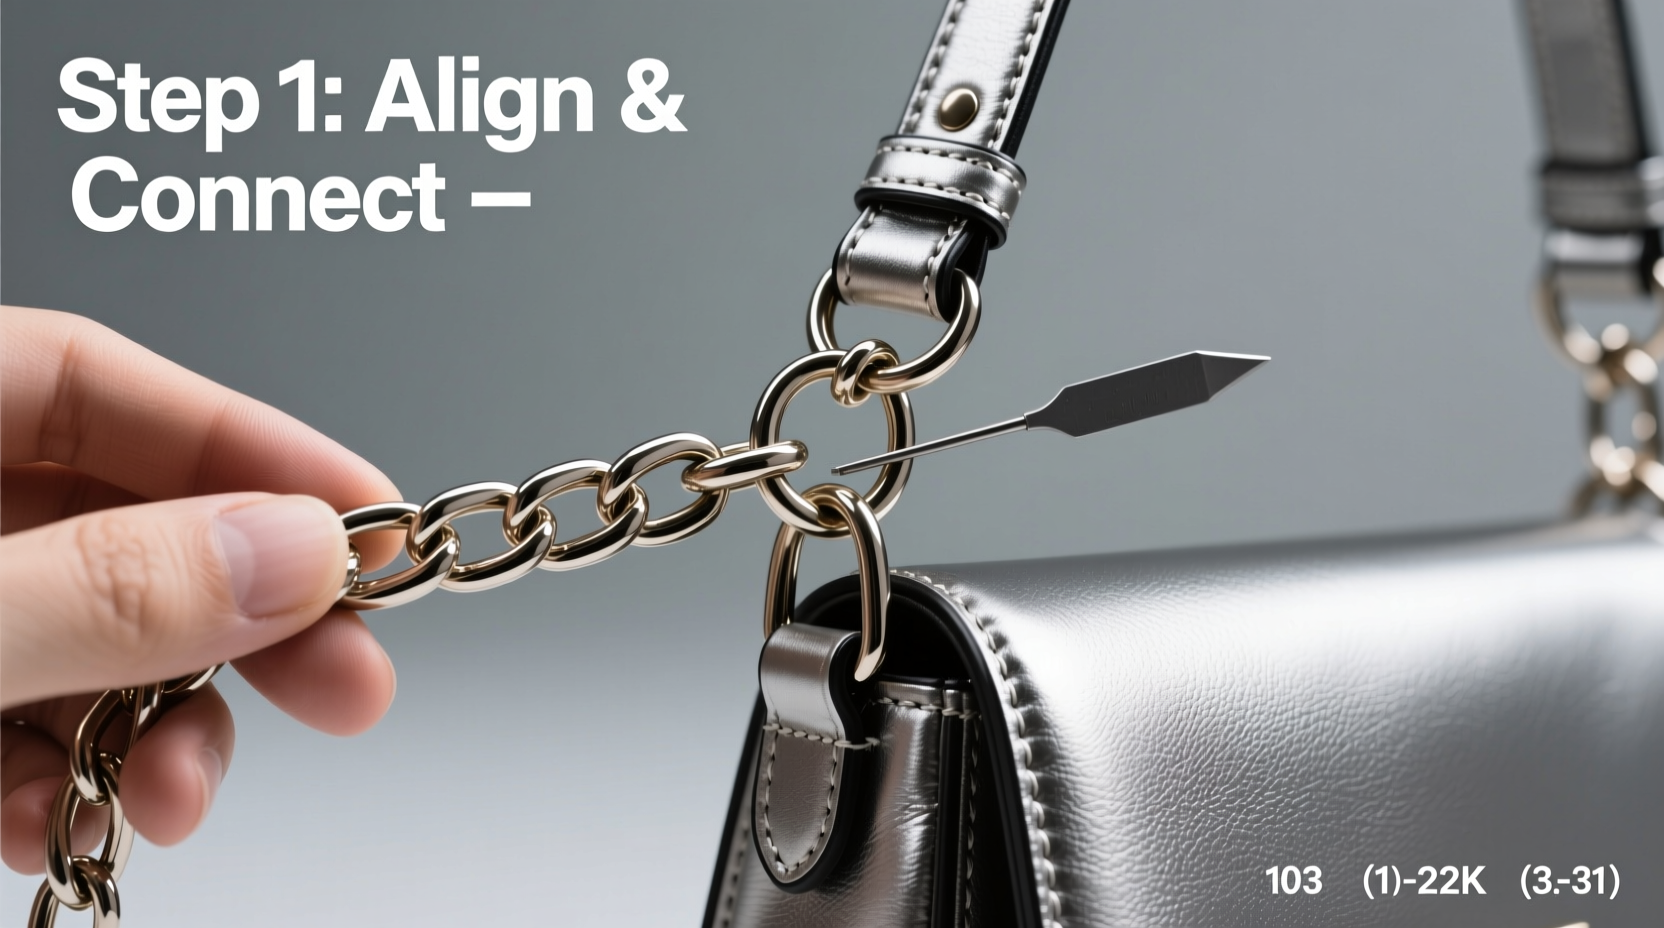
- Attach Jump Rings: Open a small jump ring using pliers, slide it through the D-ring and the chain’s end loop, then close tightly. Never force open the ring sideways—this weakens the metal.
- Test Tension and Alignment: Gently tug on the chain from multiple angles. Ensure no twisting occurs and that weight distributes evenly across both sides.
- Final Adjustments: Trim excess chain if necessary (some models allow link removal), and verify clasp operation. Smooth any sharp edges with fine sandpaper.
Reinforcing Stitching for Fabric and Leather Bags
If sewing is required, technique matters more than speed. Use a saddle stitch for hand-sewing leather: two needles with thread running in opposite directions. This method prevents total unraveling if one section breaks. For fabric bags, reinforce stitching lines with bar tacks—short, dense zigzag stitches at stress points.
| BAG MATERIAL | RECOMMENDED ANCHOR METHOD | MAX CHAIN WEIGHT |
|---|---|---|
| Leather | Riveted D-rings + saddle stitching | Up to 1.5 lbs |
| Cotton Canvas | Double-stitched O-rings | Up to 1 lb |
| Vinyl/Synthetic | Heat-set grommets + bonded webbing | 0.75 lbs |
| Silk or Delicate Fabrics | Not recommended unless internally lined with stabilizer | Avoid heavy chains |
Common Mistakes and How to Avoid Them
Even experienced DIYers make errors when modifying accessories. Awareness helps prevent costly damage.
- Using weak jump rings: Thin or poorly closed rings are failure points. Opt for soldered closed rings or replace with larger gauge wire versions.
- Ignoring weight distribution: Long chains pull downward and outward. Uneven tension can distort bag shape over time.
- Skipping reinforcement: Attaching a chain directly to flimsy factory stitching invites seam rupture. Always back critical joints with extra layers or hardware.
- Over-tightening clasps: Excessive force on lobster clasps can deform the spring mechanism, reducing grip strength.
Real-World Example: Upgrading a Vintage Clutch
Maria, a stylist in Brooklyn, inherited a beaded 1990s clutch from her aunt. While beautiful, it lacked practicality. She wanted to wear it crossbody but feared damaging the delicate frame. Instead of attaching the chain directly to the fragile metal hinges, she sewed narrow grosgrain ribbons inside the top seam, anchored with X-stitches. She then riveted small D-rings to the ends of the ribbons and connected the chain via jump rings. The result? A secure, stylish transformation that preserved the clutch’s integrity while embracing modern utility.
Frequently Asked Questions
Can I remove the chain later without damaging my bag?
Yes—if you used removable hardware like D-rings or jump rings. Avoid permanent adhesives or irreversible modifications unless you’re certain about the change. Always document original configurations before altering.
What if my bag has only one top loop instead of two?
You can still add a chain, but balance becomes crucial. Consider converting to a single-shoulder design with a centered D-ring mounted internally for stability. Distribute load across a wider internal patch of fabric or leather.
Are magnetic clasps safe for chain straps?
They’re convenient but less reliable under stress. Reserve magnets for lightweight chains or decorative accents. For everyday use, stick with lobster clasps or spring gates that lock mechanically.
Final Checklist Before Wearing Your Newly Modified Bag
- ✅ Confirm both sides of the chain are equally tensioned
- ✅ Verify clasps open and close smoothly without snagging
- ✅ Inspect stitching or rivets for gaps, looseness, or puckering
- ✅ Test with full bag weight (wallet, phone, keys, etc.)
- ✅ Check clearance: ensure chain doesn’t drag or catch on clothing
Conclusion: Style Meets Strength
A well-attached Y2K chain strap transforms an ordinary handbag into a statement piece rooted in early-2000s nostalgia. More than just a trend, it reflects personal creativity and attention to craftsmanship. By selecting quality materials, reinforcing weak points, and following precise attachment methods, you ensure your accessory remains as functional as it is fashionable. Don’t let fear of damage hold you back—armed with the right knowledge, customizing your bag is not only possible but deeply rewarding.


 浙公网安备
33010002000092号
浙公网安备
33010002000092号 浙B2-20120091-4
Comments
No comments yet. Why don't you start the discussion?