
Moving to a new carrier can be exciting—better coverage, lower bills, or a new phone plan. But one wrong move during the transition could mean losing years of memories, important contacts, or critical app data. The key to a smooth switch is preparation: backing up your entire phone before you deactivate your old line. This comprehensive guide walks you through every essential step, whether you're using an iPhone or Android, ensuring no data slips through the cracks.
Why Backing Up Before Carrier Switch Is Critical
Switching carriers often involves transferring your number, activating a new SIM, or setting up a new device. During this process, your current phone may be reset, deactivated, or replaced entirely. Without a complete backup, you risk permanent loss of:
- Photos and videos stored locally
- Saved messages (especially iMessages or SMS threads)
- App login credentials and settings
- Contact lists not synced to the cloud
- Calendar events, notes, and reminders
- Browser bookmarks and saved passwords
A full backup acts as an insurance policy. It ensures that even if something goes wrong during activation or setup, you can restore everything exactly as it was on your previous device.
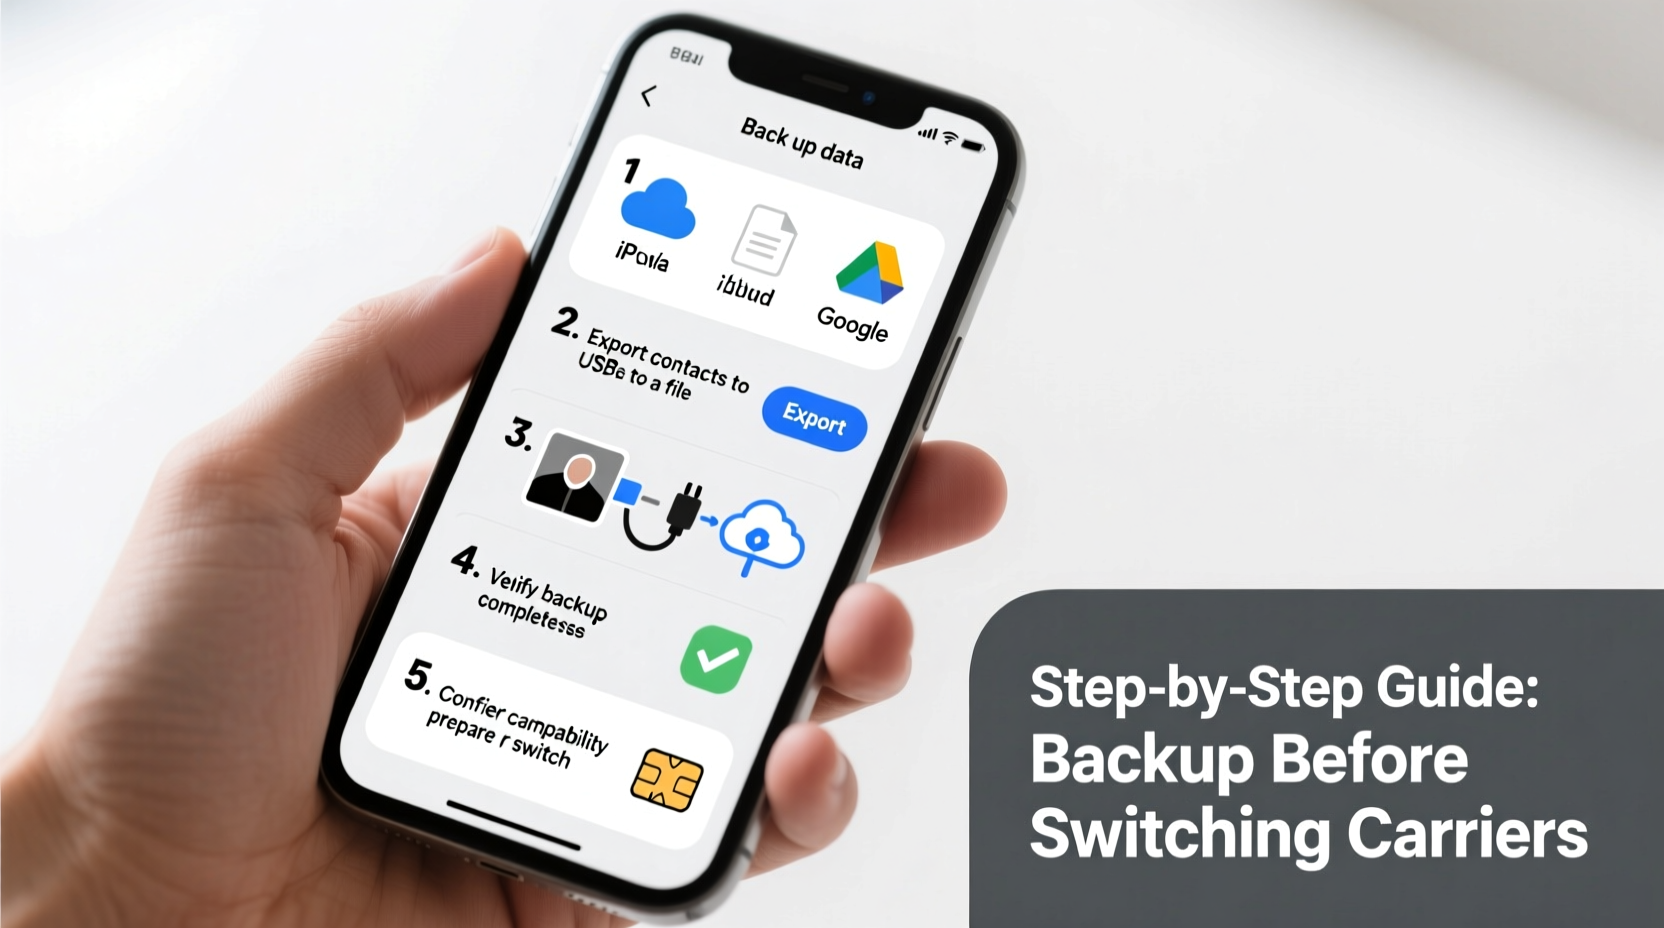
Step-by-Step Backup Process for iPhone
If you’re using an iPhone, Apple provides two primary backup methods: iCloud and iTunes (or Finder on macOS Catalina and later). For maximum security, use both.
- Charge your phone and connect to Wi-Fi – Ensure your iPhone is plugged in and connected to a stable Wi-Fi network. Backups can take time and consume significant power.
- Check iCloud storage – Go to Settings > [Your Name] > iCloud > Manage Storage. If you’re low on space, consider upgrading your plan or deleting unnecessary backups.
- Back up to iCloud – Tap “Back Up Now” under iCloud Backup. Wait for confirmation that the backup completed successfully.
- Create a local backup via computer – Connect your iPhone to a Mac or PC with iTunes installed. Select your device, choose “Back Up Now,” and ensure “Encrypt local backup” is checked to save passwords and Health data.
- Verify the backup – In iTunes or Finder, look for the latest backup timestamp. On iCloud, check Settings > General > iPhone Storage to confirm the backup size matches your expectations.
Apple recommends encrypted local backups because they include sensitive information like Wi-Fi passwords, Health data, and website logins—data not included in standard iCloud backups.
“An encrypted iTunes backup is the most complete snapshot of your iPhone. Always enable encryption if you want to preserve passwords and secure health records.” — David Lin, Senior iOS Support Analyst at AppleInsider Tech Services
Step-by-Step Backup Process for Android
Android devices offer more variability due to different manufacturers and OS versions, but Google’s ecosystem provides reliable cloud-based protection. However, relying solely on Google One isn’t enough for a full recovery.
- Enable Google Account Sync – Go to Settings > Accounts > Google. Ensure Contacts, Calendar, Photos, Gmail, and Drive are syncing. Toggle on “Backup by Google One” under System > Backup.
- Back up photos and videos – Open Google Photos, sign in, and enable “Back up & sync.” Choose “High quality” to save storage space. Verify all media has uploaded by checking the web dashboard.
- Use Samsung Smart Switch (for Samsung users) – If you have a Samsung phone, install Smart Switch and create a full backup to your computer or external drive. This includes call logs, messages, and third-party app data.
- Manually copy un-synced files – Use a file manager to transfer documents, downloads, and any media not automatically backed up to a computer via USB.
- Install a third-party backup app (optional) – Apps like Helium or Swift Backup (root required) can archive app data, including games and custom settings not preserved in standard Android backups.
Unlike iPhones, Androids don’t always back up SMS/MMS or app data completely through Google alone. Manual verification is crucial.
Essential Pre-Switch Checklist
Before finalizing your carrier change, run through this checklist to ensure nothing is overlooked:
- ✅ Charged phone and stable Wi-Fi connection established
- ✅ iCloud or Google account signed in and verified
- ✅ Full cloud backup completed and confirmed
- ✅ Local encrypted backup created via computer
- ✅ Photos and videos verified as uploaded
- ✅ Contacts synced to cloud account
- ✅ Messages backed up (iMessage history or SMS exported)
- ✅ App data and passwords secured (via password manager or export)
- ✅ Important files manually copied to external storage
- ✅ Backup timestamps and sizes double-checked
Data Protection: Do’s and Don’ts
| Do’s | Don’ts |
|---|---|
| Use encrypted local backups for maximum data retention | Don’t rely only on cloud storage without verifying upload completion |
| Test restoring a few photos or messages from backup | Don’t perform the switch without confirming backup success |
| Update your phone’s OS before backing up | Don’t delete original data until new device is fully functional |
| Store backup passwords in a secure password manager | Don’t use public Wi-Fi to upload sensitive backups |
| Label and organize external drives used for backup | Don’t assume automatic sync means full protection |
Real-World Example: What Happens Without a Backup?
Sarah, a freelance photographer in Austin, switched carriers to get better rural coverage. Excited about her new plan, she transferred her number and activated her SIM without backing up her four-year-old Pixel 5. She assumed her Google Photos sync was sufficient. Unfortunately, her last 72 hours of unsynced photos—captured during a wedding shoot—were lost when she reset the phone. Additionally, her saved Wi-Fi passwords, note-taking app data, and text message history vanished.
She spent weeks trying to recover files, contacting Google support, and re-entering contact details from old emails. The experience cost her not just time, but client trust when she couldn’t produce raw shots she thought were safe. A simple two-hour backup would have prevented the crisis.
Sarah now maintains a dual backup strategy: daily cloud sync and monthly encrypted local backups to her laptop. Her rule? “No carrier change, phone upgrade, or factory reset happens without a verified backup first.”
FAQ: Common Questions About Phone Backups Before Carrier Switch
Will switching carriers erase my phone?
Not necessarily—but many people reset their phones during the process, especially if moving to a new device. Even if keeping the same phone, deactivating the old SIM can trigger system changes. A backup ensures you can restore your data regardless.
Can I back up text messages separately?
Yes. iPhone users can use iCloud or third-party tools like iMazing. Android users can export SMS via apps like SMS Backup & Restore or use Google Messages’ built-in backup. Note that iMessages sent to non-Apple devices won’t transfer unless backed up first.
How long does a full phone backup take?
It depends on your data volume and connection speed. A phone with 64GB of photos and apps might take 30 minutes over fast Wi-Fi for iCloud/Google, and up to 2 hours via USB. Larger libraries (200GB+) can take several hours. Always start early.
Final Steps Before You Switch
Once your backup is complete, take these final actions:
- Write down your backup password – Especially for encrypted iTunes or third-party backups.
- Note your backup date and location – Label the file or drive clearly.
- Confirm with your new carrier – Ask if they recommend any additional steps before porting your number.
- Wait for confirmation – Only proceed with SIM swap or device reset after receiving confirmation that your backup is intact.
After switching, set up your new device and restore from the most recent backup. Test core functions: open messages, view recent photos, check app logins, and verify contacts. If anything is missing, you’ll know immediately and can troubleshoot using your backup source.
Conclusion: Secure Your Digital Life Before the Switch
Your phone holds more than just apps and photos—it’s a repository of personal history, professional connections, and daily functionality. Switching carriers shouldn’t mean risking that data. By following a structured backup plan tailored to your device, you protect years of effort and memory. Whether you use iCloud, Google services, or manual transfers, the goal is the same: a complete, verified, and restorable copy of your digital life.


 浙公网安备
33010002000092号
浙公网安备
33010002000092号 浙B2-20120091-4
Comments
No comments yet. Why don't you start the discussion?