
Embroidering a hobo purse transforms a simple accessory into a personal statement. Whether you're enhancing a store-bought bag or crafting one from scratch, hand embroidery adds texture, color, and soul. Unlike mass-produced items, an embroidered purse carries intention in every stitch. With the right tools and technique, even beginners can create something elegant and lasting. This guide walks through the entire process—from selecting materials to final finishing—with practical advice that ensures professional results.
Choosing the Right Purse and Fabric
The foundation of any successful embroidery project is the base material. For hobo purses, which typically have a soft, slouchy silhouette, it’s important to choose a stable yet workable fabric. Canvas, denim, and cotton twill are ideal because they hold stitches well without excessive stretch. Avoid slippery materials like satin or synthetic blends unless they’re backed with interfacing.
If you’re starting with a pre-made hobo bag, check the stitching around the top edge and seams. A well-constructed bag will maintain its shape during embroidery, especially when placed in a hoop. Alternatively, making your own purse from natural fiber fabric gives full control over size, structure, and design placement.
Fabric Comparison for Embroidery
| Fabric Type | Stability | Needle Ease | Best For |
|---|---|---|---|
| Cotton Canvas | High | Easy | Detailed motifs, lettering |
| Denim | High | Moderate | Bolder patterns, textured work |
| Linen | Medium | Easy | Rustic, organic designs |
| Synthetic Blends | Low | Difficult | Not recommended for beginners |
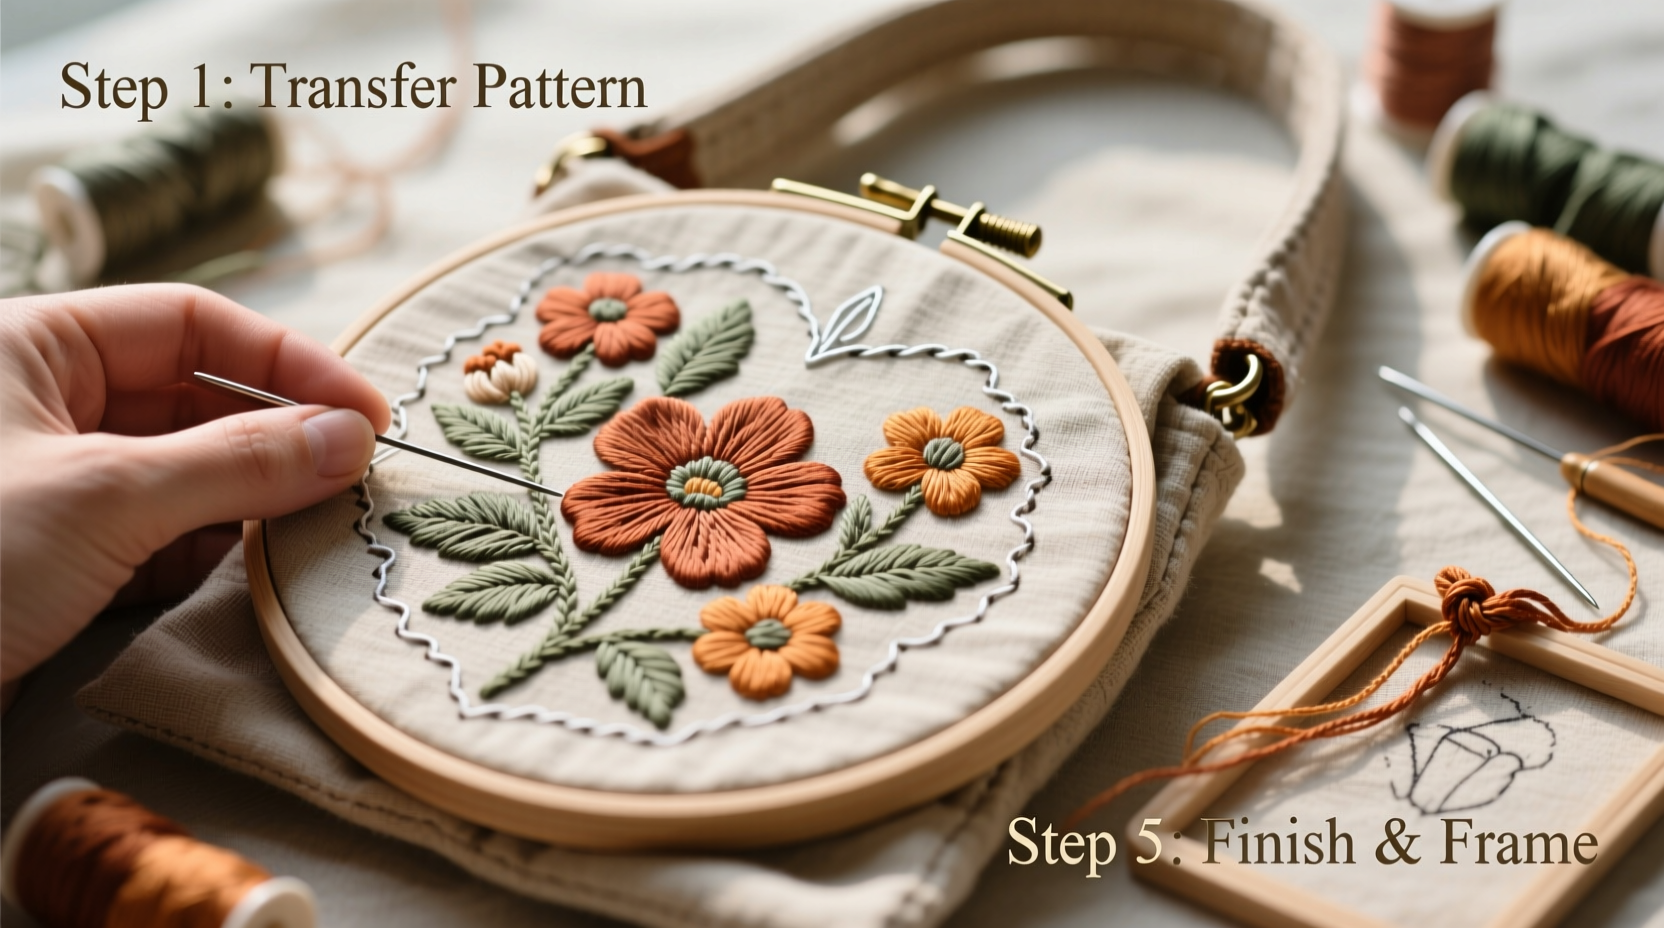
Design Planning and Transfer Techniques
Before picking up a needle, decide on a design that complements the purse’s shape. Hobo bags often feature curved sides, so consider symmetry and balance. Floral sprays, geometric borders, or monograms near the flap or base tend to look most harmonious. Sketch your idea on paper first, then scale it to fit the bag using grid paper or digital tools.
Transferring the design accurately is critical. Use one of these reliable methods:
- Iron-on transfer pens/pencils: Draw your design on paper, flip it, and trace onto the fabric with heat-sensitive lead. Press with a warm iron to transfer.
- Tracing with light: Tape the design to a window or use a lightbox. Place the purse panel over it and trace with a water-soluble pen.
- Prick and pounce: Prick holes along the lines of your paper pattern, secure it to the fabric, then dab powdered chalk through the holes to create a dotted outline.
“Always test your transfer method on a scrap piece first. Some inks bleed or don’t wash out.” — Lila Chen, Textile Artist & Educator
Essential Tools and Materials Checklist
Gathering everything before you begin prevents interruptions and keeps your workflow smooth. Here’s what you’ll need:
- Embroidery hoop (6–8 inches, depending on design size)
- Embroidery floss (cotton or silk, 6-strand)
- Needles (size 7–9 embroidery or crewel needles)
- Scissors (small, sharp for thread cutting)
- Water-soluble fabric marker or pencil
- Pins or clips to secure fabric
- Thimble (optional, but helpful for thick layers)
- Pattern transfer tool (lightbox, transfer pen, etc.)
- Lint roller (to clean surface before stitching)
Step-by-Step Embroidery Process
Follow this sequence to ensure clean, durable embroidery on your hobo purse:
- Prepare the surface: Lightly press the area to be embroidered. Use a lint roller to remove dust or fibers that could interfere with stitching.
- Secure in the hoop: Loosen the screw, place the fabric taut between the inner and outer rings, then tighten. Avoid over-tightening, which can distort weave.
- Separate floss strands: Most patterns use 2–3 strands of 6-strand floss. Pull one strand at a time from the skein and cut about 18 inches long to minimize tangling.
- Thread the needle: Use a needle threader if needed. Knot the end of the thread with a simple double knot.
- Begin stitching: Start from the center of the design to maintain alignment. Use small anchoring stitches on the backside to secure threads without bulky knots.
- Choose appropriate stitches:
- Backstitch – for outlines and text
- Satin stitch – for solid shapes and letters
- French knots – for dots, flower centers, texture
- Stem stitch – for flowing lines and stems
- Chain stitch – for decorative borders
- Maintain consistent tension: Pull threads evenly—not too tight (causes puckering) or too loose (leads to looping).
- Change colors as needed: End off each color neatly by running the thread under existing stitches on the back before trimming.
- Remove transfer marks: Once stitching is complete, gently dab water-soluble marks with a damp cotton swab. Let dry flat.
- Release from hoop: Loosen the hoop and remove the purse. If creases remain, lightly press from the back with a warm iron and pressing cloth.
A Real Example: Emma’s Botanical Hobo Bag
Emma, a beginner crafter from Portland, wanted to personalize a plain canvas hobo she bought on sale. She sketched a climbing ivy vine with tiny blossoms along one side, mirroring it subtly on the other. Using a printed template, she traced the design with a water-soluble pen after testing it on a scrap. She used two strands of green floss for stem stitch vines and pale pink satin stitches for flowers, adding French knots in deeper rose for dimension.
She worked in 20-minute sessions over three evenings, keeping the hoop on her living room table. After finishing, she washed away the markings and was thrilled with the result—unique, balanced, and surprisingly professional-looking. Her friends asked where she’d bought it, not realizing it was handmade.
Finishing and Care Tips
Once embroidery is complete, inspect both sides. Trim any stray threads and reinforce weak spots with a few backstitches if necessary. If the purse lining is accessible, consider securing loose ends between layers with a whipstitch to prevent snagging.
To preserve your work:
- Avoid machine washing. Spot clean only with mild soap and a soft cloth.
- Store the purse in a cool, dry place away from direct sunlight to prevent fading.
- Use acid-free tissue paper inside to help retain shape and protect embroidery.
- Never fold stitched areas sharply; roll or hang instead if possible.
Frequently Asked Questions
Can I embroider on a finished purse with linings and zippers?
Yes, but work carefully. Remove the lining if possible, or push it out of the way while stitching. Use shorter stitches to avoid catching internal layers. Reattach the lining securely afterward.
What if my fabric puckers during embroidery?
Puckering usually means the hoop was too tight or the thread tension was uneven. Loosen slightly and re-stretch the fabric. For minor puckers, steam-blocking from the back can help relax the weave.
How do I choose thread colors that last?
Opt for colorfast embroidery floss, such as DMC or Anchor brands. Test for bleeding by wetting a small strand and blotting it on white paper. If color transfers, rinse thoroughly before use.
Bring Your Vision to Life
Creating an embroidered hobo purse isn’t just about decoration—it’s an act of slow fashion, mindfulness, and self-expression. Every loop and knot becomes part of a story only you can tell. With patience and attention to detail, you can craft something beautiful that stands out in a world of uniform accessories. The techniques in this guide are timeless, scalable, and deeply satisfying to master.


 浙公网安备
33010002000092号
浙公网安备
33010002000092号 浙B2-20120091-4
Comments
No comments yet. Why don't you start the discussion?