
For many dog owners, helping their pets navigate elevated surfaces—like beds, couches, or vehicles—becomes essential as dogs age or face mobility challenges. A well-built dog ramp provides independence, reduces joint strain, and prevents injuries from jumping. While commercial ramps are available, a custom-built wooden ramp offers superior durability, grip, and fit tailored to your space and pet’s needs. This guide walks you through designing, constructing, and finishing a safe, long-lasting dog ramp using basic tools and materials.
Why Build Your Own Dog Ramp?
Premade ramps often lack structural integrity, use slippery surfaces, or don’t match the height requirements of your furniture or vehicle. A DIY ramp allows full control over dimensions, materials, and safety features. Veterinarians increasingly recommend consistent access to elevated areas without jumping, especially for breeds prone to hip dysplasia or spinal issues like Dachshunds and Corgis.
“Providing a stable, low-angle ramp significantly reduces stress on a dog’s joints during daily activities.” — Dr. Laura Simmons, DVM, Canine Rehabilitation Specialist
Planning Your Dog Ramp: Measurements and Design
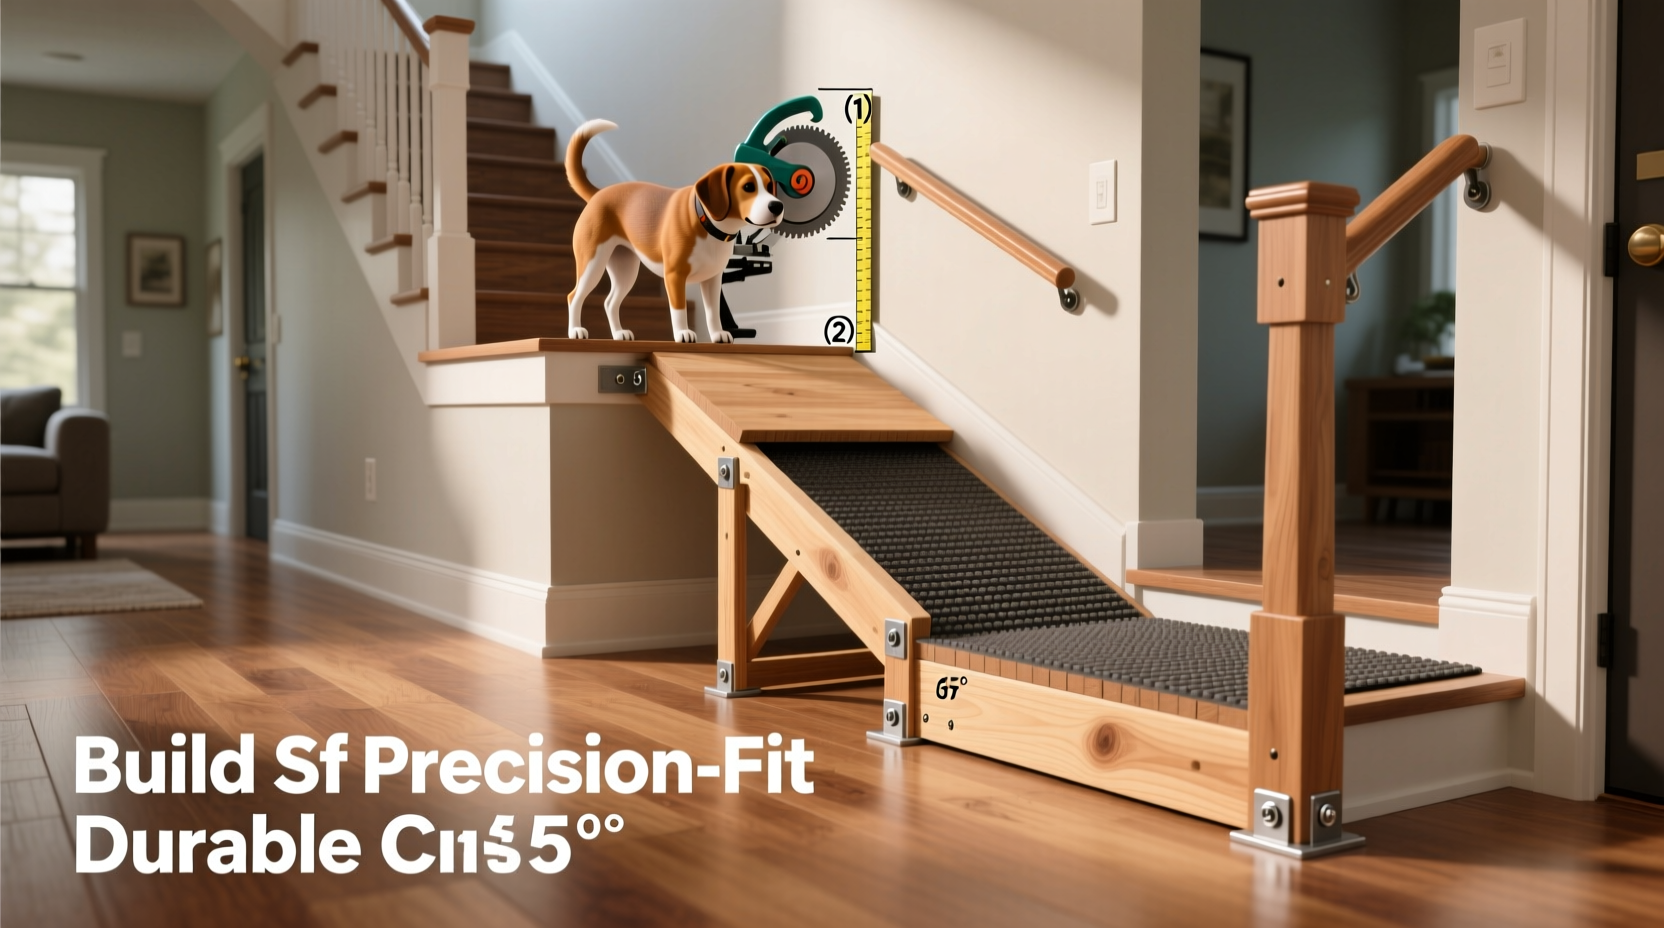
The success of your ramp hinges on proper planning. Begin by measuring the vertical distance from the floor to the top surface (e.g., bed or car trunk). Then determine the ideal incline. Experts recommend a slope no steeper than 20–25 degrees for small or senior dogs. Larger, more agile dogs can manage up to 30 degrees, but gentler is always safer.
To calculate ramp length, use this simple formula:
Length (in inches) = Height (in inches) ÷ tan(desired angle)
As a rule of thumb:
- For every 1 inch of height, allow 4–5 inches of ramp run.
- A 12-inch high bed should have a ramp between 48 and 60 inches long.
Key Design Considerations
- Width: At least 4 inches wider than your dog’s shoulder width. Most home ramps range from 14 to 24 inches wide.
- Side rails: Essential for confident dogs and crucial for those with poor balance. Install 2–3 inch high edges along both sides.
- Non-slip surface: Texture is critical. Avoid smooth wood or painted finishes that become slick when worn.
- Portability: If needed, design in two hinged sections for folding or add lightweight handles.
Materials and Tools Checklist
Building a sturdy ramp requires quality materials. Use exterior-grade plywood or solid pine for longevity and resistance to warping. Here’s what you’ll need:
- Lumber:
- One sheet of ¾-inch exterior plywood (for base), 1x2 or 1x3 pine boards (for frame and rails)
- Surface Traction:
- Non-slip tape, rubber shelf liner, or outdoor carpet with adhesive backing
- Fasteners:
- 1¼-inch exterior wood screws, wood glue
- Tools:
- Circular saw or jigsaw, drill, measuring tape, square, clamps, sandpaper (80–120 grit)
Recommended Wood Dimensions for a Standard Ramp
| Component | Material | Dimensions (approx.) |
|---|---|---|
| Ramp Base | ¾” Exterior Plywood | 60” x 18” |
| Side Rails | 1x3 Pine | 60” x 2.5” (two pieces) |
| Bottom Edge Support | 1x2 Pine | 18” x 1.5” (one piece) |
| Top Frame Reinforcement | 1x2 Pine | 18” x 1.5” (one piece) |
Step-by-Step Construction Guide
- Measure and cut the base. Using your calculated length and desired width, mark and cut the plywood ramp base with a circular saw. Sand all edges smooth to prevent splinters.
- Build the frame. Attach the 1x3 side rails along the long edges of the ramp using wood glue and screws every 6–8 inches. These act as guardrails and strengthen the structure.
- Reinforce the bottom and top. Install the 1x2 support piece at the bottom edge (touching the floor) and another at the top edge where the ramp meets the furniture. This prevents flexing and increases stability.
- Sand thoroughly. Pay special attention to corners and screw heads. A rough surface underfoot can deter your dog from using the ramp.
- Add traction. Apply self-adhesive non-slip tape in horizontal strips every 4–6 inches, or glue down outdoor carpet with waterproof adhesive. Ensure no loose edges exist that your dog could chew or trip on.
- Seal if necessary. If using untreated wood, apply a pet-safe, water-based polyurethane sealant to protect against moisture and dirt. Avoid oil-based finishes that may remain tacky.
Real-Life Example: Helping an Aging Labrador
Susan from Portland built a 56-inch ramp for her 11-year-old Labrador, Max, who developed arthritis in his hips. The back of her SUV was 18 inches off the ground, so she used a 5:1 ratio (90 inches long) to create an extra-gentle incline. She added 3-inch pine side rails and covered the surface with dark green outdoor carpet secured with construction adhesive. Max took only two days to adapt, and Susan noticed he stopped limping after car rides. “It’s like giving him five more years of adventure,” she said.
Safety and Usage Tips
A well-built ramp is only effective if used correctly. Follow these best practices:
- Always supervise initial uses until your dog gains confidence.
- Place treats along the ramp to encourage positive association.
- Secure the top edge with Velcro straps or non-slip pads if it rests on upholstery.
- Inspect monthly for loose screws, worn traction, or warping.
- Store indoors when not in use to prolong life, especially if made with wood.
Do’s and Don’ts of Dog Ramp Use
| Do | Don't |
|---|---|
| Use a gradual training process with treats | Force your dog onto the ramp |
| Check for wobbling or movement before each use | Allow the ramp to rest on a slippery surface |
| Clean the surface regularly to maintain grip | Use painted wood without texture |
| Store in a dry place to prevent mold | Leave outdoors in rain or snow |
Frequently Asked Questions
Can I make a foldable ramp for easier storage?
Yes. Build two halves of equal length and join them with a sturdy hinge. Add a support bar or leg in the center when open. Ensure the walking surface remains flush and secure.
What if my dog refuses to use the ramp?
Start by placing the ramp flat on the ground and rewarding your dog for walking across it. Gradually elevate one end over several days. Use high-value treats and praise. Some dogs take a week to adapt.
How much weight can a homemade ramp support?
A properly constructed ramp using ¾-inch plywood and reinforced edges can safely support dogs up to 120 pounds. For heavier breeds, consider doubling the plywood thickness or adding a central support beam underneath.
Final Thoughts: Empower Your Dog’s Mobility
A homemade dog ramp is more than a convenience—it’s an investment in your pet’s comfort and long-term health. With careful planning, durable materials, and attention to safety details, you can build a structure that lasts for years. Whether helping a senior dog enjoy the couch again or enabling a small breed to explore the backyard, this project delivers meaningful results. Take accurate measurements, follow the steps precisely, and prioritize traction and stability above all.


 浙公网安备
33010002000092号
浙公网安备
33010002000092号 浙B2-20120091-4
Comments
No comments yet. Why don't you start the discussion?