
Urban living doesn’t have to mean giving up the joy of gardening. Even with limited space, a balcony can transform into a lush, productive green zone. A vertical herb garden is an elegant, space-saving solution that brings fresh flavor and fragrance within arm’s reach. Whether you're in a high-rise apartment or a compact city flat, this guide walks you through designing, building, and maintaining a thriving vertical herb garden—no backyard required.
Why Go Vertical?
Balconies are often narrow and exposed, making traditional container gardening challenging. Vertical gardens solve this by using wall space instead of floor area. This approach not only maximizes growing potential but also enhances air circulation, reduces pest pressure, and creates a stunning visual feature. Herbs like basil, thyme, oregano, mint, and parsley thrive in vertical setups when given proper light, drainage, and care.
According to horticultural experts at the Royal Horticultural Society, vertical gardening increases usable growing space by up to 70% in constrained urban environments. With smart planning, even a 3-foot-wide balcony can support a dozen different herbs.
“Vertical gardening turns overlooked walls into productive ecosystems. It’s especially effective for culinary herbs, which grow well in shallow soil and benefit from good airflow.” — Dr. Lena Torres, Urban Agriculture Researcher, University of Copenhagen
Planning Your Vertical Herb Garden
Before installing any structure, assess your balcony’s conditions. Not all balconies are created equal—some receive full sun, others are shaded most of the day. Understanding your microclimate ensures you select suitable herbs and materials.
Assess Light Exposure
Most culinary herbs require 4–6 hours of direct sunlight daily. Observe your balcony throughout the day:
- Full sun (6+ hours): Ideal for rosemary, thyme, oregano, basil.
- Partial sun (3–6 hours): Suitable for parsley, cilantro, chives.
- Shade (under 3 hours): Limited options; consider mint or lemon balm, though they may stretch for light.
Check Weight Limits and Safety
Balconies have load-bearing limits. Soil, containers, and water add significant weight. A single cubic foot of moist potting mix weighs about 50 pounds. Avoid overloading railings or unsupported walls. If unsure, consult your building manager before attaching heavy structures.
Choose the Right Location
Select a wall or railing that receives adequate sunlight and allows for easy access. Ensure the site is protected from strong winds, which can dry out plants quickly. South- or west-facing exposures typically offer the best light in the Northern Hemisphere.
Materials and Setup Options
Several vertical systems work well for balconies. The choice depends on budget, DIY skill, and aesthetic preference. Below is a comparison of common vertical garden types:
| System Type | Pros | Cons | Best For |
|---|---|---|---|
| Pocket Fabric Planters | Lightweight, affordable, easy to install | Dries out quickly, shorter lifespan | Beginners, renters |
| Wall-Mounted Pots or Shelves | Durable, customizable, good drainage | Requires drilling, heavier | Permanent installations |
| Gutter Gardens | Excellent drainage, linear design, efficient use of space | Needs secure mounting, limited depth | Long railings or side walls |
| Modular Stackable Planters | Stylish, self-watering options available | More expensive, can be bulky | Design-focused spaces |
Basic Materials Checklist
Here’s what you’ll need to get started:
- Vertical planter system (fabric pockets, gutters, stackable pots, etc.)
- Drill and anchors (if mounting to wall)
- Screw hooks or brackets
- High-quality potting mix (peat-free, well-draining)
- Herb seedlings or seeds
- Watering can with narrow spout or drip irrigation kit
- Measuring tape and level
- Gloves and safety goggles
Step-by-Step Installation Guide
Follow these steps to build a safe, functional vertical herb garden on your balcony.
- Measure and Mark Placement
Use a measuring tape to determine spacing. For pocket planters, allow 6–8 inches between pockets. For gutters or shelves, ensure even alignment using a level. - Install Mounting Hardware
If attaching to a wall, drill pilot holes and insert plastic anchors. Secure brackets with screws. For railings, use S-hooks or adjustable clamps designed for outdoor use. - Prepare Containers
Line fabric planters with biodegradable coir if needed to retain moisture. For gutters, drill ¼-inch drainage holes every 6 inches along the bottom edge. - Add Potting Mix
Fill each compartment halfway with potting mix. Avoid garden soil, which compacts easily and may harbor pests. Opt for a blend with perlite and compost for optimal drainage and nutrition. - Plant Your Herbs
Start with healthy seedlings for faster results. Gently loosen roots and place one herb per pocket or section. Top with more soil and press lightly to eliminate air pockets. - Water Thoroughly
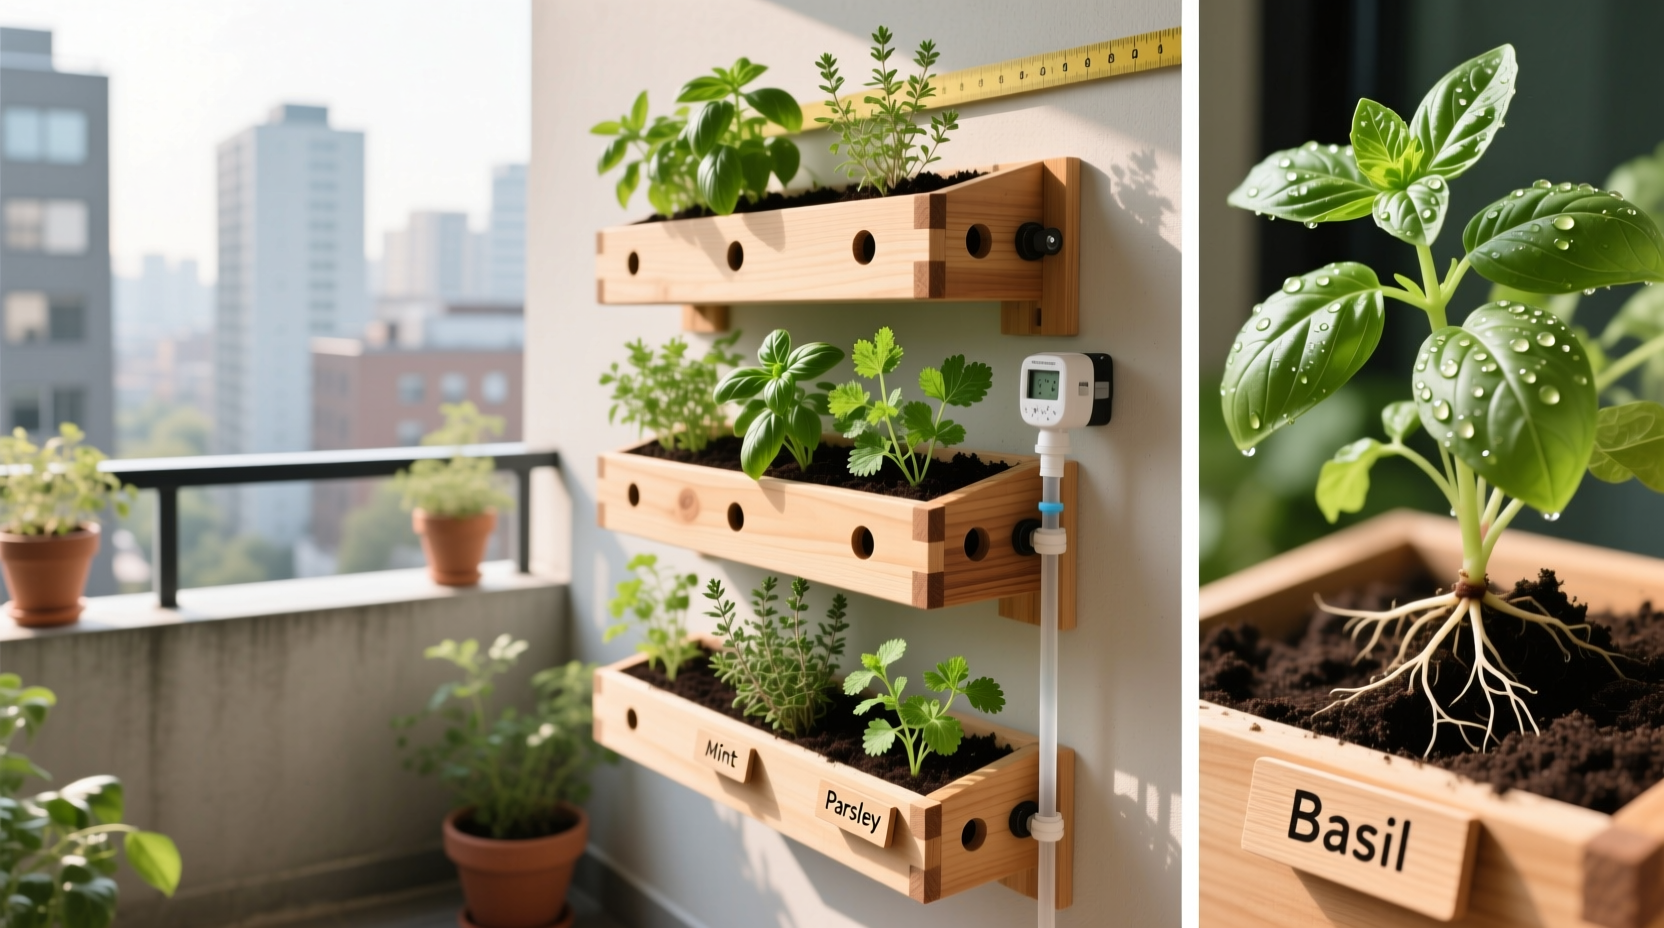
Water slowly until it drains from the bottom. This ensures the entire root zone is moistened. Check daily during hot weather—vertical gardens dry out faster than ground-level pots. - Label Each Herb
Use small plant markers to identify each variety. This prevents confusion later and helps track growth patterns.
Recommended Herb Placement by Sunlight Need
To maximize success, position herbs according to their light requirements:
- Top row (most sun exposure): Basil, rosemary, thyme, oregano
- Middle row: Sage, marjoram, dill
- Bottom row (slightly shaded): Parsley, cilantro, chives, mint
Maintenance and Care Tips
A vertical herb garden requires consistent attention to thrive. Unlike traditional beds, vertical systems have limited soil volume, meaning nutrients and moisture deplete faster.
Watering Schedule
Check soil moisture daily by inserting your finger 1 inch deep. Water when dry. During summer, most vertical gardens need watering every 1–2 days. In cooler months, every 3–5 days may suffice.
For convenience, consider installing a small drip irrigation system connected to a timer. These kits cost as little as $30 and save time while preventing under- or overwatering.
Fertilizing Routine
Herbs in containers rely entirely on added nutrients. Apply a balanced liquid fertilizer (e.g., 5-5-5) every 3–4 weeks during the growing season. Organic options like fish emulsion or seaweed extract are ideal for edible plants.
Pruning and Harvesting
Regular harvesting encourages bushier growth. Always prune no more than one-third of the plant at a time. Pinch stems just above a leaf node to promote branching.
Remove yellowing or diseased leaves promptly to prevent spread. Keep an eye out for aphids or spider mites—treat early with insecticidal soap or neem oil.
Seasonal Adjustments
In colder climates, bring tender herbs like basil indoors before frost. Hardy varieties such as thyme, oregano, and chives may survive winter with protection. Cover with a frost cloth or move to a sheltered corner.
“Harvesting in the morning, when essential oils are most concentrated, gives the best flavor from your herbs.” — Chef Rafael Mendez, Culinary Botanist
Real Example: Maria’s Balcony Transformation
Maria, a resident of a downtown Toronto apartment, turned her 5x8 ft balcony into a productive green oasis. With only eastern exposure (3–4 hours of morning sun), she chose shade-tolerant herbs and installed a 3-tier stackable planter made of recycled plastic.
She planted parsley, chives, mint, and lemon balm in the lower tiers and added dwarf basil in the top tier where light was strongest. Using a self-watering system with a reservoir, she reduced maintenance and enjoyed fresh herbs year-round. Within six weeks, she harvested enough to make pesto, herbal teas, and garnishes for family meals.
“I didn’t think I could grow anything without a yard,” Maria said. “Now my balcony smells like an Italian countryside in spring.”
Frequently Asked Questions
Can I grow all herbs vertically?
Most herbs adapt well, but avoid large-rooted or spreading types like dill (which grows tall) or aggressive mints (unless contained). Stick to compact, bushy varieties for best results.
How do I prevent water damage to my balcony?
Always use planters with proper drainage and place trays or saucers underneath to catch runoff. Elevate containers slightly with feet or stands to allow airflow and prevent staining.
Do vertical gardens attract pests?
They can, but good airflow and regular inspection minimize risk. Avoid overcrowding and clean leaves with a damp cloth weekly to deter spider mites and aphids.
Final Checklist Before You Begin
Use this quick-reference checklist to ensure a smooth setup:
- ✅ Confirm balcony sunlight duration and direction
- ✅ Verify weight capacity with landlord or building guidelines
- ✅ Choose a vertical system suited to your space and skills
- ✅ Purchase quality potting mix and organic fertilizer
- ✅ Select herbs based on your cooking preferences and light conditions
- ✅ Install securely, ensuring no wobbling or stress on mounts
- ✅ Set up a watering routine or automated system
- ✅ Label each herb for easy identification
Start Growing Today
A vertical herb garden is more than a space-saving hack—it’s a lifestyle upgrade. Imagine stepping onto your balcony each morning to snip fresh rosemary for scrambled eggs or harvesting mint for a refreshing tea. With thoughtful planning and consistent care, your small outdoor space can yield big rewards.
The tools and knowledge are within reach. Whether you’re a seasoned gardener or a curious beginner, building a vertical herb garden is a rewarding project that connects you to nature, enhances your meals, and beautifies your urban environment. Gather your materials, choose your herbs, and start planting today. Your future self will taste the difference.


 浙公网安备
33010002000092号
浙公网安备
33010002000092号 浙B2-20120091-4
Comments
No comments yet. Why don't you start the discussion?