
Building your first custom PC doesn’t have to be expensive or overwhelming. With careful planning and smart choices, you can assemble a high-performing machine tailored to your needs—whether for gaming, productivity, or content creation—without draining your wallet. The key lies in understanding components, prioritizing value, and avoiding unnecessary upgrades. This guide walks you through each phase of the build process, from selecting compatible parts to final assembly, all while keeping costs under control.
1. Define Your Purpose and Budget
Before touching a single component, determine what you’ll use the PC for. A system built for casual web browsing and office work has vastly different requirements than one meant for 4K video editing or modern AAA gaming. Defining your use case prevents overspending on overpowered hardware or underinvesting in critical areas.
Set a firm budget. For a capable entry-level build, $600–$800 is realistic today. Mid-range systems with solid gaming performance typically fall between $900 and $1,300. Stick to your limit by allocating funds wisely across components. Avoid putting too much into one part at the expense of another.
Common Use Cases and Recommended Specs
| Use Case | CPU | GPU | RAM | Storage |
|---|---|---|---|---|
| Office/Web Browsing | AMD Ryzen 5 5600G or Intel Core i3-13400 | Integrated Graphics | 16GB DDR4 | 500GB NVMe SSD |
| 1080p Gaming | AMD Ryzen 5 7600 or Intel Core i5-13600K | RTX 4060 / RX 7600 | 16GB DDR5 | 1TB NVMe SSD |
| Content Creation | AMD Ryzen 7 7700X or Intel i7-13700K | RTX 4070 or better | 32GB DDR5 | 1TB SSD + 2TB HDD |
Budget discipline starts here. Resist the temptation to “future-proof” excessively. Technology evolves quickly, and spending extra on top-tier components today may yield diminishing returns tomorrow.
2. Choose Compatible, Value-Oriented Components
Selecting parts that work together—and deliver strong performance per dollar—is essential. Compatibility issues are the most common pitfall for beginners. Use tools like PCPartPicker.com to verify that your chosen components fit electrically and physically.
Core Components Breakdown
- CPU (Processor): AMD’s Ryzen 5 and Ryzen 7 series offer excellent multi-threaded performance and come with capable stock coolers. Intel’s 13th and 14th gen Core i5 and i7 chips are strong contenders, especially for gaming.
- Motherboard: Match the socket type (AM5 for Ryzen 7000, LGA1700 for Intel 13th/14th gen). B-series chipsets (B650, B760) offer sufficient features without the premium cost of X-series boards.
- RAM: 16GB DDR5 is the sweet spot for new builds. Aim for 5200–6000 MT/s speeds. DDR4 remains viable if paired with compatible older platforms (e.g., Ryzen 5000).
- GPU (Graphics Card): For 1080p gaming, the NVIDIA RTX 4060 or AMD RX 7600 delivers solid frame rates. Avoid used or overpriced models unless thoroughly vetted.
- Storage: A 1TB NVMe SSD provides fast boot times and ample space. Skip slow SATA SSDs unless adding secondary storage.
- PSU (Power Supply): Never skimp here. A reliable 650W 80+ Bronze unit from brands like EVGA, Corsair, or Seasonic ensures stability and longevity.
- Case: Choose one with good airflow, cable management options, and room for future upgrades. Mesh-front cases improve cooling efficiency.
- Cooling: Most mid-range CPUs include adequate air coolers. Only invest in aftermarket coolers if overclocking or building in a compact case.
“Enthusiasm often leads builders to overspend on RGB lighting or ultra-high clock speeds. Focus on balanced performance and proven reliability instead.” — David Lin, Hardware Engineer at TechNode Labs
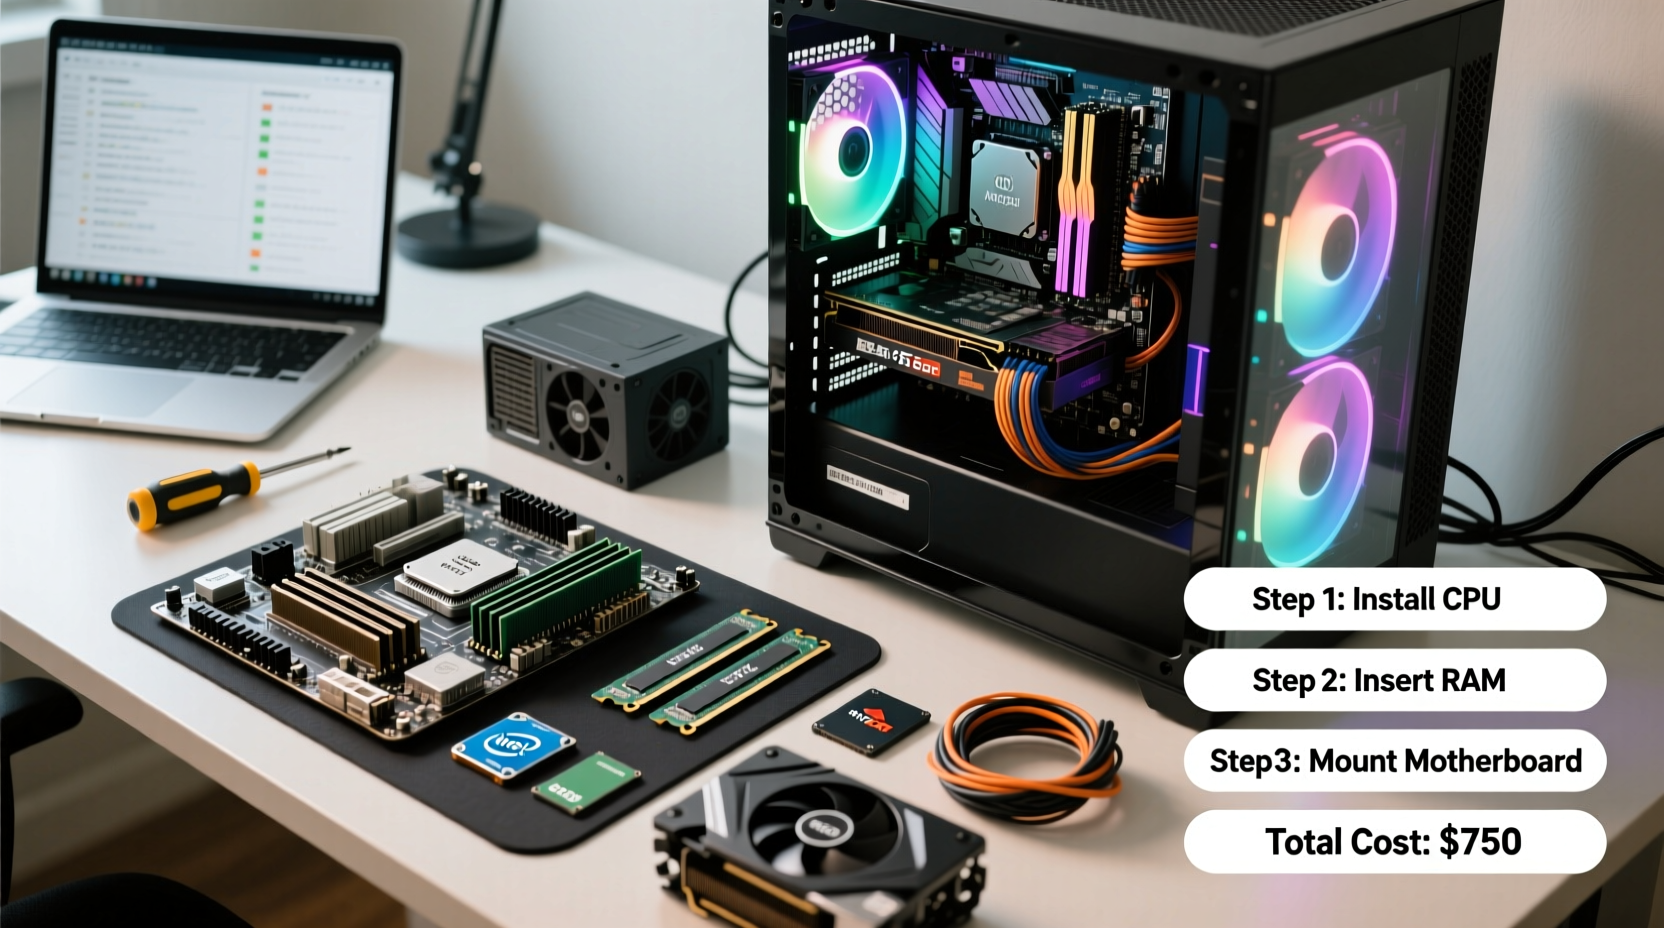
3. Assembly: Step-by-Step Guide
With all components in hand, it’s time to assemble. Work in a clean, static-free environment. Use an anti-static wrist strap if available, and keep components in their packaging until ready to install.
- Prepare the Case: Remove side panels and any pre-installed drive trays. Lay the case on its side on a non-conductive surface.
- Install the Power Supply: Slide the PSU into its compartment and secure it with screws. Route cables toward the motherboard area, leaving others aside for now.
- Mount the Motherboard Standoffs: Ensure brass standoffs are correctly positioned in the case to prevent shorts. Refer to your case manual.
- Install CPU and Cooler: Open the CPU socket on the motherboard. Align the processor (match triangle markers), gently place it, and lock the lever. Apply a pea-sized amount of thermal paste if not pre-applied, then attach the cooler.
- Insert RAM: Press down firmly on both ends of the DIMM slots until clips snap into place. Use dual-channel configuration (slots A2 and B2).
- Mount M.2 SSD: Insert the NVMe drive at a 30-degree angle into the M.2 slot, then screw it down.
- Install Motherboard: Carefully lower the motherboard into the case, aligning I/O ports with the backplate. Secure with screws.
- Connect Front Panel Cables: Attach power switch, reset, HDD LED, and USB/audio headers as labeled in the motherboard manual.
- Install GPU: Remove case and motherboard PCIe slot covers. Insert the graphics card fully into the top PCIe x16 slot. Secure it with screws and connect PCIe power cables from the PSU.
- Route and Connect Cables: Connect 24-pin ATX, 8-pin CPU, and any additional power cables. Neatly tuck excess wiring behind the motherboard tray.
- Final Check: Double-check all connections, ensure no loose screws are inside, and verify the GPU is seated properly.
Close the case, plug in the monitor, keyboard, and power cord. Press the power button. If everything works, you should see the BIOS screen. If not, recheck power connections and RAM seating.
4. Install OS and Drivers
Once the system boots, enter the BIOS (usually by pressing Del or F2) and confirm all components are detected. Enable XMP or DOCP to run RAM at advertised speeds.
To install Windows:
- Download the Windows 11 Media Creation Tool from Microsoft’s website.
- Create a bootable USB drive (8GB minimum).
- Boot from the USB, follow setup prompts, and format the SSD during installation.
After installation, download the latest drivers:
- Motherboard chipset (from manufacturer’s website)
- GPU drivers (NVIDIA GeForce Experience or AMD Adrenalin)
- Audio, LAN, and Wi-Fi drivers if applicable
Avoid third-party driver updaters. They often bundle bloatware. Always install drivers directly from official sources.
Mini Case Study: Alex’s First Build
Alex, a college student, wanted a PC for gaming and streaming. His initial plan included a $500 GPU and a tempered glass case with rainbow fans. After researching, he adjusted his build: an AMD Ryzen 5 7600 ($200), B650 motherboard ($130), 16GB DDR5 ($60), RTX 4060 ($300), 1TB NVMe SSD ($60), 650W PSU ($80), and a $70 airflow-focused case. Total: $800.
The result? Smooth 1080p gameplay at high settings in titles like *Cyberpunk 2077* and *Elden Ring*. He saved $300 compared to his original plan and left room in his budget for a quality headset and mouse. By focusing on performance essentials and skipping flashy extras, Alex got exactly what he needed—nothing more, nothing less.
5. Frequently Asked Questions
Can I build a PC for under $600?
Yes, but compromises are necessary. Consider used or previous-gen parts (like a Ryzen 5 5600X and GTX 1660 Super). You may need to start with 8GB RAM and upgrade later. While possible, $600–$800 offers a more balanced, future-ready experience.
Is building a PC still cheaper than buying prebuilt?
In most cases, yes—especially at the mid-range. Prebuilt systems often use lower-quality PSUs, proprietary parts, and charge premiums for assembly. Building lets you control every component, ensuring better value and easier upgrades.
What if something doesn’t work after assembly?
Stay calm. Most issues stem from loose connections. Re-seat the RAM, GPU, and power cables. Listen for beep codes or check motherboard debug LEDs. Consult your motherboard manual for error indicators. If one component fails, test with known-working parts when possible.
Build Smart, Build Confidently
Building your first PC is more than a technical project—it’s a lesson in research, patience, and smart decision-making. The satisfaction of powering on a machine you assembled yourself is unmatched. More importantly, you gain full understanding of your system, making future upgrades and troubleshooting far easier.
Success isn’t measured by how expensive the parts are, but by how well they serve your needs. A thoughtfully built $900 PC will outperform a haphazard $1,500 rig any day. Prioritize compatibility, reliability, and real-world performance. Avoid marketing hype and shiny distractions.


 浙公网安备
33010002000092号
浙公网安备
33010002000092号 浙B2-20120091-4
Comments
No comments yet. Why don't you start the discussion?