
Changing a light bulb may seem like a simple task, but doing it incorrectly can lead to electrical shocks, broken glass, or even falls from ladders. Whether the bulb has burned out, shattered, or won’t turn off, knowing how to replace it properly ensures your safety and maintains the functionality of your lighting fixtures. This guide walks you through every essential step—from preparation to disposal—with practical advice for handling different bulb types and tricky situations.
Assess the Situation Before You Begin
Not all light bulb replacements are straightforward. The first step is understanding what kind of issue you're dealing with. Is the bulb simply dead? Has it cracked or exploded? Is it stuck in the socket? Each scenario requires slightly different handling.
Begin by turning off the light switch and observing the fixture. If the bulb is dark and unresponsive, it’s likely burned out. If there’s visible damage—such as blackening, cracks, or a broken base—you’ll need to proceed with extra caution. Never assume the power is off just because the light isn’t working; always verify at the circuit level if necessary.
Gather the Right Tools and Supplies
Having the correct tools on hand prevents unnecessary risks and makes the process smoother. For most standard bulb changes, you’ll need:
- A replacement bulb (correct wattage and type)
- A stable ladder or step stool (if needed)
- Work gloves (preferably rubber-coated for grip and protection)
- Safety glasses
- Duct tape or needle-nose pliers (for broken bulbs)
- A dry cloth or paper towel
- A small bowl or container (to hold screws or small parts)
Always match the replacement bulb to the fixture’s specifications. Using a higher-wattage bulb than recommended can overheat the fixture and create a fire hazard. Check the label inside the socket or consult the manufacturer’s manual.
Common Bulb Types and Their Uses
| Bulb Type | Best For | Lifespan | Energy Efficiency |
|---|---|---|---|
| Incandescent | Decorative fixtures, vintage lamps | 750–2,000 hours | Low |
| Halogen | Kitchen under-cabinet lights, task lighting | 2,000–4,000 hours | Moderate |
| CFL (Compact Fluorescent) | General room lighting | 8,000–10,000 hours | High |
| LED | All-purpose, long-term use | 15,000–50,000 hours | Very High |
“LED bulbs not only last longer but reduce heat output, making them safer for enclosed fixtures.” — James Ralston, Residential Electrician with 18 years of experience
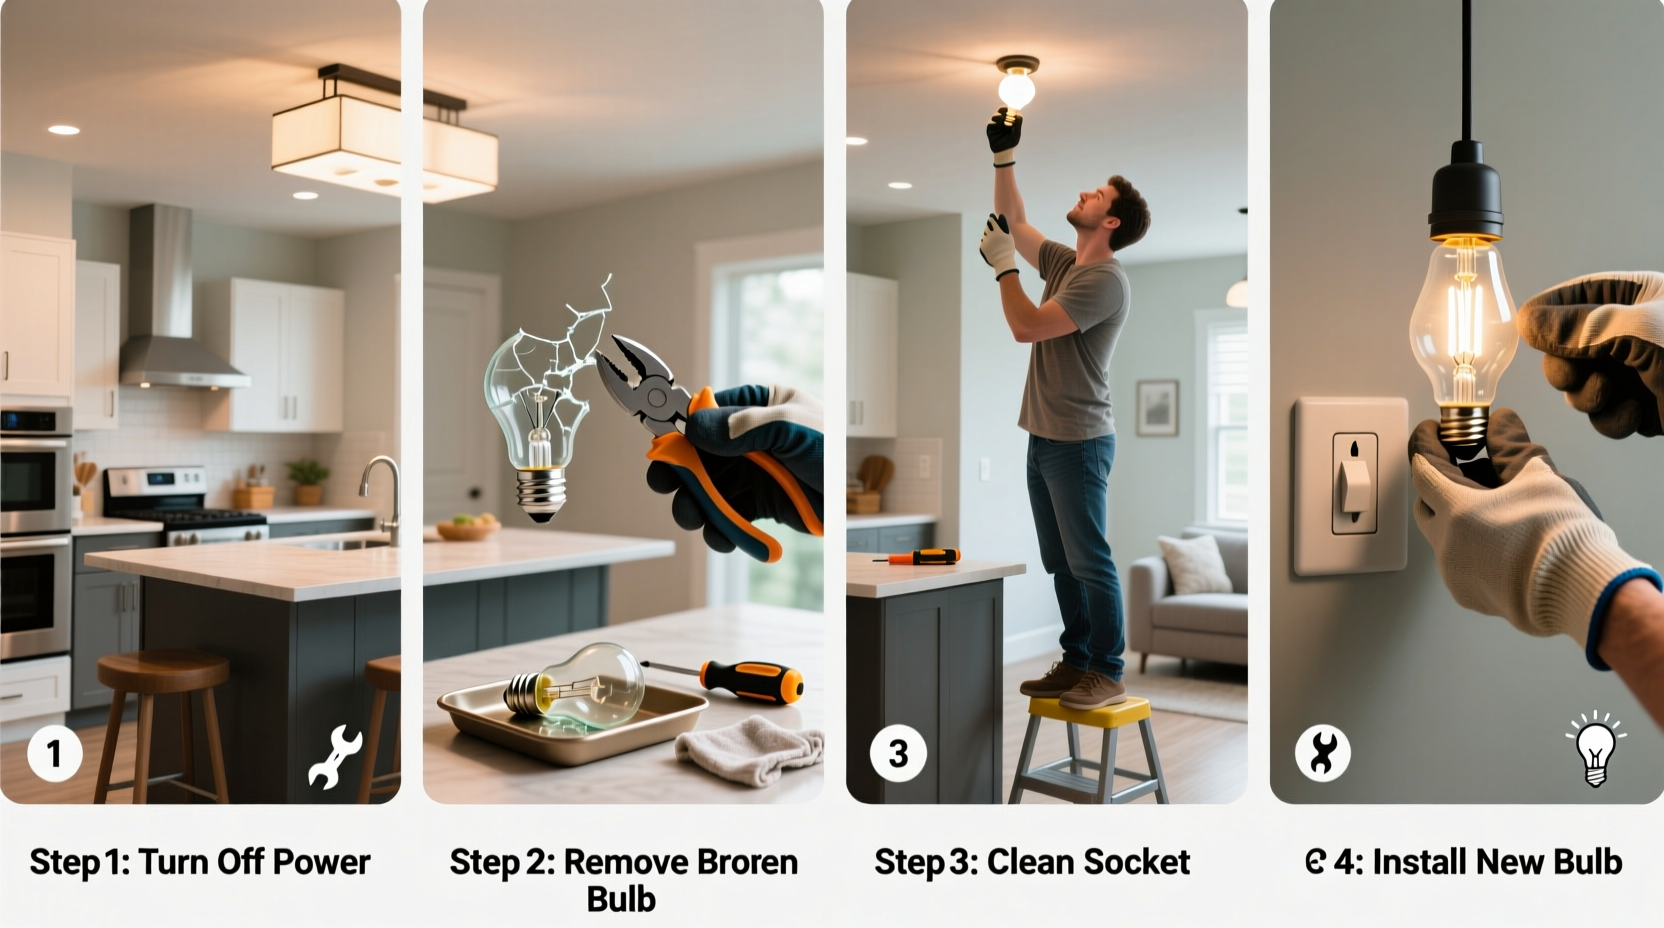
Step-by-Step Guide to Changing a Light Bulb Safely
- Turn Off the Power: Switch off the light at the wall. For added safety, especially with ceiling fixtures, turn off the circuit breaker that controls the room.
- Allow the Bulb to Cool: If the light was recently on, wait 5–10 minutes. Halogen and incandescent bulbs can reach temperatures over 200°F.
- Secure Your Ladder: Place it on a flat, non-slip surface. Have someone spot you if possible.
- Remove the Old Bulb: Wear gloves and gently twist the bulb counterclockwise. Do not force it. If it’s stuck, apply slight outward pressure while turning.
- Handle Broken Glass Carefully: If the bulb broke, use duct tape (sticky side out) wrapped around a cardboard piece to lift glass fragments. Needle-nose pliers can help grip a broken base.
- Insert the New Bulb: Align the base and screw in clockwise until snug. Avoid over-tightening, which can damage the socket.
- Restore Power and Test: Turn the breaker back on, then flip the switch. Confirm the light works without flickering.
What to Do If the Bulb Base Is Stuck
A common frustration occurs when the glass breaks but the metal base remains screwed into the socket. This poses a shock risk if handled improperly.
First, ensure the power is completely off at the breaker. Then, use needle-nose pliers to gently grip the edge of the metal base. Slowly twist counterclockwise. If the edges are too smooth, insert a wooden clothespin into the base for leverage. Another method involves pressing a bar of soap into the socket—its softness conforms to the threads and provides grip.
If none of these work, stop immediately. Forcing it can damage the socket or wiring. In such cases, call a licensed electrician.
Mini Case Study: Recovering a Broken CFL in a Ceiling Fixture
Sarah, a homeowner in Portland, Oregon, turned on her kitchen light only to hear a pop and see smoke. The CFL bulb had burst, leaving sharp glass shards and a stuck base. She turned off the main power, put on gloves and goggles, and used duct tape to remove visible debris. With pliers, she carefully unscrewed the base. After cleaning the area with a damp cloth (once power was confirmed off), she installed an LED replacement. She later learned that frequent switching had shortened the CFL’s life—a reminder that even energy-efficient bulbs have limits.
Do’s and Don’ts of Light Bulb Replacement
| Do’s | Don’ts |
|---|---|
| Use gloves to prevent oil from skin affecting halogen bulbs | Touch halogen bulbs with bare hands |
| Check fixture ratings before installing higher-wattage LEDs | Exceed recommended wattage limits |
| Dispose of CFLs at recycling centers (they contain mercury) | Throw CFLs in regular trash |
| Let bulbs cool before removal | Replace hot bulbs immediately |
| Label difficult-to-reach fixtures with bulb specs | Guess bulb size or type mid-ladder climb |
FAQ
Can I get electrocuted changing a light bulb?
Yes, if the power is still on. Always turn off the switch and, for maximum safety, shut off the circuit at the breaker—especially with ceiling or hardwired fixtures.
How do I dispose of a broken CFL bulb?
Due to mercury content, never vacuum a broken CFL. Ventilate the room, use stiff paper or tape to collect pieces, and take them to a hazardous waste facility. Many hardware stores offer free CFL recycling.
Why did my new bulb burn out so quickly?
Possible causes include voltage fluctuations, poor ventilation in enclosed fixtures, using non-dimmable bulbs on dimmer switches, or manufacturing defects. Check compatibility and consider upgrading to LED for longevity.
Final Steps and Ongoing Maintenance
After successful replacement, take a moment to inspect the fixture. Look for signs of scorching, loose wires, or corrosion. These could indicate deeper electrical problems. Wipe down glass shades and clean reflectors periodically to maintain brightness.
To avoid future issues, keep spare bulbs labeled by room and type. Track replacements on a home maintenance calendar. LED bulbs may last years, but noting installation dates helps anticipate failures before they leave you in the dark.


 浙公网安备
33010002000092号
浙公网安备
33010002000092号 浙B2-20120091-4
Comments
No comments yet. Why don't you start the discussion?