
Digital watches from adidas combine sporty design with practical functionality, making them a favorite among fitness enthusiasts and casual wearers alike. While these watches are built for durability and ease of use, adjusting the time can sometimes feel confusing—especially if you're unfamiliar with the button layout or mode sequences. Unlike smartwatches that sync automatically, most adidas digital models require manual setup. Getting the time right ensures accurate tracking during workouts, proper scheduling, and reliable daily use. This comprehensive guide walks you through every step clearly and safely, so you can update your watch confidently—without risking damage or confusion.
Understanding Your adidas Digital Watch Interface
Before adjusting the time, it's essential to understand the basic controls. Most adidas digital watches feature four primary buttons: Mode, Reset (or Split), Start/Stop, and Adjust (or Set). Their exact labels may vary slightly depending on the model, but their functions remain consistent across designs.
These buttons serve multiple purposes depending on which mode the watch is in. For example, pressing \"Mode\" cycles through functions like time, stopwatch, alarm, and date. The \"Adjust\" or \"Set\" button typically enters configuration mode, allowing changes to settings. Misunderstanding these roles can lead to frustration, so familiarizing yourself with your specific model’s layout is crucial.
Step-by-Step Guide to Changing the Time
Follow this universal sequence to adjust the time on nearly all adidas digital watches. While minor variations exist between models, this process covers the vast majority released in the past decade.
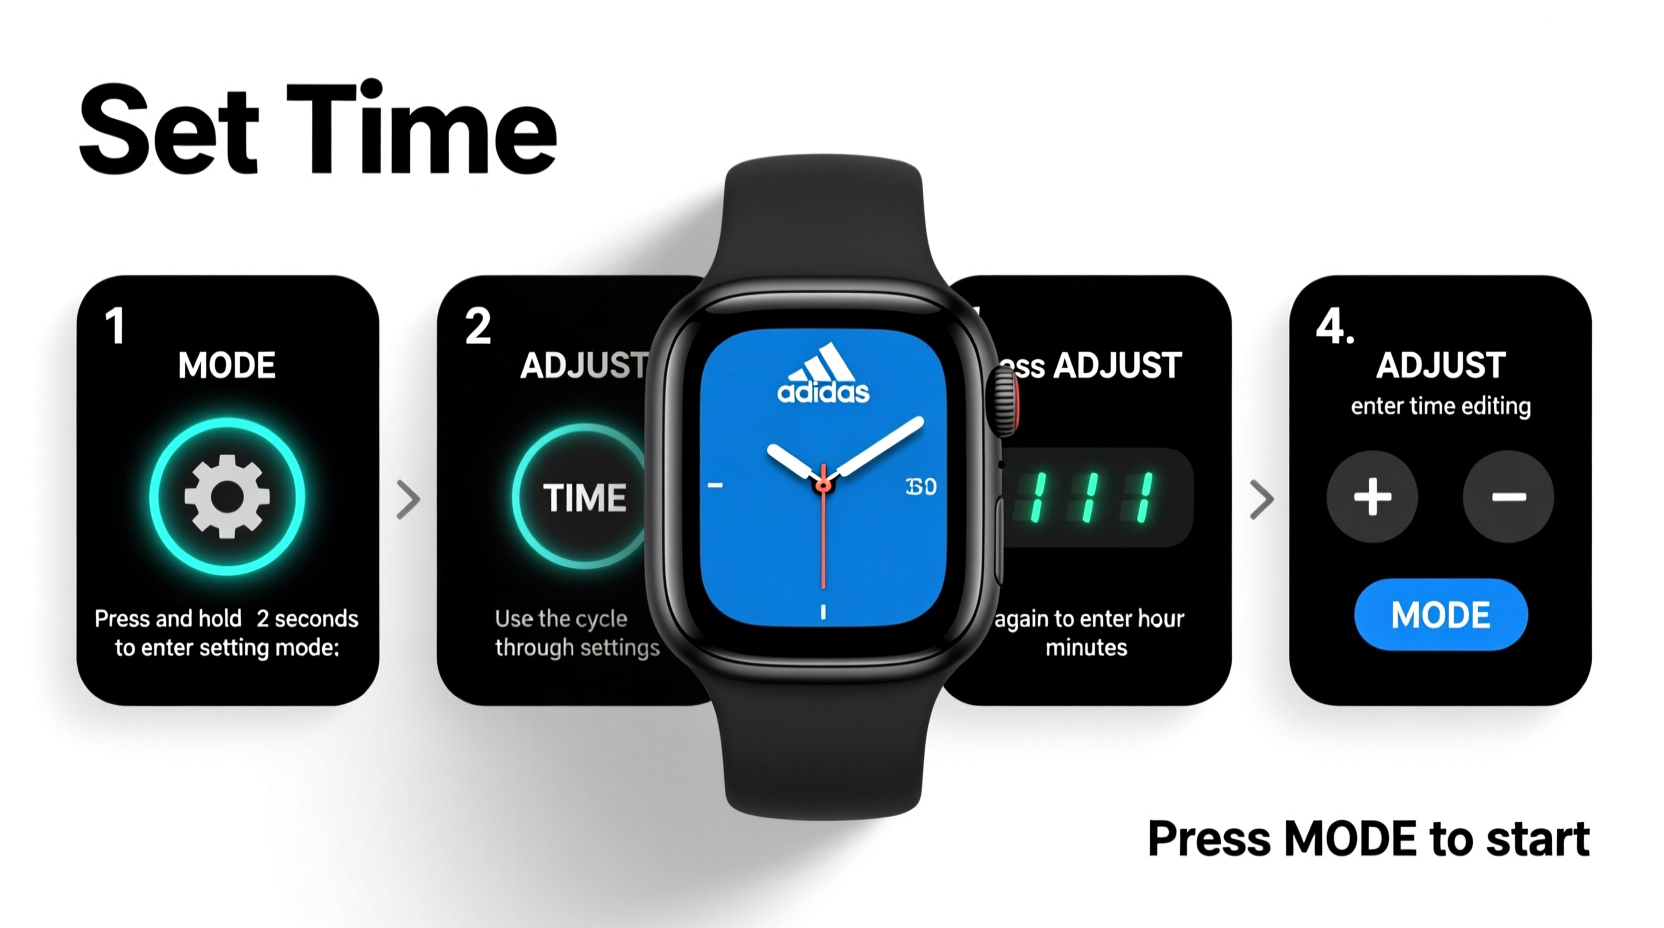
- Enter Time-Setting Mode: Press and hold the Adjust or Set button for 2–3 seconds until the numbers on the display begin to blink. This indicates the watch is ready for input.
- Select What to Change: Use the Mode button to cycle through options: hours, minutes, seconds, date, and sometimes 12/24-hour format. Wait for the field you want to modify (e.g., hours) to flash.
- Adjust the Value: Press the Start/Stop button to increase the number. Some models use the Reset button to decrease values. Continue pressing until the correct value appears.
- Move to Next Setting: Once the current field is correct, press Mode again to advance to the next setting (e.g., from hours to minutes).
- Finalize Settings: After setting all values correctly, press and hold the Adjust or Set button again to exit configuration mode. The display will stop blinking, and the watch will resume normal operation.
This entire process should take less than two minutes once you’re familiar with the controls. It’s best performed when you’re not in a rush, such as before a workout or while sitting at your desk.
Common Mistakes and How to Avoid Them
Even simple tasks can go wrong without awareness. Many users accidentally alter other settings or exit setup too early because they don’t recognize visual cues. Here’s a breakdown of frequent errors and how to prevent them.
| Mistake | Why It Happens | How to Avoid |
|---|---|---|
| Pressing Mode too quickly | Users often cycle past the desired setting without noticing. | Pause briefly after each press and confirm which field is flashing. |
| Using the wrong button to change values | Confusion between Start/Stop and Reset buttons leads to incorrect adjustments. | Test one press first; observe whether the number increases or decreases. |
| Exiting setup prematurely | Accidentally releasing the Set button too soon saves incomplete settings. | Hold the button until the display stops blinking completely. |
| Ignoring AM/PM or 24-hour format | Setting the hour without checking format results in 6 PM appearing as 6 AM. | Check if “AM” or “PM” is visible, or switch to 24-hour mode for clarity. |
“Many customers return watches thinking they’re faulty, when in reality, they just didn’t complete the time-setting sequence properly.” — Carlos Mendez, Electronics Technician at Urban Gear Repairs
Tips for Maintaining Accuracy and Functionality
Once you’ve set the correct time, maintaining accuracy ensures long-term reliability. Battery life, environmental exposure, and usage patterns all affect performance.
- Check time weekly: Even quartz movements can drift slightly over time. A quick verification every Sunday morning keeps things precise.
- Avoid water during adjustment: While many adidas watches are water-resistant, pressing buttons underwater can cause internal moisture ingress.
- Store away from magnets: Magnetic fields from speakers or phones can interfere with internal circuitry, potentially resetting or distorting timekeeping.
- Replace batteries proactively: When the display dims or digits flicker, it’s time for a new battery. Delaying replacement risks leakage and damage.
Real Example: Fixing a Post-Travel Time Error
Sophie, a runner based in Berlin, recently returned from a trip to London. After crossing time zones, she noticed her adidas digital watch was still displaying Central European Time. Confused by the blinking display at first, she followed the steps outlined above. She held the Adjust button until the hour started flashing, used the Start/Stop button to move forward by one hour, then pressed Mode to adjust minutes. Within 90 seconds, her watch reflected British Summer Time accurately. The next morning, she used the stopwatch feature for her training run—confident that her splits were being recorded correctly.
This scenario highlights how a small adjustment can impact real-world performance, especially for athletes who rely on timing precision.
Frequently Asked Questions
Can I change the time format from 12-hour to 24-hour?
Yes, most newer adidas digital watches support both formats. While in time-setting mode, continue pressing the Mode button past minutes and seconds. Look for a display toggle labeled “12H” or “24H.” Use the Start/Stop button to switch between them.
What should I do if the buttons aren’t responding?
First, check if the battery is low. A weak power source often causes unresponsive controls. If the battery is fine, ensure the watch isn’t locked or in a secondary function like stopwatch lap review. Try resetting by removing the battery for 10 seconds (if accessible) or consult the user manual for a hard reset procedure.
Do I need tools to change the time?
No. All time adjustments are done using the built-in buttons. No external tools, apps, or cables are required. This makes the process fully self-contained and accessible anywhere.
Essential Checklist Before You Begin
To ensure a smooth experience, run through this quick checklist before attempting to change the time:
- ✅ Make sure the watch has sufficient battery power
- ✅ Find a quiet place where you won’t be interrupted
- ✅ Know the correct current time (use your phone or computer as reference)
- ✅ Identify which button is “Set” or “Adjust” on your model
- ✅ Avoid wearing gloves or wet hands to prevent slipping
Conclusion
Changing the time on your adidas digital watch doesn’t require technical expertise—just a clear understanding of the button functions and a few focused moments. Whether you're correcting daylight saving shifts, returning from travel, or replacing a battery, this skill enhances the utility of your device. With practice, the process becomes second nature. Take control of your timepiece today: verify the display, follow the steps, and enjoy perfectly synchronized precision with every glance at your wrist.


 浙公网安备
33010002000092号
浙公网安备
33010002000092号 浙B2-20120091-4
Comments
No comments yet. Why don't you start the discussion?