
Transferring the ownership of a mobile phone line is more common than many realize. Whether you're gifting a number to a family member, selling a device with an active plan, or taking over a line from a former partner or employee, the process must be handled correctly to avoid service disruptions, billing confusion, or even identity theft. While telecom providers have established procedures, navigating them can feel overwhelming without clear direction. This guide walks you through every essential phase—from preparation to post-transfer confirmation—with practical steps, expert insights, and real-world examples to ensure a seamless transition.
Why Proper Line Ownership Transfer Matters
Maintaining accurate account ownership isn’t just about convenience—it’s critical for security and legal responsibility. An improperly transferred line can lead to unauthorized access, unexpected charges, or difficulty recovering service if issues arise. In some cases, individuals have faced credit damage due to unpaid bills under their name after believing a line was successfully transferred.
According to the Federal Communications Commission (FCC), consumer complaints related to unauthorized porting and ownership disputes have increased by 37% over the past three years. This underscores the importance of following formal procedures rather than relying on informal agreements.
“Ownership transfer isn’t complete until the carrier updates the registered subscriber. Verbal agreements offer no protection.” — Linda Reyes, Telecommunications Consumer Advocate
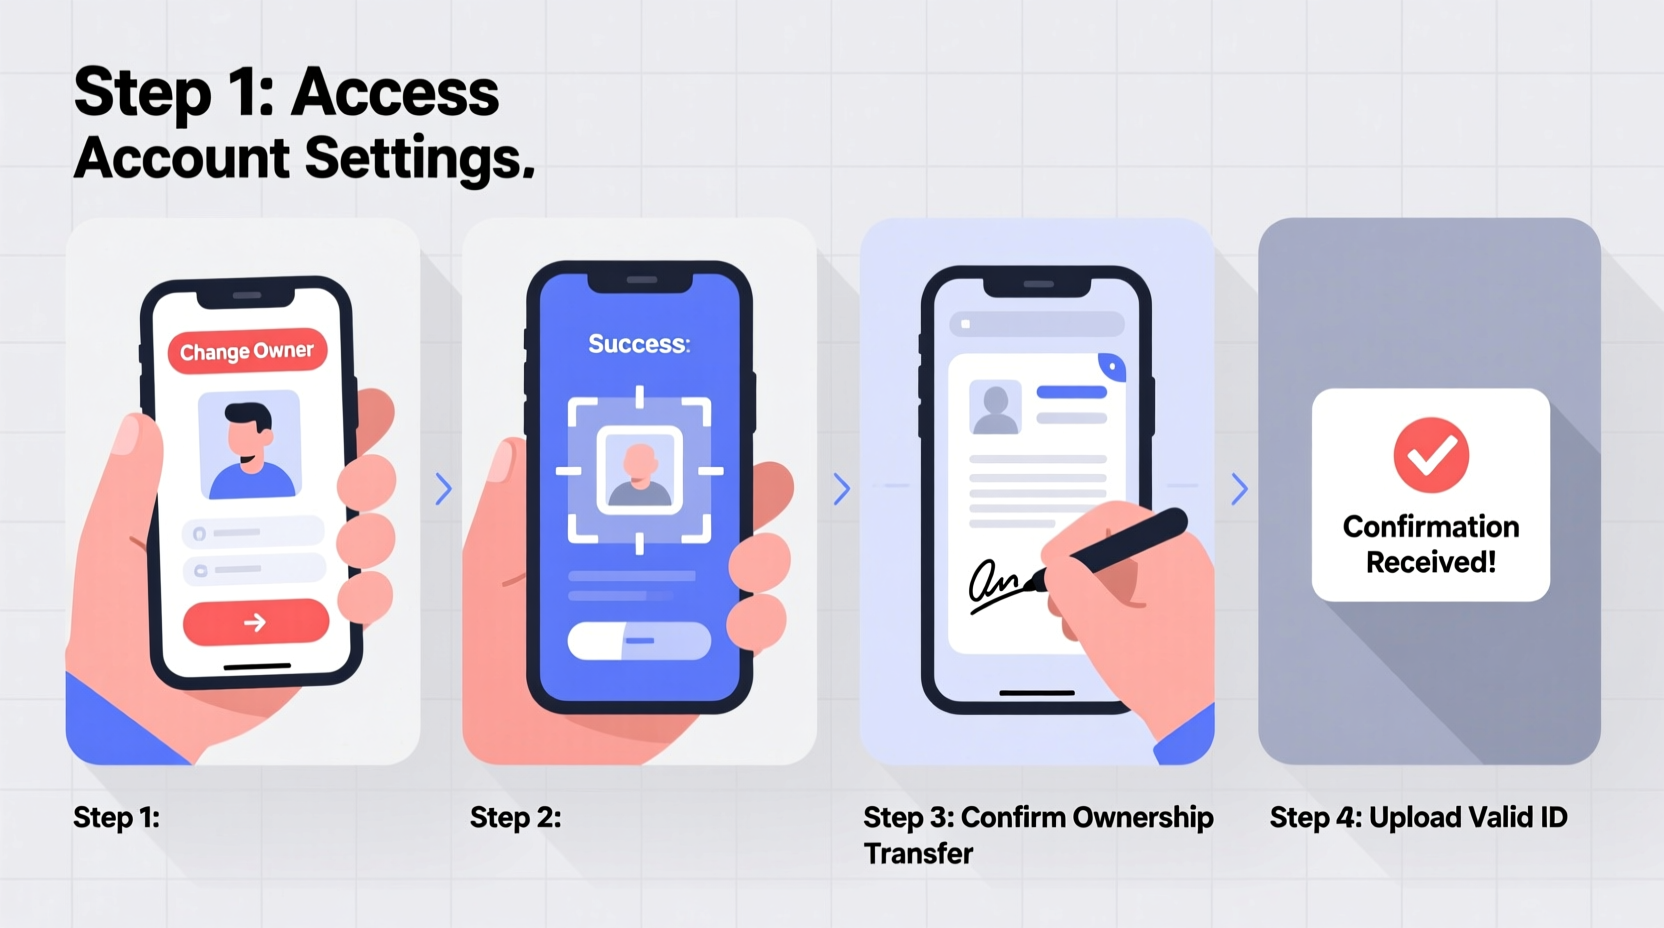
Step-by-Step Process to Change Mobile Line Ownership
Follow this structured timeline to ensure a secure and efficient transfer. The entire process typically takes 3–7 business days, depending on the carrier and documentation speed.
- Confirm eligibility with your carrier: Not all plans or lines are transferable. Prepaid accounts, leased devices, or contracts with outstanding balances may require resolution before transfer.
- Gather required documents: Both current and new owners will need government-issued IDs, account numbers, and sometimes proof of relationship (e.g., marriage certificate, bill of sale).
- Initiate the request: Contact customer service via phone, app, or in-store visit. Some carriers allow online transfers; others require verbal authorization.
- Verify identity: Carriers use knowledge-based authentication or one-time PINs sent to the current owner’s device.
- Sign transfer agreement: The new owner may need to accept terms, undergo a credit check (for postpaid plans), or commit to remaining contract terms.
- Receive confirmation: Once processed, both parties should receive written confirmation. The new owner gets updated account access and billing details.
- Update linked services: Notify banks, two-factor authentication apps, and other platforms using the number for verification.
Checklist: Essential Actions Before & After Transfer
- ✔️ Review account status (no overdue payments or liens)
- ✔️ Back up data from the device linked to the line
- ✔️ Unlock the phone if switching carriers post-transfer
- ✔️ Remove the number from old owner’s cloud accounts (iCloud, Google)
- ✔️ Update emergency contacts and medical ID settings
- ✔️ Cancel auto-pay from the previous owner’s payment method
- ✔️ Test SMS, calls, and data under the new owner’s login
Common Pitfalls and How to Avoid Them
Mistakes during ownership transfer often stem from assumptions or incomplete follow-up. Below is a comparison of recommended actions versus frequent errors.
| Do’s | Don’ts |
|---|---|
| Use official carrier channels for transfer requests | Rely on third-party sellers or unauthorized resellers |
| Ensure both parties are present during verification (if required) | Share passwords or one-time codes over text/email |
| Request written confirmation of completion | Assume transfer is done after verbal approval |
| Update SIM registration in countries with mandatory ID linking | Leave the SIM registered under the old owner indefinitely |
Real Example: A Smooth Family Number Transfer
Sophia, a single mother in Austin, wanted to transfer her prepaid line to her 17-year-old daughter, Maya, who was starting college. She contacted her carrier ahead of time and learned that minors could only hold accounts with a co-signer. Instead of a full ownership change, they opted for an authorized user upgrade with shared control.
The carrier guided Sophia through a joint application, verified both identities, and issued a new SIM card under Maya’s name with parental oversight. The number remained the same, but billing responsibility shifted gradually. Within five days, Maya had full usage rights, while Sophia retained access to monitor usage and payments. This hybrid approach provided independence without sacrificing accountability.
Frequently Asked Questions
Can I transfer a mobile line between different carriers?
No—ownership transfer occurs within the same carrier. If switching networks, the new owner must first port the number to their preferred provider under their own account. Porting and ownership change are separate processes.
Is there a fee for changing ownership?
Most major U.S. carriers (Verizon, AT&T, T-Mobile) do not charge for ownership transfers, but fees may apply for SIM replacements or expedited processing. Prepaid MVNOs vary—check with your provider directly.
What happens to my data and messages during the transfer?
Data stored on the device or in carrier backups (like voicemail) remains intact. However, cloud-synced content (iMessages, RCS chats) may require reauthentication. Always back up photos, messages, and contacts before initiating the transfer.
Final Recommendations for a Hassle-Free Experience
Start by calling your carrier’s customer service and asking specifically about “account ownership transfer,” not just “number porting.” Be prepared to answer security questions and verify your identity. Have both parties available during the call if possible. Keep records of all communications, including agent names, timestamps, and reference numbers.
If transferring a business line, document the change internally and notify stakeholders. For personal lines, consider setting up a temporary dual-access period to ensure continuity, especially if the number is tied to banking or healthcare services.
“Clarity and documentation are your best tools. A five-minute call without notes can lead to weeks of disputes.” — Jamal Patel, Senior Customer Operations Manager at T-Mobile
Take Action Today
Changing mobile line ownership doesn’t have to be stressful. With the right preparation and attention to detail, you can protect both parties and maintain uninterrupted service. Whether it’s passing a number to a loved one or formally stepping away from a shared plan, taking the time to do it right ensures peace of mind and digital safety. Don’t delay—start gathering your documents and contact your carrier now to begin the process with confidence.


 浙公网安备
33010002000092号
浙公网安备
33010002000092号 浙B2-20120091-4
Comments
No comments yet. Why don't you start the discussion?